
When I first bought the Blue Farmhouse, I was somewhat agitated with myself for spending the $100. because I had a big farmhouse kit still in the box that the girls bought me. I really did not need another dollhouse. But I am obsessed. Possessed. Once I had it home and inspected it more closely, I know that I had my work cut out for me, for it indeed did need a lot of work. Originally I had thought that I would just fix it up enough inside to sell it, but here I am putting in all my effort and lord knows how much money I have spent, but oh my what fun I am having.
As noted in previous posts, I have struggled with the bathroom simply because I got in a hurry and purchased wallpaper that was a second choice. Finding a paint to match presented a major problem.

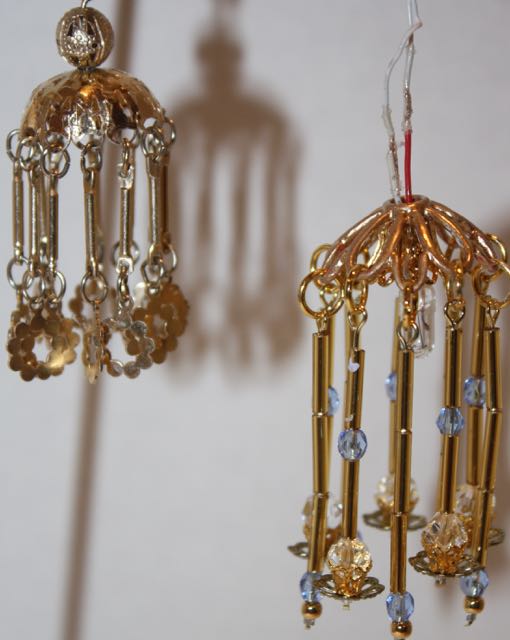
 In the meantime, I wanted a chandelier above the bathtub in front of the window. This is my inspiration piece, one of my mother's gaudy 1970s clip-on chandelier earring. Just try to find such an earring these days or even the jewelry findings to make the earring. I didn't want to tear apart mom's earring for sentimental reasons even though it would have made a great light. Instead I created my own version.


Thanks so much for taking time to visit. See you soon.
As noted in previous posts, I have struggled with the bathroom simply because I got in a hurry and purchased wallpaper that was a second choice. Finding a paint to match presented a major problem.

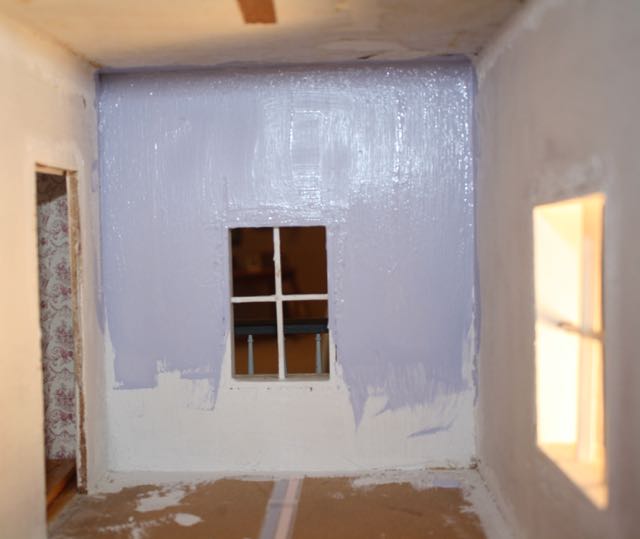
Before I began to add color to the wall, I gave this back wall another coat of white primer. The wood surface is rough plywood that should have been sanded smooth before the house was assembled. At this stage there in no way to sand it smooth, so I gave it another coat of primer.

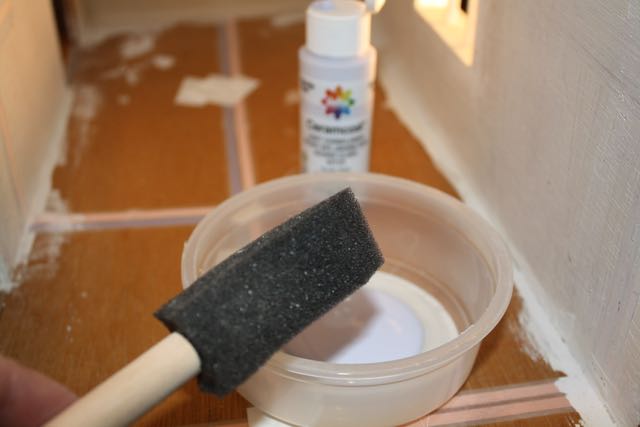
Now I am ready to add the first coat of Delta Creamcoat acrylic paint. The color is perfect, Cornflower.

I gave it two coats. Here it is not quite dry. I am loving it.
Now I am in the process of wallpapering. The ceiling was papered last night and today I will paper the walls.
 In the meantime, I wanted a chandelier above the bathtub in front of the window. This is my inspiration piece, one of my mother's gaudy 1970s clip-on chandelier earring. Just try to find such an earring these days or even the jewelry findings to make the earring. I didn't want to tear apart mom's earring for sentimental reasons even though it would have made a great light. Instead I created my own version.
I picked through my stash of beads, and through trail and error I finally came up with a chandelier for the bathroom.

I made it up as I went along. If you want to try your own hand at making a light, see what you have in your beading stash. Be sure to share your results with everyone.
In the photo:
Lighting:
- Mini Lamp from Radio Shack. My Radio shack has a very limited selection of lamps/lights. You can also purchase lights from Superior and other sites. There you will have a better choice of the type of lamp you want to use. You can even choose battery LED lights
- The clip looking tool is used to strip the plastic casing from the wire; a handy tool to use instead of your thumbnail.
- Wire. You will have to splice your mini lamp wire (comes with short but adequate hookup leads) to the wire that will be attached to your dollhouse wiring system or battery operated unit. When I hard-wire in the wall sconces, I cut off the plug end, saving it for such a project. This chandelier will be hard-wired in, so I will remove the plug-in. If you don't have any spare plug-ins, Hobby Lobby carries both wire and plug-ins.
- Shrink tube: Purchased from Superior. These very tiny tubes slip over your spliced wires to insulate the bear spice that you have when you join the plug-in wire to the lamp lead. I have tried electrical tape and while it does work, it just is not pretty or sound. I place the shrink tubes on each wire before hand, twist the wires of each end together then gently, ever so gently, push the shrink tube in place to cover the exposed wires. You do not want to allow the bare wires to touch when you plug in the light to test your splices because that is a sure fire way to short out your mini lamp. Once the shrink tubes are in place, I shrunk them by holding a lit stick match just close enough to shrink the tube in place. I will be ordering larger shrink tubes that will fit over the entire spice to make the splice look neater and stronger. At this point, I can plug in my light to see if it works. (It does).

Here are the pieces that I used to assemble the chandelier. I am sorry that I do not know what size the pieces are because I had them in my stash. I didn't have to buy anything:
- The pink finding forms the cap for the chandelier. I found a package of 4 on the discontinued sale wall at Hobby Lobby. So I painted it with Testors enamel paint. Some of which rubbed off as I added the beaded work, so I need to do some touch up. Next time I think I will use gold spray paint for a better finish and maybe a clear acrylic top coat to keep the paint from chipping.
- You can see the pieces that I used to bead the head pins. Go through your stash and see what you come up with. I finished each head pin with a very tiny crimp bead that barely shows, using the crimp tool. If you do not do any beading supplies or tools then you will have to buy the crimp tool and a needle nosed beading pliers at Hobby Lobby or Michaels.
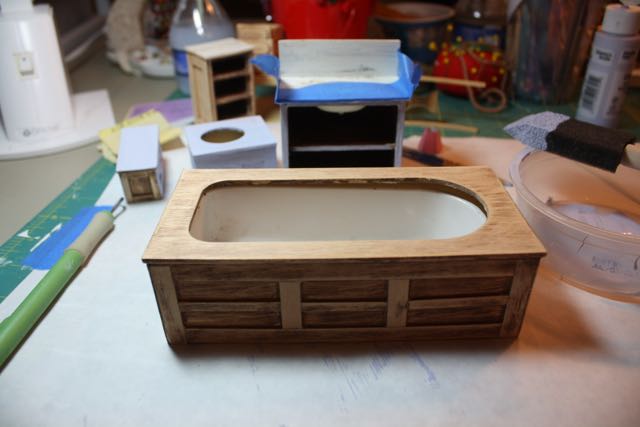
The bathroom fixtures are nearing completion.

I have the bathroom fixtures nearly all painted. I have the toilet left to finish. You can see what the pieces looked like just before I began painting.

I painted each piece with the Cornflower paint that went on the back wall then I sanded it down to smooth out the surface and to expose some of the wood, but not very much. Next I applied 3 coats of white acrylic paint, thinning it down with water, smoothing it on carefully with a small artist's brush, and sanding in between each coat.

I wanted to make sure that the Cornflower color dominated the white, so the white paint was thinned by dipping my brush into water before loading it with paint. I like the results very much.
This afternoon I will finish the wallpapering. I had to wallpaper the ceiling first and add a wall sconce. Now I am ready to do the walls. I won't wire in the chandelier until I order the shrink tube to give the splice a more finished look.
Suppliers used for today's post:
Radio Shack
Hobby Lobby


