I have sworn to nurture this blog a little bit more, so I thank you for visiting and leaving comments. I now have two followers and two or three other regulars who kindly comment on each post, which encourages me to spend more time here. I have know them for some time now through my other blog
Welcome to the Garden Spot. I spent a lot more time at the Garden Spot, so if you want to know what goes on around here up above ground and beyond the basement where I tend to seclude myself when I am in one of my obsessive moods working on the dollhouse, visit the
Garden Spot.
You will see that it is just the two of us, me and my husband, aka The Head Gardener, who tend 5 acres in Northern Colorado. You will meet Mo the feral cat, Boone Doggle, the adopted 2 year old dog, Pop, the pony (actually a POA), Sundance, the palomino quarter horse, and few hens and two roosters. Right now we are brooding six new chicks in the office. With Spring arriving, I will be leaving the basement to work in the garden, so I am putting as much time in on the Blue Farmhouse because I'd like to get it finished. I have two more houses to build, one in my garage and one for the granddaughters.
The watering can lamp has not yet been finished. I did receive the batter operated lights for it, but they chips not light bulbs. I am thinking that I will return two of them and reorder or maybe just wire the lamp using once of the little plug in lights that I have on hand.
In the mean time, I ordered this bare wood blanket chest from
Miniature Market Place. com to make a toy chest for the nursery. It has turned out so cute. I have struggled with getting the acrylic paint smooth without globs of paint and brush strokes that are hard to sand out. I did a bit of reading and found a simple solution to smoother paint finish: a wide brush, which helped so much.

Using Ceramcoat acrylic paint that I purchased at Hobby Lobby, I gave the chest 3 coats of paint. I wish I had done a bit of sanding first, but I sanded the last coat of paint to give the paint a smooth, more finished look.
I found plenty of printable Peter Rabbit images on Pinterest. (You can find them on my Peter Rabbit Pinterest board) Also purchased at Hobby Lobby, a package of Rub-onz.
For the water can lamp, I decoupaged the image on, which I am not really liking now that I discovered these transfers at Hobby Lobby. They are very easy to use and give a very nice effect.
Let me take a moment to explain the process I used to transfer the images onto the toy chest:

- Find an image. Anywhere. Original art work, stamp, clip art from the web
- The image will have to sized, which I do in Microsoft Word. I simply measure the size of the area where I want to use the image, for example a photo for a mini frame. I double click on my image in Word to get the editing box. The dimensions of the image will show up in the tool bar at the top of the Word screen. There I enter the size of the image that I want. The images for the toy box for example are height: .98 x width .88. By entering the height, Word will automatically enter the width. Now, in all honesty, there is a lot of trial and error, especially in the beginning when you are just learning how to use Word to size images. You can also try dragging the selection box around the image diagonally from corner to corner until you reach the desired size. Word measures in inches; sometimes centimeters are easier to measure and are more accurate, so here is how you change inches to metric on a Mac:
- Word> Preferences>General>Check last option on list
- But there is another challenge. When you print the image on the Rub- on and then transfer it to your item, the image is reversed, i.e. backwards. So now the image has to be flipped. Word will flip text, but not images (unless I couldn't figure it out), so I opened my image in Photoshop. I had to google how to flip images in photoshop, which is a very easy process, but sizing is another story. I don't use Photoshop enough to even explain. So now you are on your own. I google for good tutorials when I want to use Photoshop. Perhaps you have an easier photo editor that you could share. At any rate, I managed to get the images printed on the --- and applied. I did have to google for better instructions on how to actually use the----. Here is the Youtube tutorial that I used: using grafix rub-onz transfer film

As I worked on this little toy chest, I remembered a similar chest that I created for my oldest daughter when she was a baby. It was one my dad made for her fashioned after the old wooden apple crates with a lid. I painted it then put old fashioned decals on it. We still use it as a toy box for the grand kids.
The little box turned out so cute. I may add some blue trim so that it is not so white.
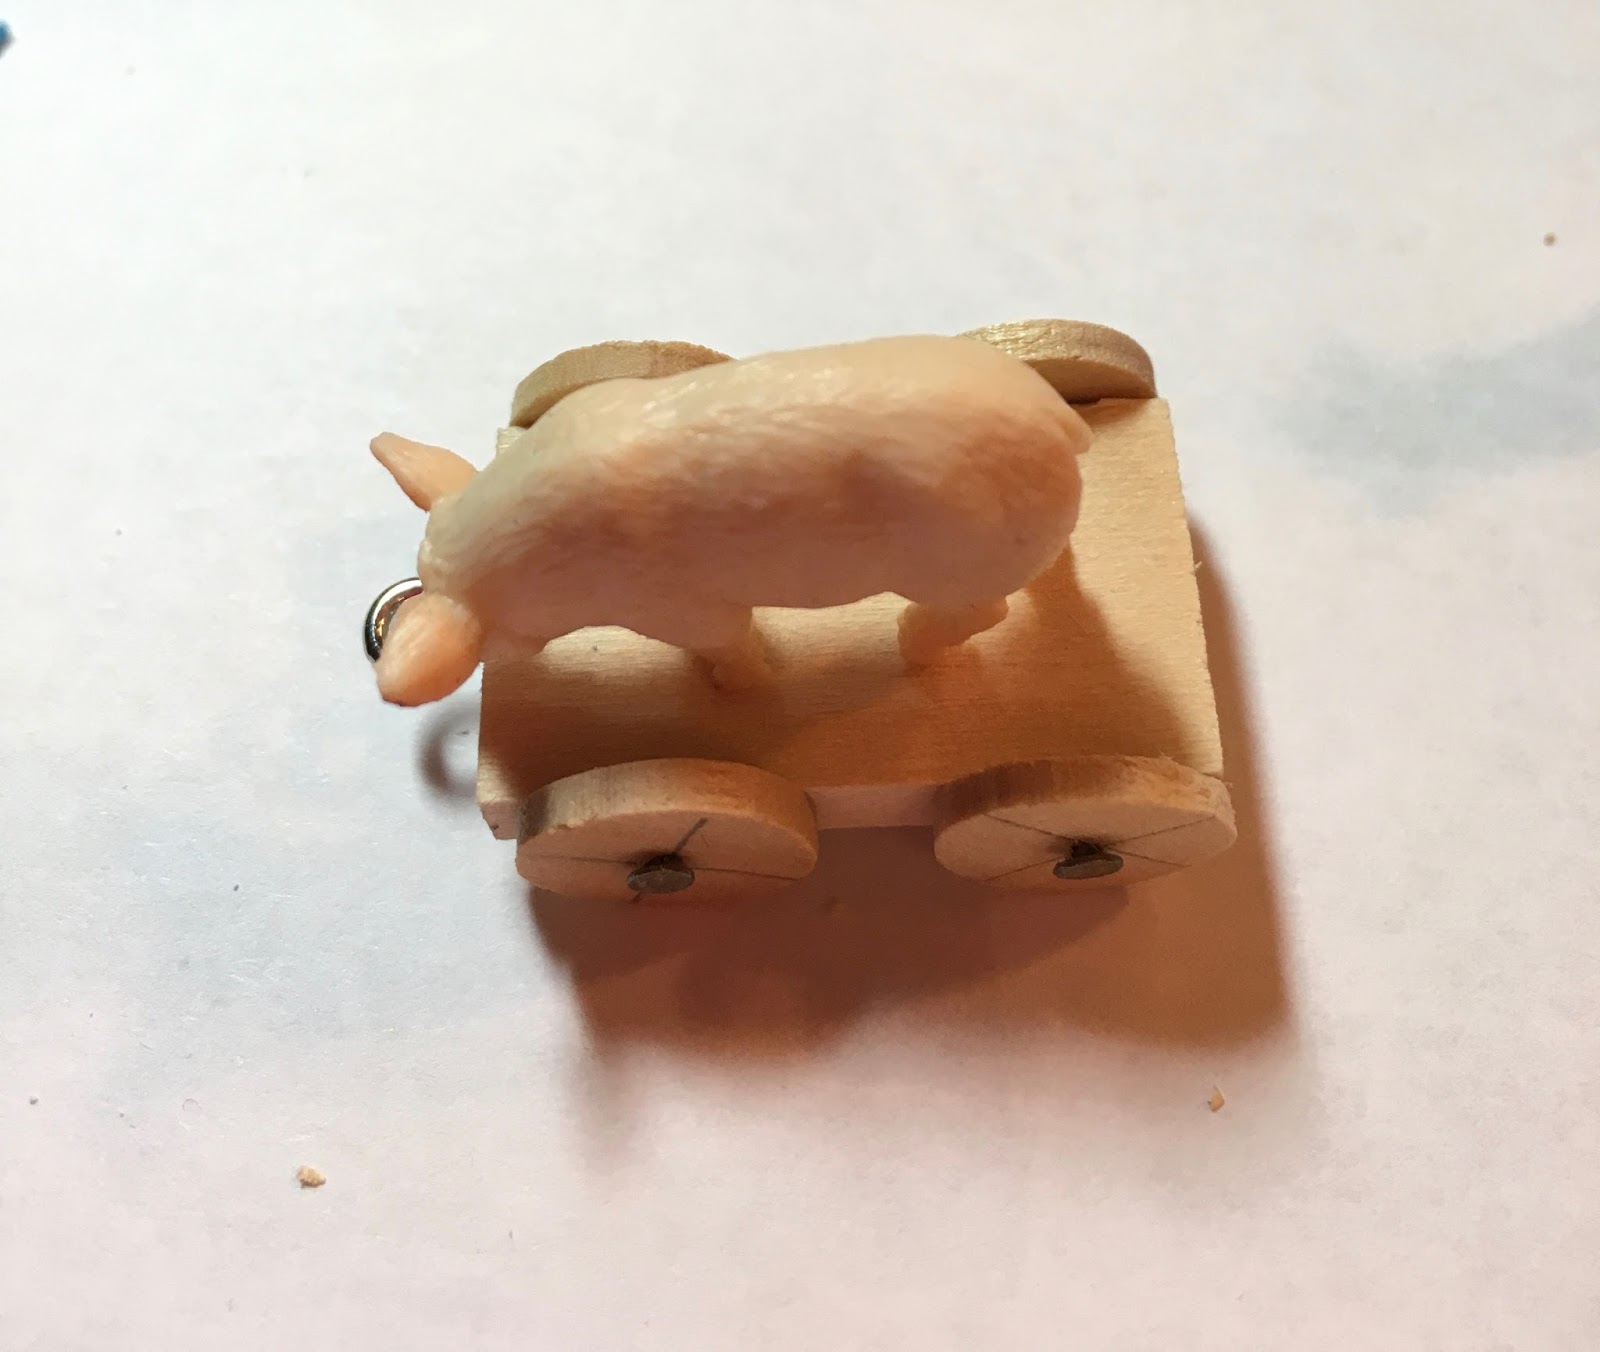
Now I am pondering how to make a pull-toy. These are my two possibilities, both purchased from Hobby Lobby. (What would we do without that store?)
I want to add a shelf to the nursery. I purchased the one on the left at Norm's Dollhouse store in Denver for $7.50. Because it so nice, I don't have the heart to paint it white, so I made my own using craft (pop sickle) sticks. They work well, but tend to split easily.
I did do plenty of sanding to smooth out the craft sticks, especially the cut edges. Then I applied two coats of craft paint, sanding the last coat of paint lightly. I used a small emery board to sand this tiny shelf. For the knobs, I used colored----. Even though I measure the distance between each one, one is still off. I may move it or I may not. As it hangs on the wall, I don't think that this mistake will be noticed. Will it?
I'll be back soon. This week end I am leaving the dollhouse work behind to attend a scrapbooking Crop with a dear friend. I have made Creative Memories scrapbooks for three of the grand children, two to go, so I'll be working 6 year old Nathan's book, hopefully to have it finished for his April 7th birthday. So I may not have much to report on for the dollhouse.
I love reading your comments, so thank you for visiting.


 I couldn't wait to get home to make my pull toy. Eagerly, I began digging through my stash looking for parts. These wooden rounds of various sizes come in handy for a multitude of projects. I found them at Hobby Lobby. The wheels were my biggest challenge. As I looked at pull toys on the web, I found that most of the wheels were spoked wheels. I thought about using buttons, but settled on these little wooden disks.