
Though I should be outside working in the garden, the weather has not been cooperating. You know the saying, "April showers bring May flowers; well, while it wasn't raining today, the weather was miserable, so I spent the day working on a new shower for the Bellingham Farmhouse. I had already built a shower, but after discovering Emily's blog, The Den of Slack I decided to remake the shower. Compared to her shower, mine looked pretty amateurish. So I set out to improve my shower. She used plastic for really cool, modern looking shower door, so while I was having my car serviced, I visited the glass shop across the street and asked if they would cut plexiglass for a dollhouse shower. The young lady was so nice and said that they would be happy to, she and recommended other materials, including glass. I have decided to use glass, but today I built prototype shower doors using a piece of thin acrylic from my stash that I had once tried to cut out an octagon window with scissors. It didn't go well.
Today I used a utility knife successfully to score the doors and then cut the straight lines by running the blade over the cut several times.
I used my iPhone to take the photos, but I have been having trouble with the quality of the photos on the blog and have decided that I need to upload them with a higher quality, which may make them load more slowly 😩. Sorry about that.
 Before we get to the shower, here's more on using caulking to seal the gaps that sometimes occur when the crown molding doesn't fit snuggly against the ceiling. Purchased at Ace Hardware, this product works so well to seal that unsightly gap. I kept a wet sponge handy to dampen my finger as I smoothed the caulk along the seam and to clean my fingers when I had too much caulking. The before and after photos show how a clean seam between ceiling and crown molding can be achieved.


I needed to use the damp sponge to clean up where my finger got too try to smooth the caulking, and again I was working in a very tight space.
 I installed the stairs today, too. Wow. That was a big commitment. The stairs gave me so much trouble. I even rebuilt them because the stairs that I built from the original kit were really bad. So I bought pre-built stairs at Hobby Lobby and had to cut one step off because they were too long. I also struggled with where to put the bedroom and living room walls. According to the house plans these walls are supposed to blush with the front edge of the house so that the openings to the rooms are at the back of the wall or at the front of the house. I installed them so that there were flush with the front exterior wall.
For the bathroom I even had my husband cut a new wall that extended the full width of the house so that I install a door and make it look more like an old farmhouse.


Today I used a utility knife successfully to score the doors and then cut the straight lines by running the blade over the cut several times.
I used my iPhone to take the photos, but I have been having trouble with the quality of the photos on the blog and have decided that I need to upload them with a higher quality, which may make them load more slowly 😩. Sorry about that.
 Before we get to the shower, here's more on using caulking to seal the gaps that sometimes occur when the crown molding doesn't fit snuggly against the ceiling. Purchased at Ace Hardware, this product works so well to seal that unsightly gap. I kept a wet sponge handy to dampen my finger as I smoothed the caulk along the seam and to clean my fingers when I had too much caulking. The before and after photos show how a clean seam between ceiling and crown molding can be achieved.


This piece of crown molding was particularly troublesome as I struggled to get it cut right to fit in place; I will have to do some touchup painting to make the corners look a little neater. My fingernails are too long, so I had a hard a time working the caulking into the corners.


For the bathroom I even had my husband cut a new wall that extended the full width of the house so that I install a door and make it look more like an old farmhouse.
The floors are all installed now. In the rooms that have tape wiring on the floors, I used wide double sided carpet tape to adhere the floors so that if there is electrical problems I have access to the wiring. The kitchen floor and the downstairs hallway floors are glued in place.

So the crown molding is finished and the floors are installed.
Now for the redesigned shower.

I really do like this shower, but as I said, it looks just too amateurish. I started rethinking it because I wanted to add glass doors. I never did quite figure out how to make a shower curtain--what sort of material to use--, so I dug out that sheet acrylic plastic and cut the shower doors. Then I made an new shower stall:
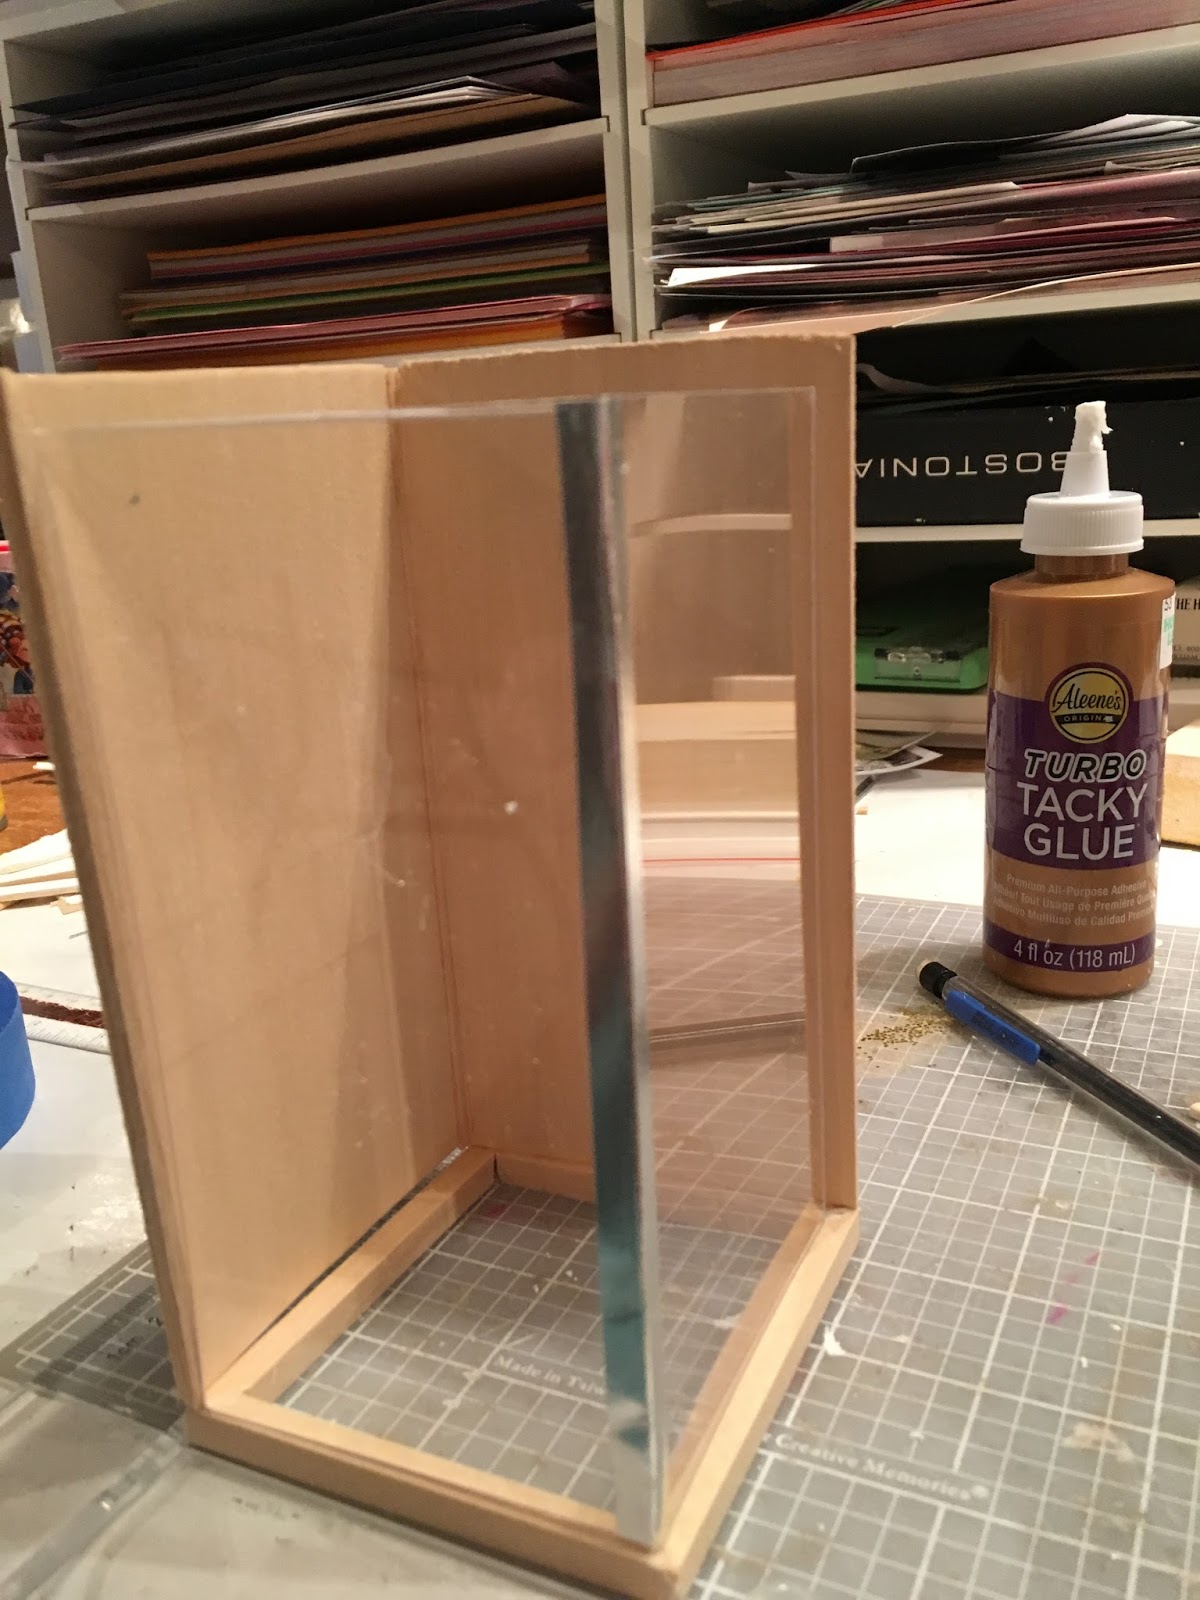
The shower base for the first shower has three pieces, including two angled sides. As I was trying to figure out how to cut the new base, I discovered that the angles were not equal, so I decided to make the base square. I also want the door to open. Emily had used porch railing to set her doors inside, but I have decided to install the doors on top of the shower base, much like a really shower might be built.


I think the new shower will look pretty nice. I have to order another sheet of the black and white tile so it will be a few days before i have it finished. My car needs more work, so next week while the little SUV is getting a wheel alignment, I'll be across the street at the glass shop having them help me build my shower. I am hoping that they can help me figure out some sort of hinging so that that the door will open. Right now I have the two sides of the acrylic held together with silver wasabi type tape.
And that is my April Shower
Thanks for stopping by. Let me know what you think.


You have put so much work into your shower arrangements and it looks amazing!
ReplyDeleteThat is a very sophisticated bathroom! Looks terrific. I see your little bricks downstairs. Those are cute. I would love to use some on a walkway. That would be gorgeous! I can't wait to see how it all comes together.
ReplyDeletehugs,
Caroline