Thursday, March 28, 2019

Lights Out

The Farmhouse is giving me fits. I want to finish it up and move it out of the workshop, but it has  issues with lighting--the lights have always given me problems. I have redone the tape writing more than once on the second floor and I thought I had it all the bugs worked out, including the excess humidity in the basement from the aquariums, but the two lights in the kitchen have remained troublesome, so I did what I didn't want to do, pulled up the flooring the second floor to get to the wiring for the kitchen. I had adhered the flooring with carpet tape, really sticky stuff, so that I could remove them if I had to, and I guess I had to.


Here is the culprit joint. I put in new brads and had a connection then I didn't. Then I fiddled with it more and ended up shorting it out because now the only line that works for the living room. I am bummed to say the least. I did find a live wire on the ceiling of the kitchen that I ended up not using, so I think I can do some rerouting--I hope. Otherwise, it is lights out in the Bellingham Farmhouse because I am NOT ripping of wallpaper in the bedroom.


Has anyone used solder to secure wiring? My husband bought me soldering iron which I have not yet used, but I am about the use it. I've read some tutorials and soldering seems to be a good choice. Is it?

The attic of the farmhouse needs to be finished. I have the boy's bedroom figured out, wallpaper chosen from my scrapbooking stash, and a tongue depressor floor ready to stain. With a Roy Rogers' theme, the room is going to be such fun, but there is the other half of the third floor. I'm not sure now just what inspired me, but I decided to create another room and wanted a daybed, so I searched Pinterest for daybeds and found Caroline's tutorial on her daybed at Cinderella Moments. Her pieces are simple, easy to execute, and use common products. So here is my little daybed.


First I made a prototype out of cardboard just to see if I could manage it. Actually, I wish I had taken more time and done a better job, because it turned out okay. I'm going to clean it up and maybe make a bed for one of the girls. 


I re drew my pattern, making sure that all the measurements were accurate. I used 1/16th" Bass wood that cut easily with a sharp knife. For thicker wood, I would have used the scroll saw.


Caroline's headboard has straight lines, but I wanted curves, so I folded the pattern in half and cut away. The sharp point on one side would eventually splinter off, so i removed the other one, causing the sides not to fit accurately, but a nice fluffy pillow covers up that corner.


I cut a mattress out of foam board just slightly smaller than the daybed and covered it with wool batting. Poly fiberfill would work, but I used what I had on hand. (I made some dolls a while back that required wool batting).


I covered the mattress with cloth cut from an old pillow case that was handy.

Then I dug through my fabric stash, finding bits and pieces of fabric that I could use. The crocheted piece is a coaster that a blog friend sent me from England. There are six, so I try to add one to each house so that there is a touch of Elizabeth in each house.


I already had the pillowcase made up and I save those silicone packets, so I stuffed on in the pillow case, but I will new pillows.


I thought about what sort of embellishments I might add, but then decided that the bedding will cover most of the bed, so I left it plain.


This attic room is an odd space, but I think I have a plan for it.


This afternoon I painted the bed with a chalk paint, giving it a light finish.


When the paint dried, I sanded it smooth and tried to adde some wear and tear.


It will be a cute little space that the teen-aged girl has created for herself, her own hideaway where she has dragged things out of storage to make her little nest.

I made the hall tree a while ago with the idea of using in another house, but I've never found a good place for it. Inspired by Cinderella Moments, again, I used a new door in my stash that came without a jamb. The little hall trees are fun to make, and I think this one has now found its home.

I borrowed the rug from the upstairs hall and it is just the sort of rug that would end up in the attic all rolled up, so it stays here. I don't remember where I got it. Etsy maybe, but one can just as easily be printed on muslin. 

I made the chair, a House of Miniatures kit and covered it with muslin. It is rough looking, and that is okay for an old chair relegated to the attic. The young teen who is creating this little hideaway nest in the attic will find other "cool" things hidden and stashed way back in the dark corners of the attic. Stay tuned.

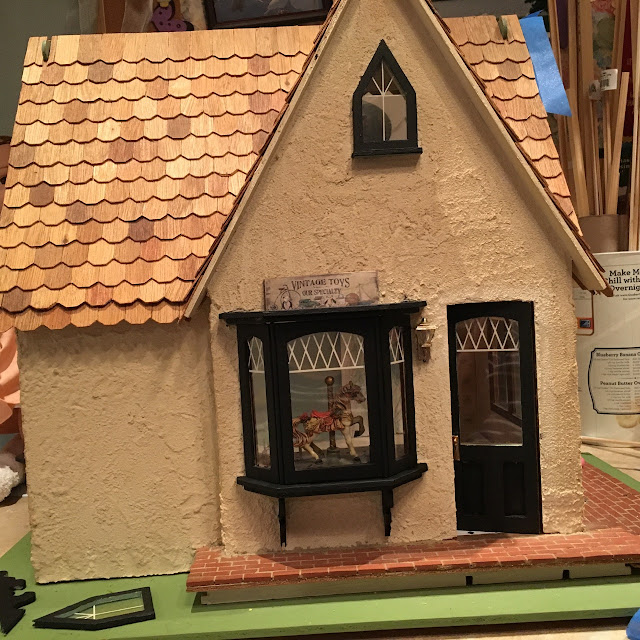
It's spring break and my little grandson is here, so I won't get a lot done on either house. He wants to work on his house--yes, his house. He needs some furniture. He says that he is doing a Halloween house, so I think we will make him a bed.  I am close to wrapping up the toy store. I have flooring to install in the loft and I have cut the ceiling paper, and I have a chandelier to install then it I will fill it with toys. The farmhouse needs the attic finished and a roof. Oh how I dread the roof. 

Thanks for stopping by. I hope you enjoyed your visit.

Sunday, March 17, 2019

What's in Your Stash?

Gosh it's good to be back home. I have been hanging out at Face Book, reading and watching what the dollhouse builders are doing over there, and they are working on some wonderful projects. I posted an abbreviated tutorial there today, summarizing the one I'll share here.

Anyway. We survived the Cyclone Bomb--I did not know that was an authentic weather term. Here we had snow and then wind that blew it all away, but other parts of the state suffered and are probably still digging out. I just stayed inside and worked on my miniatures. Today, still chilly, the birds are noisy, announcing the pending arrival of spring. We are having two big parties here in August, my husband 50th class reunion meet and greet and the next weekend a garden wedding, so we have a lot of work to do to get ready, and I am sure that the workshop downstairs will collect dust.

I am stalled with the toy store right now because I don't know what to put on the loft floor, so I am waiting for some sort of epiphany to hit, but I did wallpaper the loft.

Originally, it was egg yoke yellow--a pale egg yoke, a yoke that lacks nutrition.


The loft is really hard to photograph because of lack of lighting, but I did paint it a luscious chocolate milk brown, you know, Nestles Quick color. I used latex, semigloss left over from painting the real house--it may have been one of the samples, but it looks nice and I wondered if I should just it painted, but nice as as the color was, it was blah.


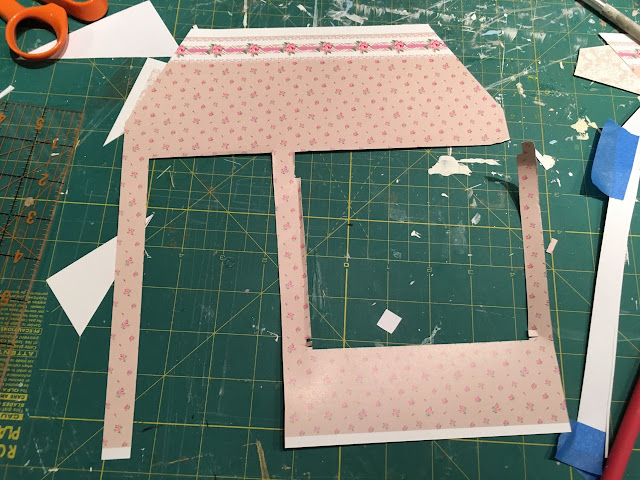
 I had two sheets of the lacy paper, so I used it up. Installing the first piece with the glue on the back was tricky.


Cutting the triangle for the side walls was really hard. I have not glued them in yet because I may not. 

The front point was difficult, too, and you can see that I didn't quite get the right 
angle covered. I do like the wallpaper. Now for the floor. ????


Every now and then someone mentions going to their stash to look for a window or a door or baby just some lumber, just as I did the other night to look for lumber to recreate the display. I have decided that white would be better, but I don't want to paint this one.


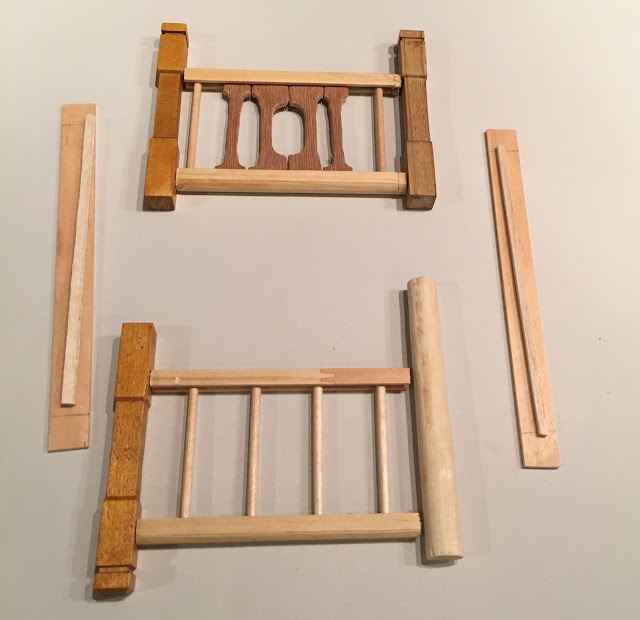
I spent the evening sorting pieces, for the lack of anything better to do. The mess was still on my work table when the 3 granddaughters stormed the craft area, eager to create something. Lily became absorbed with the wood and I finally asked her what she was trying to build and she said, "A bed." The piece that she had picked was the railing for the Bellingham Farmhouse that I had built and decided not to use because I didn't like it, so I set about going through the bits and pieces to help her build a bed.


I am short newel posts. I'll use the unpainted on for the toy store and then upon closer look, I realized that the top of the posts are not all the same, so I returned to the stash to look for alternatives because the project after all is about using up scraps.


The dowel might work and if I look in the garage or the barn I might be able to a longer piece, but the rails don't match up the best. 


I like the post, but this one is reserved for the toy store, too. But wait; this box is only one stash. 


I found a second 1/4 inch post along with a wooden button (not actually what it is called) that came from another type of stash. It adds a finishing touch to the top of the bed post.


The rails are not the same length, so I had to even them up.


And then I had to sand the one side to get it even.


With a little sanding, I slowly whittled away enough to even out the rails. I used the lines on my quilting mat to help me determine when they were even.


Nice.


I glued on the rail to hold the bed slats and then glued the side of the bed on, but here. I finally decided to glue it to the leg to get more surface. 


I like it.


All finished; just need to let glue dry.


I'll make the mattress using foam board. That I do not have in my stash, so I'll have to go buy some when I get to town. My sponge sander gives me an idea of how thick to make the mattress. 


The slats are glued in, stabilizing the frame. Not bad for a bunch of scraps. I am wondering what else I could build.

Now just for fun: one of the Facebook group, wanting to get started on her first house was quite confused about scale and size and wanted to build a house for an 18 inch doll, actually with some clarification she wanted to know what size of a house to build for a 2 inch doll that the 18 inch doll would play with; in other words a dollhouse for a doll. This is what I posted for her:


My Madame Alexander 18 inch doll ( $3.00 rescue from a thrift store) demonstrates how the half scale (1:24)  Fairfield dollhouse might be perfect. Then 4 inch Merida showed up, inappropriately dressed, I might add. I think my post was appreciated it. The young woman thanked me and maybe I got  "A Like"

This week the granddaughters on spring break and the grandsons are on break next week, so I probably won't get much done on the toy store. I need to figure out craft projects for the girls. 

Thanks for visiting. Have a great week. 


Sunday, March 10, 2019

A Face Lift

The little Storybook house badly needed a face lift. I am guessing that it was built in the '80s then sat on the shelf for at least two decades, collecting dust and absorbing cigarette smoke. I have purchased four houses by the same builder at the antique store here in my little village on the Northern Colorado planes. The first one was a large farmhouse with all of the furniture along with a general store for 'free'. The general store has everything a turn of the 20th century general store might stock. I was new to world of miniatures. I just wanted a dollhouse, so when I found a magical farm house, I purchased it.

And the rest is history.

Then three more houses showed up the shop's window and I bought them, too. Next, I suffered buyer's remorse. Now, I am renovating the Storybook, originally a toy store. It was in the beginning dedicated to bears, lots of bears that came with it, but I have been collecting toys, lots of toys.

For renovations,  I first decided to just replace the wallpaper; out of respect to the original builder, I thought I'd leave things original, but the more mored I worked with the little house, the more I wanted to make it my own. So last night I took a bold step and painted the exterior wood trim.

Here is the original cottage.So what color will I go with for the wood trim?


Before I began painting, I did some shopping. I meet my oldest daughter Heather and little grand son at the Denver Doll and Toy Museum Mini Show that hosts local artists and miniaturists. I came home with a nice section of toys.


A hand made rocking dated 1991.

My daughter insisted that I buy this hand crafted replica of the characters in the Christmas classic, Rudalph, the Red Nosed Reindeer. Years ago, someone whom my husband worked with decided that he looked like Hermi, the little toy maker elf who wanted to be a dentist, and mistakenly began calling him Herbie. For years he was called Herbie. A must have for a toy store, I'd say.
The Bellingham Mistress collects cactus. I should have purchased more because they were so authentic.

Childhood classics


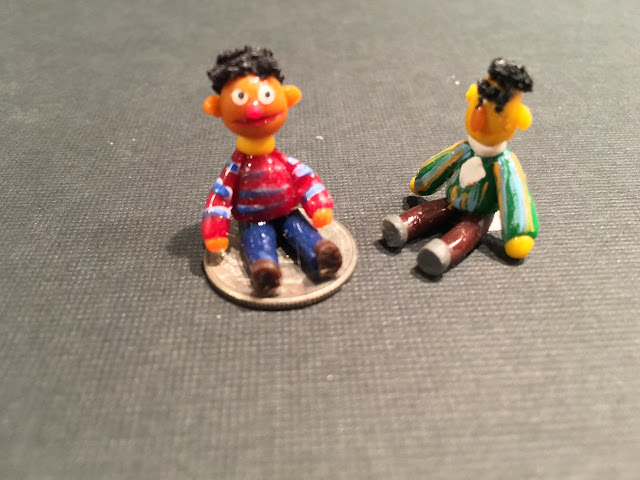
Handmade Bert and Ernie

I think the vendor my favorite, Dave, said the barn is 1:24 scale. I've been trying to make one out of paper, with fair results, but this one will authentic.

Good finds at the show. The museum will sponsor another mini mini show May 4th. Should I go?

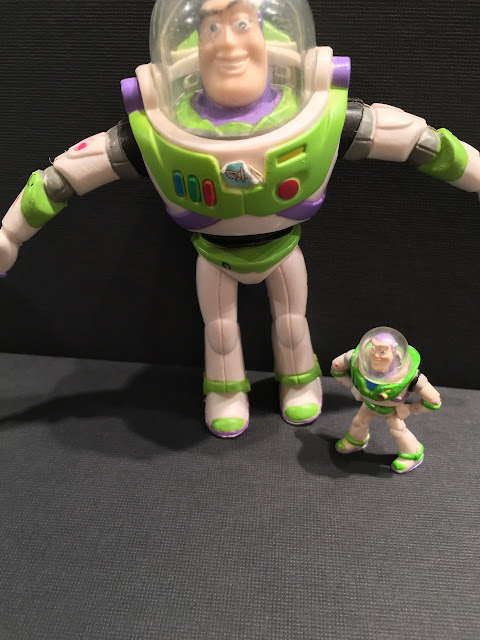
Buzz Light Year, Etsy. 


Tim Allen is a favorite actor, and I admire Buzz. The mini is actually a Polly Pocket, now no longer available in retail
Also from an Etsy store, two rugs:


Love the red truck--learned to drive my grandfathers 1950 stick shift, red Chevy pickup.
The second rug will go in the Roy Rogers bedroom on the Bellingham.

And doesn't this bring back childhood memories. I still have the girls' little school bus, the people, and the dog!

 I found this one at a Hallmark store under the label of "The World's Littlest Toy. There is an entire collection. Love it. It is a bit large for the toy story, so I'm not sure if it will go in.
More Etsy fun: a collection of tiny horses.


This super hero girls represent Girl Power in the store. They are craft buttons, but so cute. Buzz likes them.


A Hobby Lobby hutch. I love the look, but I am wondering if I will use it because it makes the store look like a bedroom or a toy room. I'll see.

The American Girls love the spotlight.

Okay. Here we go. Before new wallpaper: fuzzy bear wallpaper. I know that the previous builder built  this little house with a lot of love, and I do feel a bit guilty covering up all that love.


 I was very nervous making this first cut. I don't know how many times I cut and recut the templates to make sure that I had a perfect fit.


One problem: the wall is taller than the wall paper sheet, so I had to leave the white border meant to be trimmed off. I will install decorative trim to cover it.


IT FITS! Just as perfectly as it could.


The front wall with the door and the bay window is particularly difficult to fit. I fit and re fit it several times cutting templates and finally got a good template, but it fit very tight.

I ended up with a tear, but it doesn't show. 

I took the piece out, but realized that I had to use it regardless of the tears. There will be so many toys in the store that it won't be noticeable.


 The right wall was a challenge too with the bay window, but I got it to fit--finally.


Flooring, next.

I decided to play with signs. On left is a vent piece that I didn't put on the Bellingham. I painted a faux sign. Hate it. 

I ordered a sign from miniatures.com, but even at scale it seems large. 


 This piece has possibility, but I am not a sign painter. I will keep playing with signs until I get something that looks authentic.


 Floor and trim have been installed, but not glued down.


So, last night I was home alone and went downstairs to see what I could do to keep me entertained. I have mess in the work area, which makes it hard to decide where to start. I decided to just do it: Paint. 

First I taped the windows to keep paint off of them.


The door trim around the door was easily removed, as was some of the other trim and a window.


It adds a very dramatic look and the store is beginning to take on a new character. I think the original builder would like it.


I still have some touch up to do, but I need to re tape the windows and find a time when my hand feels nice and steady, mostly my wrist. 


I love the new look. It seems more authentic. More English. 


The carousel horse fits perfectly in the front window and sets the theme for the store.


I like  love it.


Yep. I love it.

Now I need to clean up a very messy work area.

The original builder didn't install stairs or the house didn't have any, but since there will be a rocking horse gallery upstairs, its needs some sort of access, so I working on a ladder. If it doesn't work, I won't use.

I am so thankful that you stopped by. I hope you enjoyed your stay. 

UPDATE: Sorely behind on my posting, I did make a ladder. In a few days, I'll tell you all about it. 

I love your comments, so if you stop by from Face Book, say 'hi.' 

Thanks visiting.


Houseworks, LTD Garage Kit, a Perfect Fit

It's late April and we are supposed to be doing spring garden clean up, cutting back last year's canes on the roses, hacking away at...