Wednesday, November 28, 2018

While Glue Dries

Progress continues on the Cranberry Cove. I told Lily when she was here the other day that she couldn't see the house because I want the finished house to be a surprise Christmas Eve. It finally looks like house. I was not too sure about her choice, but it has turned out to be a really cute, easy to build house. Unfortunately, I don't think it was a very popular model because there aren't any finished ones on Pinterest and Real Good Toys has discontinued this model.  None the less, work continues here. Want to take a peak?

Wiring is always such a pain, but I am getting better at it. This connection is for the porch light.


It works! Even with tape to hold it place while the glue dries, it looks cute.


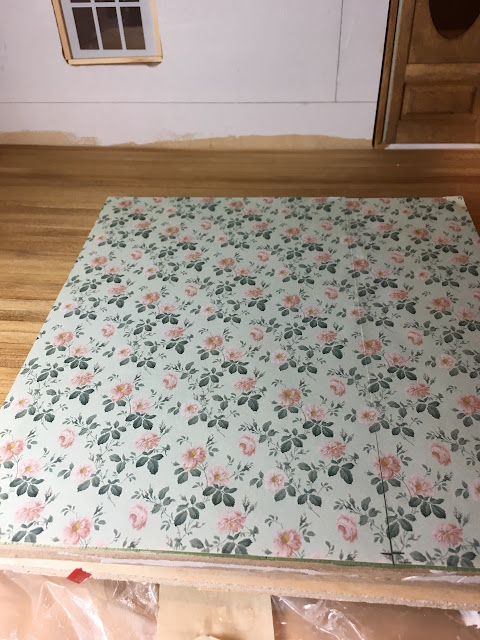
Despite having a lot newspaper on hand, I ordered two sheets from Itsy Bitsy Minis and I should have ordered three because I decided to paper the stair wall, but fell short. The seam does show but will less noticeable since it will be at the back of the stair wall behind the stairs.


The fireplace is already lit, keeping things warm as our winter winds blow. The fireplace is a Hobby Lobby one that came with the San Franciscan kit. I have another fireplace for that house.


Taking wiring to the next floor above has always been a problem for me. I usually take it up over the front edge, but then it shows and requires more connections and hammering brads in awkward places, so in the Bellingham when the connections failed on the second floor, I created a new connection between floors using a left over plug end cut from a light that was hard wired in, so I did the same thing here. To get the connection brads properly placed, I dipped the prongs in an ink pad to place the dots where I would pound in the brads. Now the upstairs lights can be unplugged. 


It works! The lights on the first floor ceiling will be connected here on the second level floor.


The front door will be a tight fit. I actually flipped the placement of the floors which has caused me minor problems. As I looked at the instructions, I realized that the drawings didn't clearly show how assemble the base structure to get the floors placed correctly, so the walls are on the opposite side of the stairs, making fit for the front door very tight. No matter. It works.


Time to dry fit the top floor and the mansard roof.

I have misplaced the instruction booklet, so I called Real Good Toys yesterday to ask if they could--and before I could finish my sentence the sweet voice at the other end said, "I'll email you one right way. And she did.


I like it! Yes the ironing board. I have every flat surface in the basement covered. 


Soon I'll get the nerve to glue the pieces together.


The wall fits. I'll let the glue on the mansard walls harden over night before I put on the final pieces.

In the meantime, the grand kids have asked for new hats and fingerless mittens, so in while the glue dries, I have other things that do. This time of the year I crochet.


This little clutch hat is for Lily. She loves green.


Her older sister Elinore asked for navy and burgundy hat. Someone noticed that these the colors for the Colorado Avalanche. No one in the family are hockey fans, but the colors are pretty.


The final roof piece has now been put in place. The wood buckled when the wet paint soaked in, so I had to weight it down as the glue dried. My brother gave me my dictionary so many years ago. As I put it in place, I wondered just out of date it is. I doubt that the word 'blog' is listed. The other two are literature anthologies, one for American literature one for the Romantic Period. Such great reading.


Lucy requested a new pair of fingerless mittens. They are so easy to make. I can make a pair in an evening as glue dries. I can even remake them when the dog finds them.


This is Brody, our German Short Haired Pointer pup who has a fascination with my yarn and can destroy a Kong. He's advanced to the black one, the one for extreme chewers, as he is still teething. Brody is only 8 months old and still in his puppy stage. I've not yet figured out that I have to put my things away. Fortunately he has not discovered the basement. He sees us go through the door and disappear, but he hasn't tried to follow us and I plan to keep it that way.

As the glue dries outside, the interior work can continue. I have the living room papered, but now I am waiting for new glue to be shipped in. I left the lid off of my container and the glue dried up.


What's next? Watching paint dry. I have a lot of trim for the exterior to paint. 

Thanks for stopping by. I love your comments and appreciate very much your visit. 


Wednesday, November 14, 2018

Meeting the Challenges

Along with my growing list of blogs that I follow both with my gardening blog, but also with this blog, I also belong to several dollhouse groups on Face Book. Miniaturists  from all over the world participate, sharing such great ideas and beautiful projects. This morning one member asked about if anyone kept a journal or scrapbook of their houses. I said no, but then remembered that my blog does exactly that. I take a lot of photos, which are really helpful to see how the project is going and then I share and comment on the project; so I guess our blogs really are records of our work, stories about how we work, how we think, our momentary frustrations and how we solve problems, the products we use, and the vendors whom we rely on for tools and supplies. We learn so much from each other, too by sharing how we solved a problem or created something and we do with joy and love. How great is that!

Take this project for example: One of Lily's requests for her house was for a weather thing--with a horse. "Oh," I said, "you mean a weather vane?"  "Yes," she answered.  I wondered where she came up with the idea then I realized that we have a weather vane on our barn.


It is a very simple piece and does define what we are all about here--horses, gardening, chickens--all subjects for my gardening blog; however, a previous owner installed it. I always wanted one of those copper weather vanes with a rooster to put on our hen house.

So here is my interpretation of a weather vane.


First I searched for miniature weather vanes online. Have you seen how much they are? I might spent a small fortune for my dollhouse, but not for a child's house where things will get glittered, painted, and modified with child's play. 

After struggling for a few days on design, which included trying to cut a horse on the Circuit, I turned to buttons and finally settled on this one. I love those packages of themed buttons at the craft stores. I've got a nice stash. The horse button is too small and the loop in the back goes in the wrong direction, so I settled on the whimsical unicorn. Lillie loves unicorns, too.


I gained inspiration from two builders, Jen's Minis on Face Book. She used this same base with curly-q's. Mine was in a stash of stuff that came with the Franklin when I bought it. I found the arrow in the jewelry findings section at Hobby Lobby, the brass pipe there, too, It is smaller than 3/32 which I started with, but the the loop on the back of the button is small. I threw away the packaging, so I can't tell you the size. The beads were in my stash. Right now scotch tape holds it together. I need to find a good glue. Any suggestions.While Jen has blog, Jen's Minis , she also posts great tutorials on Face Book. She removed the whale and modified  a cherub for her embellishment. Jodi at My Miniature Madness  used the same weather vane and created a really cute, whimsical weather vane that fits the theme of her little cottage by adding a really cute tea pot. Both tutorials helped me design my weather vane and encouraged me to figure mine out.

Now, do I paint it or not? I thought about spray painting weather vane black or leaving it as it is because I like  the glittered unicorn. 


This week's project, however, has been to paint the house. I primed it earlier so I set out to paint the the main box.


The first coat as it dries always looks splotchy and awful. I should have removed the tape.


The saga green does not photograph well, but I like the color.


Painting the trim and shutters white came next. Painting is not my favorite thing to do. I don't know which I dislike more: staining or painting.


With the painting finished, installing the windows came next. I was really dreading that task. As you can see, the mass produced dollhouse has curved windows cutouts and the instructions say to use a box cuter, Xacto knife, or wood rasp to square the corners. I used all three, even my Dremel with bad results. The kit windows also had a lot of parts, so I considered buying Houseworks pre-built windows. I went to Real Good Toys to see what they recommended for the Cranberry Cover only to discover that the house has been discontinued--or at least removed from the website. Was I bummed! Now, I am thinking about it, there are very few examples of the house being used on Pinterest. I don't think it was very popular. As I priced windows, I realized that I didn't want to spent another fifty dollars on new windows that had to painted, too. So after thinking about and doing some measuring, I realized that the window opening would require a lot of rasping to accommodate pre-built windows, so I decided to figure out the kit windows.


With the house laying on its front, I pieced the pieces together to see how everything fit, which gave me confidence that it wasn't going to be so difficult to install the windows.


And they will look nice, too, so I started gluing.


The squared corners of the Plexiglas windows did not fit in the curved corners very well, so I snipped a bit off of the corners and they fit perfect-- much easier than rasping corners to make them square.


The windows are in! And I like them.


The lines left by the tape are not as visible in the photos, but some still show. I even rolled on another coat of paint trying to cover them. I should have either removed the tape right away or forgot it.


And I painted the front door. OMG Fuchsia! I will take my little can of paint to Ace Hardware and have it tinted darker. 


Now here is a curious photos. Can you tell me where I took this photo?  It all looks to be dollhouse furniture. Nope. If you could read the sticker on the furniture, it says "fun chew." I saw these cute little items at Pet CO when I went in to buy parakeet seed. They are hamster toys. The tub is ceramic and about the right size, but yellow? Perhaps. 

Have a great day. Thanks so much for visiting. 


Monday, November 5, 2018

The Cranberry Cove

I've been able to spend some long hours on the Cranberry Cove house. I put the primer coat on inside and out; now the the outside is ready for the first coat of paint, but I am going to wait until I have some of the electrical work done incase I have to turn the house on it's side to pound in the eyelets. I still haven't decided how to run the tape. Such decisions!


This will be the living room The flooring is cut and ready to stain. As you can see, I have run the copper tape. This kit has pre-cut to slots insert the tape between floors. Nice as that it is, I am sure if I am going to run the wire that way. I have to figure out to put the power source. 


Promising myself to build the kit as is, I traded out the door. The kit door is a plain six panel door, so I ordered a front door with a oval window. I like to see who is at my front door before I open it. Right now it is in backwards just so that I can get the wall placement correct.


The kitchen will be next to the living room without a door between. I wanted to use up items in my stash, such as the tile floor, but today Lily came and said she preferred a wooden floor. No worries. I have extra flooring. I decided to run the flooring long ways because it fit bettering will give a smoother edge, more finished edge.

So with the excess cut way from the living room, I was able to use it as a wainscoting for the kitchen. I've made wainscoting for other houses out of craft sticks and was never really happy with the look and it is so much work, why not flooring? I'll stain it the same as the floor. 


The kitchen looks pretty bare, so I began to play.


When Hobby Lobby had a close out on their wallpaper and now carry a roll of preselected papers made by Real Good Toys, I bought out all they had because I loved the papers so much. Bargain that the papesr were, I now realize that all of my houses will look the same, but for this little house, I wanted to use up some of the excess that I have gathered--not working out as I planned.

This checkered paper I love, especially with the farm animal border. Lily loves farm animals. She has a bunny, and her sister has 4-H rabbits, the other girls have horses, and they also have hens, and dogs, and a cat. The little girl loves animals.


I texted this paper to Lily's mother to see if Lily liked the paper. She is the youngest of the family and with the influence of older children and her parents she has very mature answers, so I got her answer: "Not really, but it will do." That's our little girl. Honest, straight forward, and easy to please.

I had to agree with her. I had originally planned on putting this paper in the Bellingham Farmhouse and it is just too wild and bold and dark. I may never use it.


She does love the border, so I cut it off. I will paint the walls tan. Lily doesn't like that. She wanted maroon. I don't think so, I told her, we'll paint another wall maroon. 

I want to have the house ready for Christmas, so I have a lot of work to do, along with the rest of life. Tomorrow I'll stain the floors and then I can glue in the wall and place the stairs. 

Before sign off, I'd like to share a link with you. A Denver TV station featured David Nelson, a Denver area dollhouse builder, Sunday night. I got to know him when we visited his mother's dollhouse store in Denver where he built the dollhouses, following in his father's footsteps. In her 80s, his mom decided that after 30 years it was time to close the store. Now he builds houses in his warehouse. I'd like for you to meet David. He's also on Facebook, search for David's Dollhouse, and he also has a website, David's Dollhouse where you can order your favorite things and some new items, too. Now that the store is gone, he travels to miniature shows outside of Denver and Colorado that he announces on his Facebook page, so you can look for him at your local shows. If you check out his FB page you will see his large inventory that he takes with him. 

Thanks for dropping by. I appreciate your visits.

The Tale of Two Projects: Trials and Tribulations

  Murphy's Law says if anything can go wrong it will, and so it is in dollhouse building. I set out today to get the wallpaper installed...