I spent most of the day going between some obligatory housekeeping chores and working on minis. First I'll brag a bit and offer a self analytical review of my kitchen cabinet for the Blue Farmhouse Now Pink. I'll share other things too. The Fairfield needs a fireplace--in fact it needs four and it needs a new kitchen . So here we go.
I wrote about this sink project a while back. I began by making pieces from one of Julie Warren's books. I love her technique, but I made three different cabinets each with a major builder error, so I decided to design and build my own sink. And now it is finished and installed.
I ordered stove and dishwasher kits from
Elf Miniatures in the UK. At first they were a bit intimidating and I didn't quite know exactly what to do with pieces, especially for the stove. Thank goodness for bloggers and Pinterest where I was able to find photos to help guide me. I had visioned both appliance with working doors, but decided against that. It just got too complicated and beyond my skill set.

While the drawers down the center open up, the one beneath the stove and the two underneath the sink do not. The sink is just a little crooked. Darn it.
In place, I love it. I still have the refrigerator to finish and this is not it. I made one then had to make it over again. The original plan for the kitchen included the hens and roosters, so using those moisture gathering canisters that come in my baby aspirin containers, I fashioned them into kitchen canisters when I first began my Miniature Making journey. They still work.
Doesn't take long to mess up the kitchen--in this make believe life and in my real life. I made the kitchen towels, as well, designing them in Word then printing them on printable fabric.
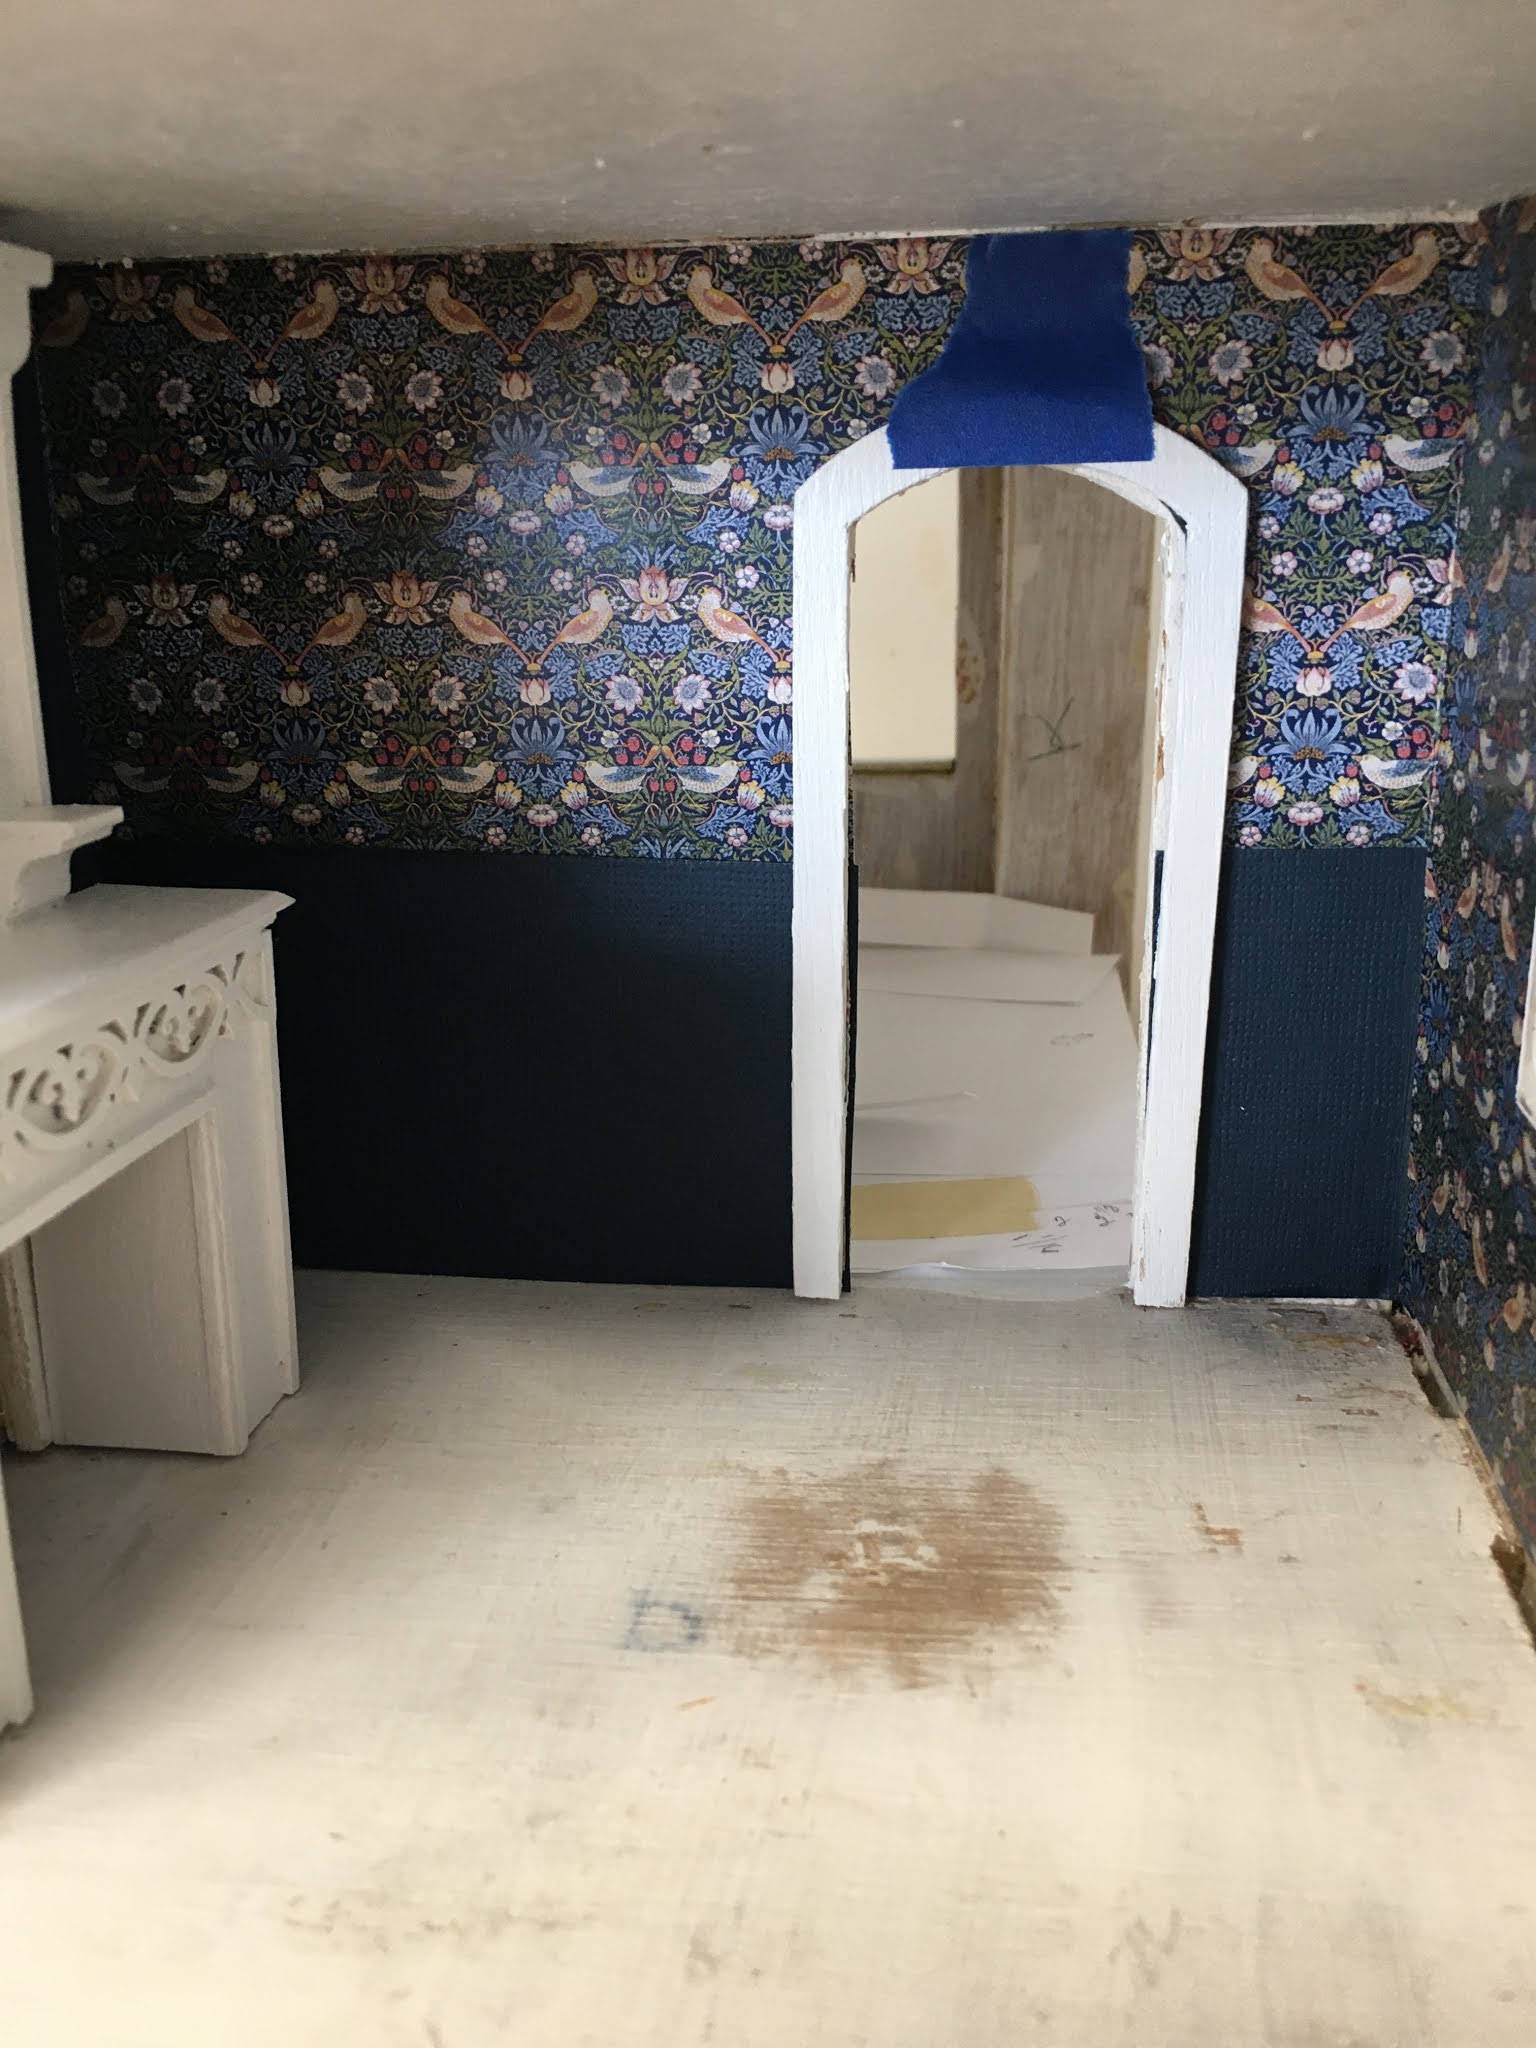
On to the fireplace project. The Fairfield has 4 flat faced fireplaces that really need some dressing up. Again I've been searching Pinterest for ideas, which are limited. While the half scale Fairfield seems to be a fairly popular house there just are not many examples to study, so I began to play. I found an eBay store that has beautiful picture frames and framed art that I'll share later. I've ordered my wallpaper from Itsy Bitsy, including this William Morris in half scale wallpaper. I love it.
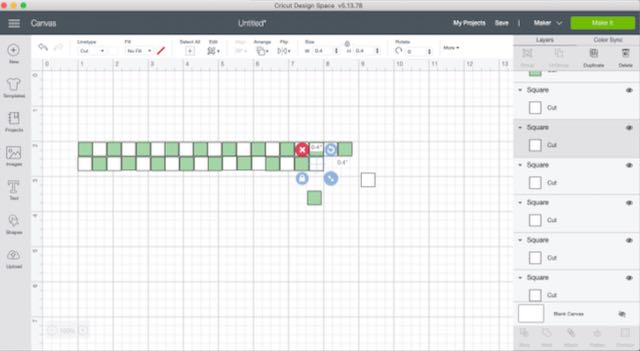
Next I began to play in the Maker Design Space to come up a design. It was a long project, but by using the weld tool, I was able to create a nice design for the 1:24 scale fire place.
Before I cut it out in wood on the Maker, I cut my pieces from scrapbook paper and roughly glued the pieces together to make sure that I had measurements correct.
Here is the back of the fireplace that I cut first. I have found that when there are several pieces to cut, it works best to cut a few at a time, mostly because it's easier to trouble shoot the process and design one or two pieces at a time instead of cutting out all of the pieces only to find that there's a major design flaw. Wood is expensive and takes a while to cut.
Here's a visual of my journey in designing the little fireplace. I began with craft tongue depressors. They were just the right width. Now, if you don't have a Cricut Maker or Silhouette machine, the craft sticks are great. I hurriedly put them together, ending up crookedly, but in the excitement of the moment I wanted to see how my design would work.
Next I cut the major piece out of card, which provided a good model to test my sizes. Then I came up with the idea to add a high top to the fireplace instead of just a flat mantle. More playing around in Design space and I was able to come up with all of the pieces, welding together the pieces that would fit to reduce the number of pieces, cuts, and simplifying assembly.
I used 1/16 bass wood with the Maker knife. And while the program is pre-set for 14 passes, 11 passes is adequate.
I was quite excited to begin gluing pieces together.
Late last night, I hurried upstairs and out to the garage where I am working on the Fairfield to test my first fireplace.
So. Yes, it does take up more room, but I am okay with that. The fireplace will be the focal point of the living room and will dress it up nicely.
Now it is ready for embellishment.
I realized that it needed to be framed out. When I built the Bellingham, I bought all new windows and left out tiny little pieces that I cut here for the trim.
I dug more in my stash and found this 1:12 crown molding scrap for the top of the back and as shelf brackets. But I've decided not to add a shelf. I ordered extra laser cut trim from an eBay store and newel posts, thinking that I might re-do the stairs railing in the little house.
I found a candle stick that I had made for the Bellingham and made a matching one that will sit on the full scale crown molding shelves.
The fireplace is not quite finished. It's in the garage now getting painted. It's pretty cute, if I do say so myself.
I have 3 more to go. At least I have the bugs worked out.
This is my first half scale project, so I don't have any sort of stash pieces to work with. I am having to order everything. I am finding, however, that there really isn't much half scale inventory available. There are some necessary supplies, but when looking for speciality pieces, they are sparse. Elf has very limited kits for half scale, for example. Given the history of the Fairfield and keeping with the furniture that came with the house, I've dated it in 1920s to give me a foundation for selecting wallpaper, flooring, and the kitchen.
While the furniture that came with the house is decidedly Victorian, the kitchen cabinets were mid-century and didn't fit, so I began searching for tiny kitchen items. I found exactly what I wanted on Etsy at Red Cottage Miniatures. I ordered the sink and cabinet with a hanging wall unit, the stove, and ice box. I also ordered a rocking chair, crib, and dresser for the baby's room, and a turn of the century seated. The kitchen pieces have been partially assembled and once I decide on the wallpaper I'll finish assembling them and paint them. Research shows that green and yellow were exclusively popular in the 1920s. Not really happy with those choices at the this moment.
The kits are well made, easy to remove from their boards, easy to assemble, and will appear to be authentic once installed. The kitchen is very small. Some have opted to move it next door to what should be the dinning room, but with the fireplace that room is small, too, and to me doesn't offer a much better room design.
The kitchen also has an outside door that some builders close off to allow for more wall space. There are some really elegant half scale kitchens in this little house. I thought about closing off the door, but decided not to for a couple of reasons. First, it would be easier to fill in the door as the house is being built rather trying to design exterior siding and I'm no up to that task.
More importantly houses have back doors and old farmhouses had kitchen doors. As a kid, I remember them as the "backdoor." It made a lot of sense to have backdoors since they often led to the barn or the garage. In addition, kitchens were really hot with the wood burning cook stoves the threw off a lot of heat. Open kitchen doors helped keep the kitchen a little cooler. Leaving the kitchen door seems to me make the kitchen more authentic. Wait until you see the adorable little screen door that I found.
I still have a lot to work out in the kitchen with the placement of the furniture. I like where the sink is and the stove, but the refrigerator--icebox--doesn't seem to have a place. I'll figure it out.
Now I am painting doors and the gingerbread exterior trim that I bought to dress up the porch and outside of the house. Very tedious. I also have to work on the electrical. I've ordered some nice hanging and ceiling lights. I can't wait to add them. They will be a major upgrade to original lighting, but I don't think they have shipped yet.
Speaking OF: Shipping in these days of Covid has been a nightmare. All of my online orders that come through the USPO are very slow, being held up in Denver sometimes for days. My kitchen kits came all the way from Australia, so with Covid, distance, and Customs the order took weeks to arrive and so well worth the wait.
On a final note I have made my little half scale fireplace public on Design Space. I'm not sure exactly how that works, but I got brave and went public. I also clicked the option to post it on Pinterest were you will find it on the Design Space board. Click on it and it is read to either customize or cut. If you try it let me know how it works.
One note on the pattern. I did not include the top mantle piece that will measure 8.2 x 2.2 mm. Using Julie Warren's trick for beveled wood edges, I sanded the three sides to give that beveled edge. I am really just testing the waters in posting a project on Design Space; it could be a disaster. If you have questions, email me. You can find it here.
Pinterest
Have a great day and thanks for visiting.


