Monday, February 29, 2016

Procrastination

I have been procrastinating the installment of the second set of stairs for the Blue Farmhouse and not without just cause. Since this house was built from the scratch, nothing fits as do pieces in the kit houses where each piece is engineered to fit. There are standards in sizes for everything from doors to windows to staircases so that the builder can modify and change and retrofit pieces.

Not so with my farmhouse. The cutout for the first floor staircase was too wide, which required modification to narrow the opening so that the Hobby Lobby purchased stair case would fit. For the second floor staircase installation just the opposite was necessary, the opening had to be widened. I had call for back-up.


As you can see, I needed to widen the opening just enough for the stair case to fit, about the width of one floor board. Here my husband has made the first cut, using a stronger, better saw blade.


After making the two side cuts, he used my little battery operated dremel to drill holes so that he had insertion point for the next tool.


More Power! He was able to get his electric saber saw in the small space so that he make the final cut.


He didn't have much room to work in.


The saw makes an awful racket. We should have had ear plugs, even Boone the dog hated the loud sound.


And there it is, not perfect, the the gap will be covered when I install the railing. I need to glue the stair case in place next.


He's my hero for sure.

I took my two daughters and their 5(13-3)  children to a miniature show in Denver a couple of weeks ago. The Denver Doll and Toy Museum sponsored the small show that featured mostly local miniaturists and artists. Had I known (rather, read the website more closely) it would have cost $35. to get everyone in, I might have gone alone, but then what fun would that have been? We had a lovely day and the children were great, even the 13 year old grandson, who I am sure would rather have been doing his own thing, but he was a good sport. 


We each bought a sweet doll from this lady who makes the most wonderful sculptures. This one is Alice. She has an Easy shop, but I have misplaced her card for the moment. I'll share this artist with you when I find her card. Isn't Alice sweet? I am astonished at the detail of her work.
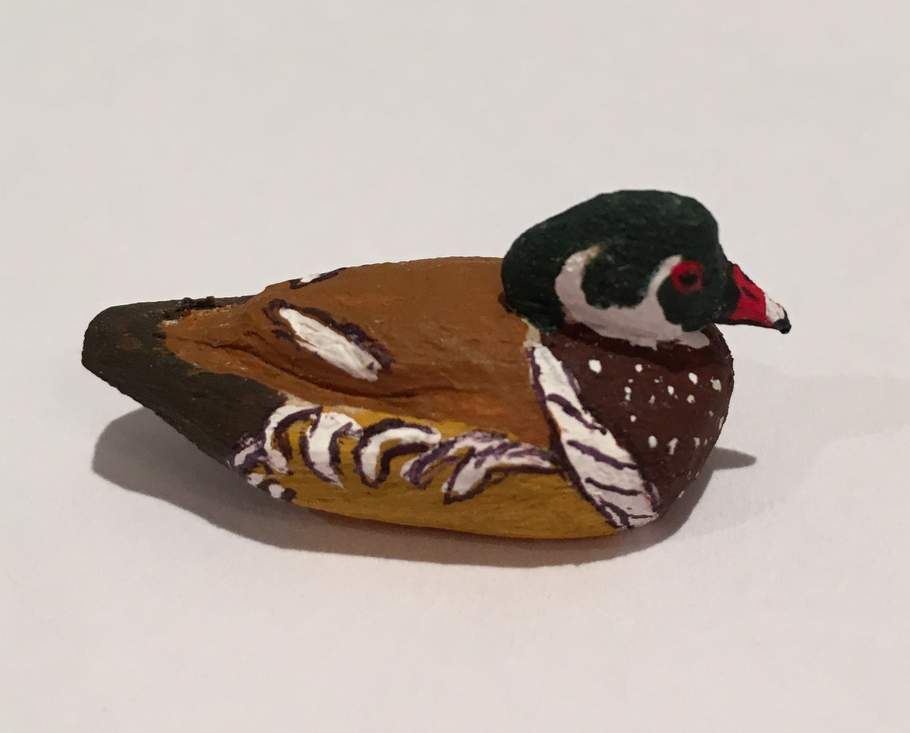

For the dollhouse, I purchased this hand carved wood duck. I have an affinity for wood ducks. In nature they are so beautiful. We don't see them much here in Colorado though they are probably more likely to be found east of us. This artist had a wonderful collection of hand carved birds from basswood. He doesn't have a website. I hope to see him at the miniature show in Denver in September. I have decided that I can splurge on some special handcrafted pieces made by true artisans because I make so much stuff by my own hand, such as these boxes.


I have been collecting printables on Pinterest, so in the evenings when I don't want to go downstairs where it tends to be a bit chilly, I print, cut, and paste while I watch TV. Love the tissue boxes. 


I placed an order with Norm's Dollhouse store in Denver during their 25% sale that ends today. I have the real life figurine of these doves. It is one of my favorites.


The likeness is amazing.


Now a project like this one, does make me wonder about my own sanity. Who sits around beading a miniature vanity set? Me. It is cute, don't you think. I bought the blanks at Hobby Lobby.

I am so glad that you visited. I am hoping to keep this blog updated more regularly. I'll begin the ceiling on the 3rd floor soon. Have a wonderful week.


Wednesday, January 13, 2016

And a New Year Begins

Hello. Is anyone out there? One of my goals (I'll not call this mental activity Making Resolutions because we all know that we don't do so well at keeping our resolutions) for this New Year is to nurture this blog a bit more. My Welcome to the Garden Spot has a wonderful following because I tend to it. So hopefully I can gain a few more followers this year for this blog. So if you are new to the Ann's Dollhouse Dreams, thank you for visiting. Do leave a comment and sign on. Sign up through email, so that you get notifications of new posts which come irregularly.

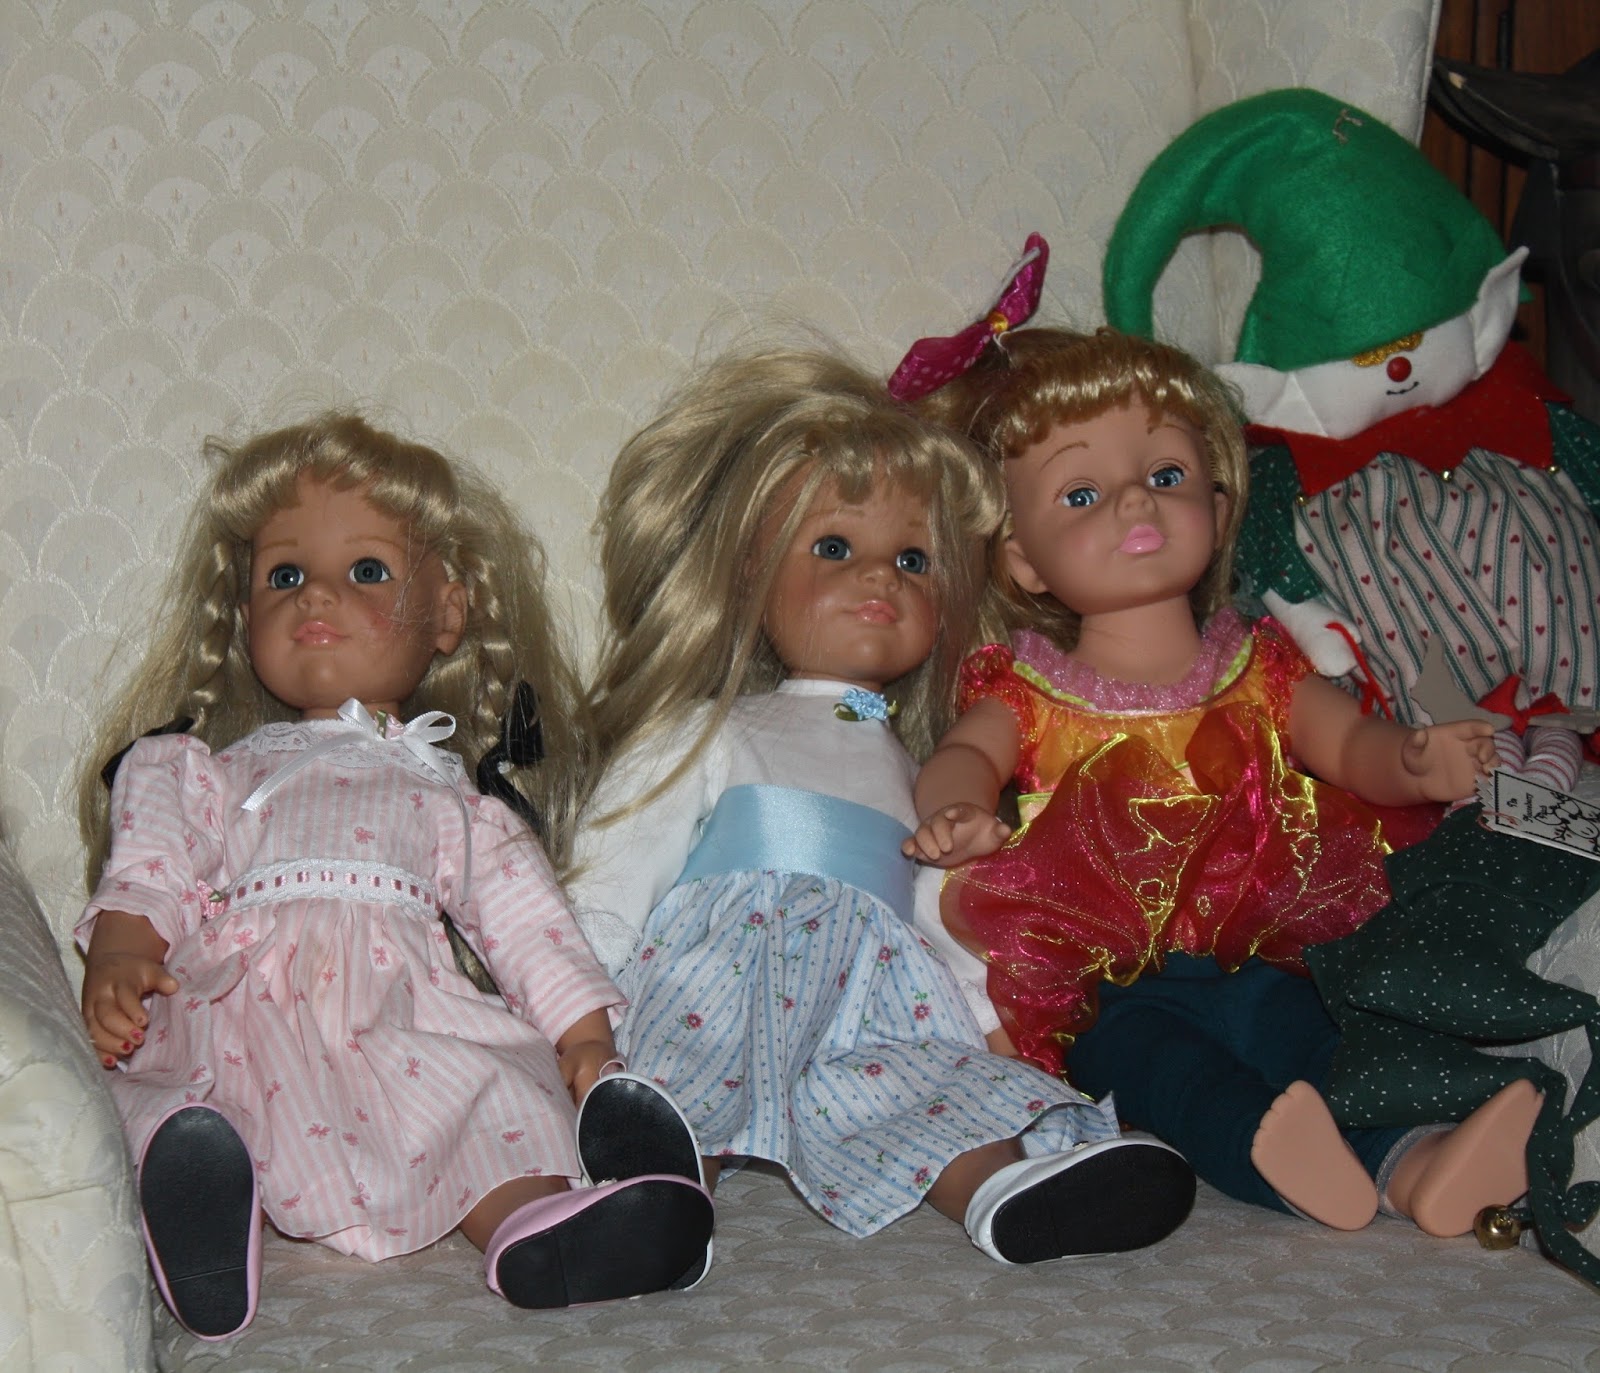
I put away all of the dollhouse tools and cleaned the workspace so that I could sew for the American Doll type 18 inch dolls for the little girls on my Christmas gift list. I made six little dresses and purchased matching Mary Jane shoes for a fun website Silly Monkey.com  While not perfect, the little dresses turned out so cute. I dug through my stash of material to find enough bits and pieces to make all six dresses.


My own doll patiently modeled the clothes while I worked on each dress. I tried each one on to make sure that it fit. In this photo, I am not real happy with the bow in front of the dress. The other two dresses were mailed to the two little girls before I had time to photograph them, but they were of the same pink and blue fabric. My favorite is the lavender dress. 


I found her at a new thrift store one cold, windy fall afternoon on an outing with my daughters. While they were giggling over fashions, I sorted through the toy rack and there she was laying face down on top of recklessly assemble toys. When I turned her over, I was amazed at how clean and new she looked. I checked for her markings and to my surprise she is a Madame Alexander. I paid only $5. for her. What a find.

Working assembly line style, I cut out all of the pieces, then I hemmed all of the skirts and added the gathering seams for the waists. Next I assembled the bodices. From there, I pieced each dress individually. Originally I had planned on making button holes and sewing on buttons, but then decided to use snaps, which were a real pain to sew on. I decided to use hook and loop strips that I found at Hobby Lobby. I cut the 5/8 " wide strips 4 1/2 inches long to fit the length of the back bodice then cut each strip in half and machine stitched them in place, making a much neater closure.


I found this pattern on Pinterest. When you print it from the website and cut out the pieces, they will be too large, which the designer makes not of, so before you print the pattern, you must size it. Susan has  drawn her own 1" grid paper to hand draw the pattern. The squares are 1.5 inches, so the pattern has to be down sized to 1" sized grid.

Click here to find the pattern and instructions that I used: http://www.susankramer.com/bridesmaid.html

Here is how I sized it for a perfect fit using my iMac with Microsoft Word:

  1.  Download the pattern. I was able to drag the image from the website directly to my desk top. Susan  does provide a link to purchase the pattern if you don't want to go through this process. 
  2. Once the pattern is down loaded, I drag it into a Word document. (Pages on the Mac will work the same)
  3. Double click on the image to select it. In the toolbar, you will see the size button at the far right of toolbar. You must select the pattern image in order to see the sizing button. The image measures 8.7"high X 6.5" wide. She gives instructions for drawing the pattern, but by putting her pattern in a Word document, it is easy to re size it. After resizing and printing, measure a square to make sure that the graphing square measures 1". In order to re size the image in Word, click on the image, place your cursor (pointer) on the upper right hand corner of the resizing box, and slowly drag the corned diagonally down toward the bottom opposite corner until you reach the size of image that you want. The width should be  about 5". 
  4. Sizing the pattern is a bit tricky and requires a steady hand along with a bit of patience to control the mouse, but you will have an easy to sew and free pattern. As Susan instructs, the grid square should measure 1" scale per square after you print the pattern, so make sure to measure the grid before you use your re sized pattern.
  5. Print and cut out.
Of course, friends, if you find downloading and printing your pattern too much to go through, you will find patterns for sale on Etsy and in McCall's and Simplity pattern books. My dear blogger friend Diane at Lavender Dreams kindly shared patterns with me, and now with the Christmas rush over, I can work with her patterns.
As I wander around on Pinterest, I am astounded by the lovely and beautiful 18" dolls. It is little wonder that they are so widely popular. Sewing  for these little dolls brought back memories of sewing for my own little girls. I made a lot of their dresses for special occasions. Now I can sew again for them, only in a smaller scale. My granddaughters don't play with their dolls much, yet it is still fun to give them little outfits for their dolls.


Ellie's and Lucy's dolls have been in the family for some time. The girls were instructed to bring their dolls to the Christmas Eve celebration when we open our gifts. I was anxious to see the dolls all dressed up. They are the original German Gotz dolls. They really are lovely dolls that are no longer made by Gotz. Now Potter Barn sells the Gotz 18" doll. Lily received her doll Christmas Eve, a Madame Alexander doll. Instead of putting grandma's dress on her, Lily chose the dress that came with the doll. She named her Clair.

I have six little flannel night gowns cut out that I will sew up next

It it is, however, tax season and I will have to get my tax documentation ready for the accountant then I will get back to work on the Blue Farm House, hoping to finish it up this year. Here is quick look at the progress so far:


Of course I have a lot of finish work to do, but I am pleased with the way the rooms are turning out. On a cold, snowy evening a cup of tea and a few good magazines in front of nice, hot fire help to wait out the storm. (And trust me, our own gas logs burn every night as we have had a very cold, and snowy winter thus far). 


The hall has required so much work. You wouldn't think that a hallway could be so difficult. I ended up stripping out the wallpaper that I had put in, replacing it with paper that I had on hand, giving the hall more character. I do like the way the stairs look; installation was challenging and I have to install another stair case upstairs. -:(.


We had a month of birthdays, so there was lots baking going on. In the Farm House kitchen, more baking. I found the Duncan Hines cake mix printable on Pinterest and the mixer and baking tray on Etsy. The red splatter cookware came of Superior and the milk bottle from my stash. 

I am so glad that you took the time to visit. Come again.


Friday, November 13, 2015

My Old House: Stairs Project Continues

Years ago before the trendy HGTB fixer upper house and decorating shows, I watched This Old House on the public TV channel 6, always fascinated by the projects. I have also watched my husband's Uncle Don work his magic on our many old house projects. Even in our newest home built in 1994, walls are uneven, floors don't have the perfect surfaces, and I am sure that the window frames aren't exact.

So why would my Blue Farm House probably 20 years old or more be any different? It isn't. Installing the Hobby Lobby stair kit proved to be quite a challenge. I remarked to my husband that nothing fits in this old house built out of heavy, thick ply woods and other odd woods and because the house not a kit house windows and some doors are not standard measurement,  and since I think it passed through more than one set of working hands, it has certain structural problems. The two openings for the stairs are not the same size. One is too large to accommodate the stair kit and the other is too narrow. So I spent hours days trying to get the stair case in place. 


The stairs on the first floor are now installed. They required a lot of work, but I think they turned out really well.


I use a lot of blue painter's tape to hold pieces in place as I test them to see just how they will fit.


Upstairs I had to fill in the opening to narrow it up some. The piece fits, looks added on, but I will camouflage it when I put in the stair rail.


Another problem needed to be accommodated, too, the gap between floors. As I said the walls were uneven, so the wall paper didn't exactly fit.


So I added some added a strip of wall paper and trim to cover the gap.


Assembling the upstairs railing took a lot of planning. The hand rails and slats came with the kit, but the edging that I wanted to add to the floor to give it the finished look came from my stash, the same trim that I used for the window casings. I laid the pieces out on rough sandpaper, hoping to keep them from scooting around too much as I tried to get them glued into place. 


Ready to glue together, I made another trip to the house to make sure that it was going to fit and that I had pieces where I wanted them.


I liked the way this project turned out. There is still one more set of stairs to install, and they will be  a greater challenge because this set will be installed in the opposite direction. 


The bathroom presents a problem, too. I had great visions of adding architectural interest to the large room. 


 Once I got the wall built and put in place, it didn't fit. And it closes off the bathroom too much, so I have abandoned the architectural interest wall for the time being, anyway. I can always add the wall later, but for now I will leave the bathroom as it is. 


Tool of the month: the heat gun. Have I shared it with you before? For rebuilding chores it is a must. I use it to dissolve old glue when I want to deconstruct something, like removing old glue from the door jambs in the house, or removing the small items from the top of this old fireplace or even removing  this clock face that was glued on slightly off center.


So the work continues on this old house. Retrofitting every kit piece is just part of the challenge and the satisfaction that I get when the project turns out decently.


 Despite the rough edges, I am loving how the house is coming together. Here is a little tour:


I would live in this living room. I want to add some area rugs to make it feel more homey. The tea cart is a really sweet piece that I ordered from Superior.  The little tea set was a surprise find at a local garden center in its fairy garden collection.


I made the lamp and ordered the phone from Superior and found the ship at the miniature show in Denver. 


I decided to put hardwood in the bedroom because the carpet didn't fit the best. I am going take the carpet that I purchased for the room and cut it down to make an area rug.


The kitchen is just so cute. The sink does not match the stove and refrigerator that I purchased at Norm's Dollhouse store in Denver. The sink that goes with the set was out and has not come back into stock yet. Right now I am using a sink that came in the stash of miniature stuff that I bought from the junk man last summer. It does not have faucets, so if I keep it I will add the hardware. I have not yet painted the baking center. I will either stain it or maybe even leave it bare. The cabinet in the back corner is supposed to go on the wall, but I am having a hard time fitting it in a corner. The two windows take up a lot of wall space, making the kitchen layout hard. 

I found a great website that has such good stuff and unusual items: Minimumworld. I placed an order not realizing that it would come from England, so it was long 2 weeks before the order arrived.


But such good stuff. I am going to use the little skates to decorate a mini sled for Christmas. I don't think I will go to a lot of work to decorate the house for Christmas, but I won't be able to resist making it a little festive.


I showed my daughter the spinning wheel and she shouts, "oh I must have one." Hmmm. I will stain the side table using the same honey colored stain that I have used for all of the other pieces and place it in the downstairs hall. 

So there you have it. I will put work on the farm house on hold now until after the first of the year. I'll be back then as I tackle the second stair case, already stained and ready to install. I will be working on the 3rd floor to create the nursery, nanny's room, and the man cave--is there a Man of the House?  

Thanks for taking the time to visit. See you soon.


Wednesday, October 21, 2015

Building the Stairs

I spend so much time working on the dollhouse that I forget to update the blog. Renovating an old dollhouse poses the same problems that renovations on real houses present. Since this house is not a kit house, the room sizes vary--everything varies--, so every space has to measured and pieces have to be cut to fit. Take the stairs, for example. Walls are not straight, floors not level, corners not square. 


Take the stairwell, for example. I have the stairs taped in place so that I can figure out how everything will fit. You can see that the opening is too wide.


So I used pop sickle sticks (the narrow craft sticks) to extend the upstairs hall floor. I glued them to cardboard and stained them. The stain is a decent match to the original wood flooring. 


I have pre-fit all of the pieces, realizing that I need some sort of base on the floor for the railing that I have to create. While some of the pieces come with the Houseworks stairs kit, I have improvise other pieces.

You can see how the piece fits from the the ceiling downstairs. I will cover it with ceiling paper before I glue it permanently. I have stripped out the wallpaper so that I can repair the tape wiring on the wall, as you can see the patch. A previous owner had a off/on switch that controlled the hallway light and porch lights on the outside of the house. It quite working properly, so I took it out which meant that I had repair the wiring to restore the flow of the electrical current.


Now, the stairwell patch has been glued in place and held securely with small clamps to hold it until the glue dries. Next I begin planning the stairs by laying out the pieces, trying to figure how they will all fit together.


I have laid out the pieces after cutting pieces for the railing to fit to give the stairway a finished look. Of course I check many blogs to see how others have installed stairs. I used the same trim that I used for the window casings.

With the stairway opening project finished, I set about laying the flooring. Because I have placed much of the wiring on the floors for easy access, I don't want to permanently attach the flooring because I want to be ale to lift it out should the wiring go bad. So I used double sticky carpet tape, difficult stuff to work with and not totally satisfactory.


The tape worked in the living room to hold the flooring in place. I have added the baseboards and the room is beginning to look finished. The tape did not work in the hallway, however. It just would not grab hold to keep the flooring from buckling. The living room floor looks great. 


 So I pulled it up. I decided to use Gorilla wood glue to adhere the flooring. First I used the scroll saw to cut out a place in the flooring that I would not glue down. The cut will covered up with furniture or 


The downstairs has caused a lot of consternation--aggravation--frustration--angst. The living room lights above the fireplace have been flickering, so I decided to figure out how to create access to the the wiring. I ended up stripping out the the blah, band creamy wallpaper, replacing it with Hobby Lobby's paper. I like the stripes and the border at the top better than the plain paper. I fixed the tape wiring on one wall then wall papered over the patch. 


Now with the hall flooring installed, I am working on completing the stair installation and what a challenge it is proving to be. So, I will leave your here. I'll be back soon, hopefully with the stairs nicely installed, looking fabulous. 

Thanks so much stopping by.


Supplies:
Stair kit: Houseworks/ Hobby Lobby brand
Carpet double sticky tape: Ace Hardware store brand
Thin narrow casing for stairs: open stock Norm's Dollhouse Store, Denver


Bargains Galore and So Much More: It's nice to back Hello friends. Yes, I have been MIA for quite a long while. I first took a hiatus fr...