Showing posts sorted by relevance for query Blue Farmhouse. Sort by date Show all posts

Friday, June 3, 2016

New Project

Work on the Blue Farmhouse has been temporarily put on hold. I am quite anxious to get the interior finished; however, I have had a bit of a set back. I ordered a box of 12 pieces of channel molding to cover the rough outside edge of the walsl. It arrived today, but when I opened the container, the wrong wood had been sent. Instead of the 1/4 inch channel casing, the company sent a box of crown molding. It was a simple mistake; someone simply grabbed the wrong box of wood. Easy to do. I won't mention the company, but I will praise them for their cooperation and willingness to correct their mistake. In addition, they didn't require me to return the crown molding. Now if I can just figure out how to cut perfect mitered corners, I will put crown molding in the old farmhouse.

In the meantime, I am beginning two new projects, both vintage Dura Craft kits purchased on craigslist.org. My granddaughters and I will be building the San Franciscan, a Painted Lady Row house so famous in in San Francisco. We took the main pieces out of the box Wednesday and assigned rooms to the girls. Here at home, I will be building the Bellingham Farmhouse, circa 1999.

I took all of the pieces out of the the box months ago and began labeling them with sticky notes.

Before I could return to the project, the garage needed a lot of cleaning. I had four stacks: donate (located in the back of my SUV), haul to the barn stuff, keep pile, and throw away. The idea was for the last category to catch the most, which I think it did. Anyway, mission accomplished; with help of my husband we cleared the second half of the garage so that we could set up a second work table where I can paint and clue.

The dollhouse box has a great photograph of the house. It will be helpful in deciding how to assemble all of the fancy trim.  I am trying to decide the color. 


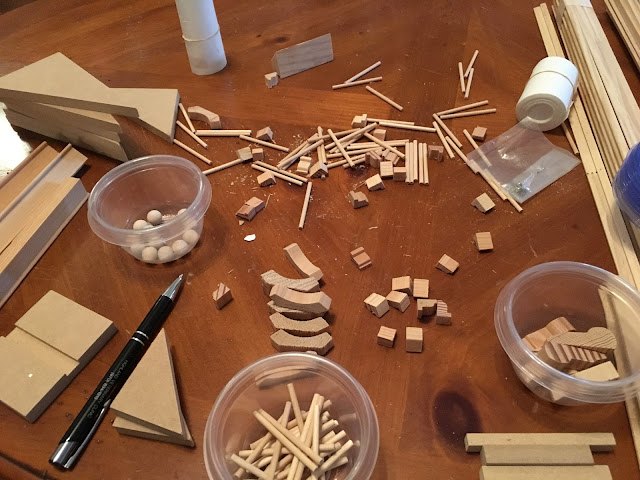
This is only part of the mess that I faced today. I forgot to photograph the entire pile before I began trying to assemble main walls of the house. I had used sticky notes to label all of the pieces, but the garage is a dusty place, so the sticky notes didn't stick.


Looking at what will be the inside of the house, I now have a better idea as to how the house will fit together. I will have to follow the instructions carefully to avoid mistakes. I made a main mistake on the Ballet Studio because I didn't pay close enough attention to the instructions.


The base had already been assembled by the previous owner, accurately, thankfully.
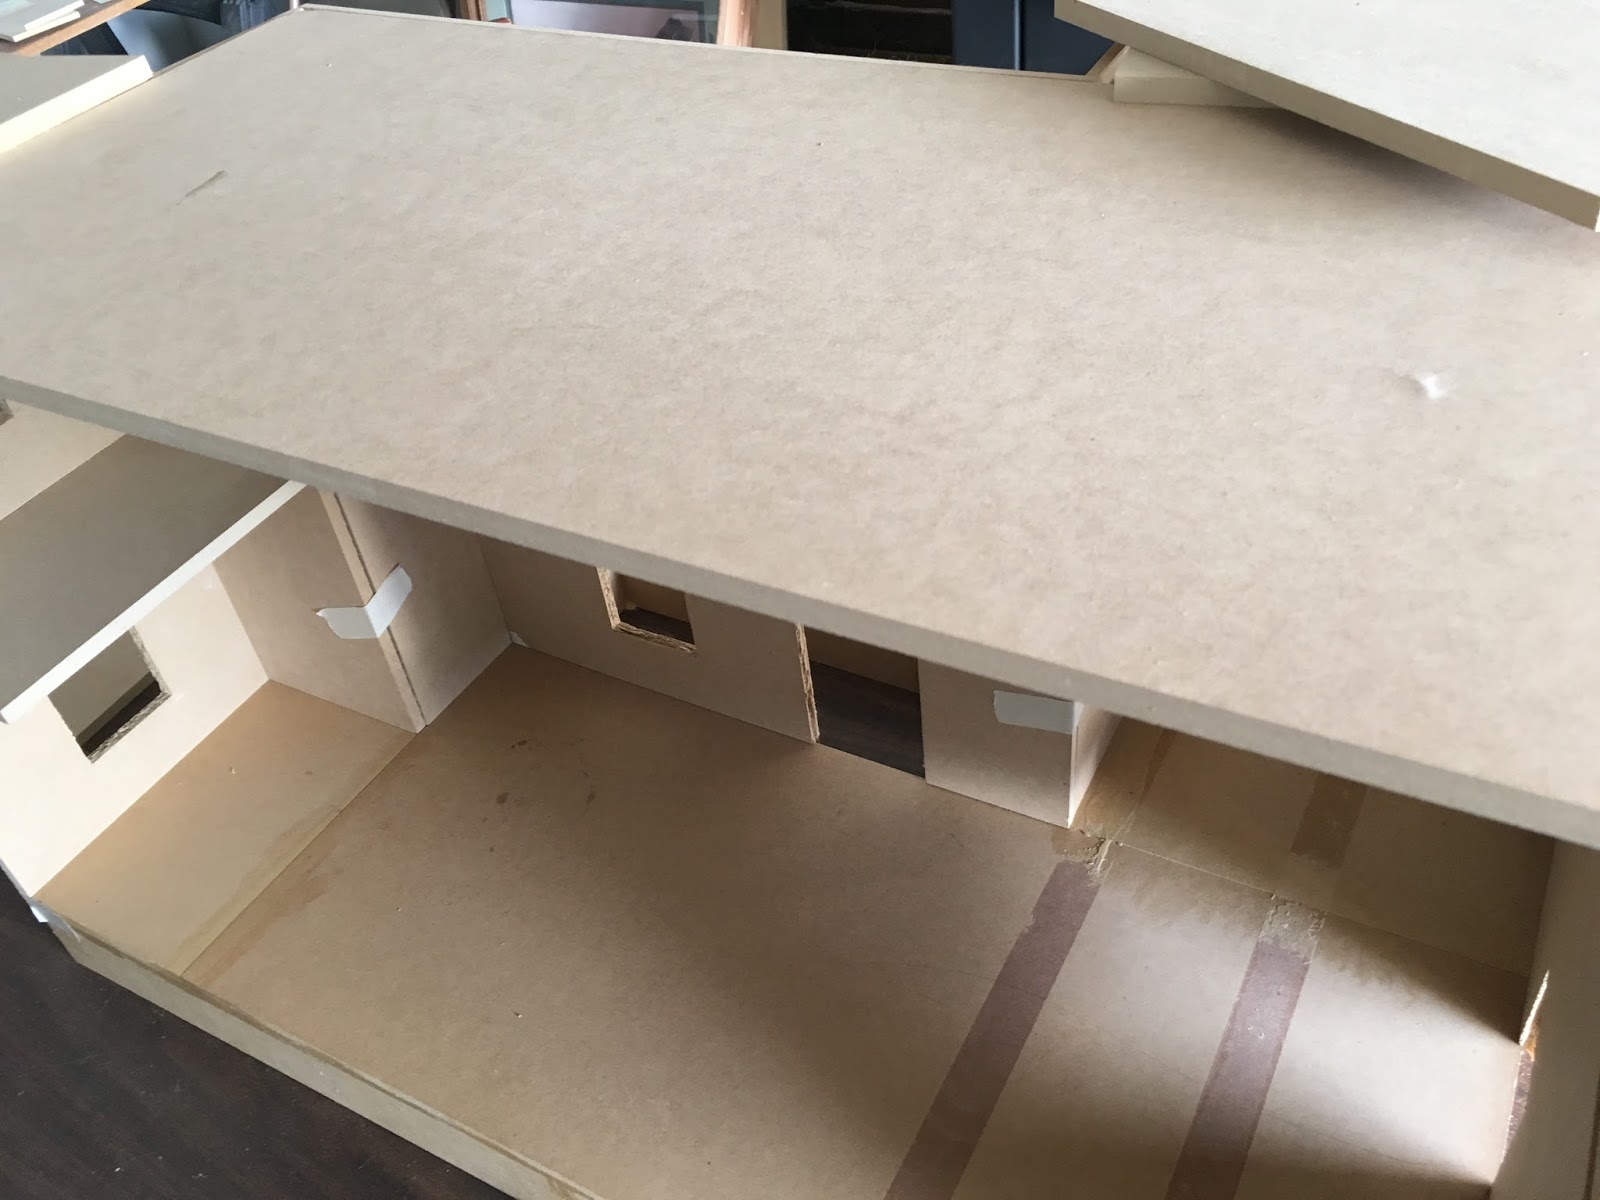


I now have a good sense as to how the house will fit together. I am hoping to do some of the interior work before assembling the walls. I think doing so will be a lot easier than all of the rebuilding that I have had had to do with the Blue Farmhouse. 


It will be a good sized house.


Taping the house was only temporary and the tape didn't hold. I fussed with it too much causing it to collapse. 


These two pages represent the parts list. The first page lists the pieces for the house, and the second lit lists the pieces that will need to be assembled such as the windows, doors, and fireplace. There is a third page that details the world trim pieces.


And here they are. I spent the evening sorting these pieces of trim and labeling each once type. Now I need to figure out where they all go.


All sorted and labeled, next these pieces will be painted.


The Bellingham has a lot of detail work on the exterior,  much more the old Blue Farmhouse. I sorted all of these pieces, placing them in the little plastic cups. They, too, will all have to be painted. I am, however, considering buying turned railing balusters instead of using these plain round ones for the porch and the stairs.

There are several sheets of the press-out pieces for the two doors and six windows, but I am actually considering buying the pre-assembled windows. I think that they will look much better than these plain round ones. What do you think? Would you cheat and opt for a nicer looking window?

Each of these pieces will have to be sanded and painted. Here you are looking at parts for the fireplace and chimney. I have already decided to use a fireplace that I am building from an Xacto kit. It will look awesome.


I can begin priming the main pieces anytime now since I have paint primer on hand. The firsts step. I'll prime both the interior and exterior surfaces.

And Wednesday I will do this all over again to get the girls' house ready to assemble.

Thanks for taking time to visit. I will return.


Monday, August 8, 2016

No More Blue Farmhouse


We finished our basement because I didn't want it to become a repository for the "I don't know what to do with it" stuff. It was far too easy to just send it to the large vacant space below. A previous owner had had finished a bedroom and a bathroom, so we finished as second bedroom and then one large space as a family room/TV room and a craft/office area for me. At each end we have large 110 gallon aquariums, one marine tank and one fresh water tank that my husband (known as the Head Gardner or HG over at the my other blog, the Garden Spot) tends. The room is sparsely furnished with a sectional sofa and a TV.

Oh I forgot to mention the village of dollhouses, along with the tables full of miniature furniture and accessories for the blue farmhouse. I was moving tables about last night when the HG asked me what I was doing doing. I told him that I was adding another table to the village for when I finish the blue farmhouse, which will be very soon.  I am anxious to bring this project to a close, except I know that there will always be some tinkering and things to add. Is anyone's home ever finished? Don't we always decorate only to redecorate and remodel again? I am so very close to finishing the house, and I thought that I would catch you up.


This is the house as I brought it home from the antique/junks store. I began the restoration by cleaning up the interior.


Most of the rooms were lined with poster board-like paper that I stripped way to get to the bare wood.


The kitchen had been worked on--more than once. I don't think that the original builder completed the house or the second person had stripped out the original wallpaper.


The kitchen had more than one layer of wallpaper.


I didn't find the black at all appealing.


So much work and elbow grease.
 

The kitchen is primed and ready for wallpaper now.


It was looking better, but more work to get the walls clean, old glue removed, and surfaces smoothed down.


The house was fully wired, but not all lines worked


I was so new at working with this copper tape wiring, that I really didn't know what I was doing. I should have left much of the wiring intact, but I messed and messed and messed with it. Not all of the  lines that I added work, now.


Take this light in the second floor hallway, for example. In this photo it works. Then one day I plug in the lights and this light and others on the same line don't work. I used one of the pound-in plug-ins that failed twice.


There were broken windows, too. the house came with a shoebox full of left over pieces and odds and ends of wood pieces, thankfully. I was able to repair these windows with all but a couple of the original pieces.


These little opera windows on either side of the house and on the second floor front are a problem. The walls on both sided are double walls with dead space in between. So each frame requires a pane of glass. The window kits come with 3 pieces, two wooden frames and a window pane, but each frame required glass, so I am trying to figure that one out. 

This is the Peter Rabbit themed nursery. I tried to install a beaded an lighted chandelier, but again that  pound-in plug-in failed. Big mess. And the pretty chandelier that I made for bathroom was on that circuit. After paper and re papering the wall, I took out that electrical line. I will turn the nursery chandelier into a battery operated one.


I love the living room and kitchen. The hardwood floors purchased at Hobby Lobby turned out so nicely. I stained them, used polyurethane, and Johnson paste wax to get a nice shine.


I've had fun playing with furniture and accessories along the way. If you want to check the progress over the last year, go to 2015 links.


I spent a lot of time with the bathroom. You can see that it has only one wall sconce. 


The stairs were probably the hardest and worst of the entire project because nothing fit. 
The back of the house is now pretty well finished. I had to add trim to the raw edges to hide them, a rough plywood along with ragged edges on the wallpaper. Not perfect, but the edges are much cleaner.


TADA: No longer the blue farmhouse. I don't know what I will call the house now. Perhaps once I move back in (I've had furniture in and out, in and out, and again), I'll come up with a proper name.


There is just a little more exterior work to do. The front porch railing has been repaired and painted and I am now working on a screen door to cover the front door. There will be a final showing in a few weeks. Stay tuned.

I am so glad that you visited. This blog gets little traffic, nor to do I tend it as I do my gardening blog
--that's where all the action is. I have found that many dollhouse bloggers aren't quite as chatty as are the home and garden writers and that's okay since we probably spend more time working on our miniature projects than we do writing about them. We blog when we have great progress to share. 

See you soon when the farmhouse joins the village. We will have a celebration. I hope you join me then, too.  In the meantime, check out Normandy Life where Maggie hosts Mosaic Monday, a meme for bloggers to share their mosaics. Maggie lives in Normandy, so I enjoy reading all about her life there. Join us for the fun and to make new friends.


Monday, January 21, 2019

All Dolled Up

I sometimes wonder about myself. I am 72 and I play with dolls, like this morning as I photographed dolls for this post that will ask the question: Do you like to put people AKA dolls in your miniature projects?

I couldn't help but wonder if I could be doing something more significant with my time than playing with miniatures, like volunteer. I do volunteer in the Writing Center at my Alma Mater, University of Northern Colorado where I taught freshman writing for nearly twenty years. I spend two hours each Wednesday working with students, helping them solve their writing problems. It is most rewarding and satisfying. No grading, no planning, no troublesome students, but two hours a week? I could do more. I think of my friend who volunteers at the Refugee Center working with the little children and tutoring the adults in English or a friend who is active in her church, but I prefer the quiet of my basement listening to the radio, maybe, making tiny things.

I openly admit that I am living in a sort of second childhood. I grew up on farm and had a horse and played outside with my brother and worked, but I loved dolls. I had a couple, one has survived, but I always wanted a dollhouse. Anyway. I am digressing, back to my question.

One blogger wrote as she showed off her dollhouse that she didn't like dolls in her house, that she had instead created a mental persona who lived in the house, Caroline. And I got to thinking about whether or not to put dolls in the dollhouses. I am wondering if dolls spoil the illusion of world that dollhouse represents or do the dolls personalize the house?

Here then is my small collection of sundry dolls that may or may not work in a little house.


This is Lily's family that will live in her house. A large family that will give Lily hours of imaginative play. Her house will be added to her already large collection horses, unicorns, and fairies.


Here an another family that I acquired when I purchased a metal dollhouse. I once passed on a whole bag of these dolls at a thrift store. They are vintage and can be found on eBay, but I don't think that I'll be using them. I am surprised at the anatomical detail, too. My daughter wouldn't let her girls play with these dolls, dressed or not.


Not sure where the baby came from, but perhaps he could find his way into a house. I did buy the vintage doll at an antique store, but I've not found place for her. 

But some of my houses do have people.

The Ballet Studio


This was my first built from a Real Good Toys kit. It is a ballet studio inspired by granddaughters who were taking dance lessons. Today they are cowgirls and take riding lessons. I began collecting the little McDonald's Madame Alexander dolls that fit nicely in the little house. 

This little girl is always late for class.


Alice works upstairs making the dance costumes. 


The dancers are a combination of dolls and Hobby Lobby Christmas tree ornaments. Their favorite performance is, of course, The Nut Cracker.

 The Mooshka House

This house is the little Dura Craft Lafayette that I bought for $5 at a sale. It was a bit beat up, but I fixed it up. I fell in love with a series of imaginative little dolls at Target called Mooshkas. Each cute little girl came with an animal friend. 


I still need to do some work on the house. The furniture was bargain find someplace that a I quickly pinned some "slipcovers" on it. 

The Toy Store

I am taking applications for the store, now.


You have already met this little girl, my eBay purchase. She and the chair will be in the Toy Store.


And who does not love Buzz Light Year from Toy Story?  You don't bend, Buzz, so you won't very useful and you are a bit out of scale.


Buzz! This was not your shot.


Pink is one of my favorite dolls. She is a thrift store rescue, and so is Buzz who doesn't seem to be bothered that she is so much taller than he is. And that is a problem for him, so he will remain on the shelf. 


Tinker Bell came down off of the shelf, too, to try-out for a place in one of the houses.


She is quite the show girl.


Pink is pretty confident, too.


Really, Buzz?


Tink, I think you are too large for the toy store.


Pink has returned, this time with her purse. She is a serious shopper, you know.


I can tell that Pink will be the best customer for the toy store.

The Texas Farm House


Pink may shop at the toy store, but I think that her home will be the Bellingham farmhouse. She just seems to think that she owns it.

The Blue Farmhouse Now Pink

My first renovation was this huge house that I bought at a junk/antique store for $100. It required months--years--to complete. 


I am not remembering where I came by these two kiddos, maybe with a metal dollhouse. They spend their days in the porch swing.


These are just little decorative porch people. They remind of a couple that I know.


There she is, Pink in the Blue Farmhouse bedroom. She is visiting her friend. They share the same secret. They are thrift store rescue dolls. They were in the same plastic bag at the thrift store. I original bought them for the granddaughters who didn't seem to like them. They, too, were McDonald's Happy Meal Toys--poor girls, but their story has a happy ending.


This lovely lady lives here. As a mom of 4 kid, she is very busy. She is baking birthday cake for the twins.


The twins are a handful. They spend all of their time in the Peter Rabbit nursery in the Blue Farmhouse (now pink)


They have a lot of toys


These girls were bag mates with Pink and her other friend. The hang out on the balcony of  the Blue Pink Farmhouse.

So there you have it my little collection of dolls that may or may not live in my houses.  Pink obviously is my favorite. 

And what about you? Dolls or imaginative personas for your miniature projects?

Thanks for visiting. 

(I am so glad that I ordered different wallpaper for the toy store!)


Bargains Galore and So Much More: It's nice to back Hello friends. Yes, I have been MIA for quite a long while. I first took a hiatus fr...