
 The Lafayette has required quite a bit of work to get it repaired, mostly re-gluing it back together. The original builder did a decent job of assembling the house, but it did need some minor adjustments. Nor will my restoration be perfect just because it has already been assembled and I am repairing damage the best I know how.
First I had to remove old glue. I googled removal of old wood glue which gave two suggestions: use a blow dryer to heat the wood glue or use rubbing alcohol. Let's just say that I have to buy a new blow dryer. For exposed glue easy to get to, I found that rubbing alcohol did a fine job of dissolving the old glue. My first challenge was to remove this little chip of wood that may have been placed as a support or foundation for a stair case. I saturated a cloth then dabbed the clue and gently rubbed the wood chip. Eventually the glue dissolved and the chip pried loose. Next I used a scrapper at the suggestion of my husband to scrap away the rest of the glue along with more soaking with alcohol. Yes, it was a time consuming process. I worked out on the patio table in the evening surrounded by the beauty of the garden. Next I worked on the glue strip where a wall divided the down stairs. There was also a similar line of glue in the up stairs. Lots of alcohol and scraping gave very good results.

An alcohol soaked rag rests on the glue glob to be scrapped off.

I used my iPhone to get inside the house for the pretty descent shots.

I pre-fit the tabs to understand how the house was meant to fit together. It was rather like putting a puzzle together.

These wood kits by Dura Craft attach walls to the floors with tabs that fit into grooves. Ideally when the house is assembled a bead of glue will be applied along the entire edge of the tabbed piece (in this case, the floor), which it wasoriginally, which assures a tight, stable fit. However it was very difficult to first remove the old glue and then reapply new glue because the back tab and edge of the floor still had a good hold, so as the photo shows, I applied the glue to the front slot. Of course there was a lot of wrangling the pieces around to make sure that I got a good fit.

With the tab in place, I applied more glue to the tab and slot and then as I had watched our professional painter apply caulking to the our crown molding and chair rail, I ran my finger along the bead of glue to smooth it out and push more into the groove. You can see that I did not run a bead of glue all along the floor/wall joint. The tab held the floor in place nicely without adding more glue.

I could not get the roof to fit down properly so that I could re-glue it in place. I finally figured out that the outside trim on the house had been improperly installed and my guess is that the roof never did fit properly. The trim just a tad too long.

I used my little saw from my kit to remove just enough of the trim to get a good fit on both sides of the roof.

The gluing was not done all at once because after each phase of gluing, the glue had to dry. The pieces also had to have a tight hold to keep them in place. Sometimes clamps can be used, but in this case I used rubber bands to hold pieces in place with the glue set. The rubber bands provided enough tension to keep the pieces in place. I think I worked on gluing the floors in place and roof back together for two nights.
Next I had to decide how to create a floor. I could leave the original floor as is or get fancy and add a hard wood floor.

I decided to build a hard wood floor using pop sickle sticks. I laid them out in both directions on the floor and consulted my husband. He thought that they should run from side to side. I liked from front to back. Once again I turned to the helpful websites to see how more experienced builders made their floors. They did both. They also painted sticks one by one before gluing them in place. Some glued them right to the floor of the dollhouse, some made a subfloor out of card stock, some stained their floors, the shabby chic-ers painted them.

I decided to glue my floor to card stock so that it could easily be removed. Should I want to wire the house for electrical lights, the wiring will be nicely concealed beneath the floor and I can remove the floor. I used an old manila folder that I cut to the shape of the floor. The floor was much easier to work with outside the house.

I cut pop sickle sticks and glued them in place on the folder, staggering them to create realistic looking wood floor. I used a yellow wood glue.
About glue: to glue the house together I used a white glue, water soluble, but from what I read wood glue that is not water soluble should be used because the sticks will absorb the water from the white glue, causing them to warp. White glue dries clear; wood glue dries yellow, so you have to make sure that you clean up all drips.
Some builders use a hot glue gun to adhere the sticks. I decided that it was just easier to use wood glue. I don't think hot glue would create as flat a bond as the floor needs.

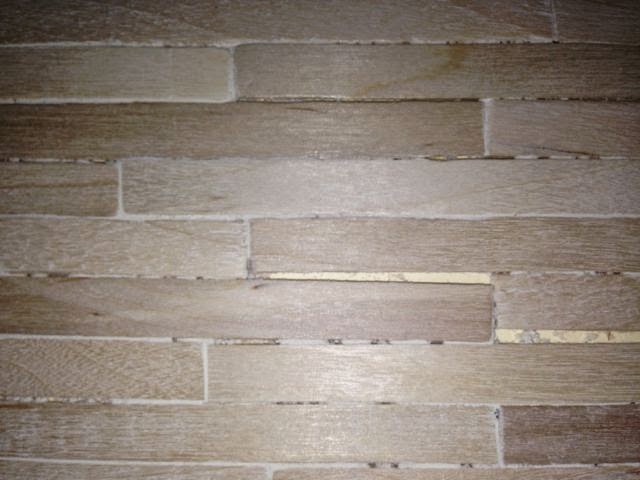
Once the sticks are glued in place, the floor has to be sanded, so I used a 180 grit sand paper block and sanded and sanded and sanded. . . . You can see that the sticks didn't quite butt up to each other in some cases. I purchased my sticks at Hobby Lobby. I have started the upstairs floor with sticks my daughter gave me. They seem to be a better quality. And I didn't do a careful enough job of cutting rounded ends off of the sticks, so they really didn't fit as nicely as I wanted them to. My husband purchased a wood filler for me that I applied twice to fill the gaps, sanding between each application. It worked fair. I will work harder next time to get the sticks more evenly laid down and glued in place and use a different wood filler.

I like the look of the floor. I have now stained it a golden pecan with three coats and followed by two coats of polyurethane.
My next challenge is to repair the window on the left. I have cut an arched window casing out of balsa wood, but it split. I will glue it together and paint it.
I have ordered wall paper form Itsy Bitsy Mini, a great website that has all of the supplies needed to build a perfect house.
I am really nervous about the wallpapering. So I spent this afternoon making paper templates out of computer paper. The downstairs was a breeze with only 3 square walls. The upstairs is another story.

No, you do not have to stand on your head to get to awkward corners. I laid the house on its side to get a good view of the ceiling and walls. I was able to place the computer paper on the surface, run my finger along the edge to mark where I should cut. I was able to get a perfect fit for each elevation and surface of the upstairs.


While the templates fit nearly perfectly, I will have to remember to cut the wallpaper pieces a little larger to wrap around the edges and corners to give a more seamless finished look.
Helpful websites:
I often look on YouTube for ideas, but really I like the bloggers better. The youtubers talk too much, don't get to the point quickly enough, apologize for kids spoiling the shot or the dog barking. The bloggers take their time, provide good photos, and are easy to communicate with, unless the blog is too dated.
Now I wait for wallpaper and supplies to arrive. In the meantime, I have done some painting on the Alpine. I need my husband to help me glue it together. It is made of manufactured wood, so it is heavier and I need extra hands.
By the next post, the floor will be finished and hopefully I will have the wall paper installed. The exterior will remain its natural wood look. I am falling in love with its natural beauty.
See you soon. Thanks for stopping. I do appreciated you taking the time leave comments.


What a lot of patience yu must have. I do like the look of the new floor.
ReplyDelete