
I do social distancing very well; I've been practicing it since I retired from teaching in 2013. We can look at life with our bucket either half full or half empty. I prefer to see my bucket as half full, so I set out to build a bucket to prove my philosophical approach to life. This is my first attempt.


 Thinking that the bucket was a wee small, I cut two more at 2.4 inches, one out of food packaging cardboard and one out of a textured yardstick, and left a little more edge to the circle

I cut the bottom larger because I can never seem to get the bottoms on round boxes or these buckets to fit exactly. The stiffer cardboard doesn't always bent easy or concentrically, so once the glue is set, I can trim the excess bottom off to fit the shape of the bottom of the round container. I then used an emory board to sand the edges smooth. I still need to paint these two buckets and add the handles. I think I like the craft paper better. It is not so stiff and is a little easier to fold into shape without bending.


Part 1: The Bucket

While the tutorial is in Spanish, you will still be able to assemble this little bucket, so here is the link to the original tutorial: http://miniaturasjm.com/manualidades/paso-a-paso-para-construir-un-cubo-de-zinc/
On my MacBook laptop, I simple drug the image to the desktop, opened it in Preview, copied it then pasted it into a Word document. Next I double-clicked on the entire image and sized it to 2 inches; however, I decided that the first bucket was a bit small, so I resized the pattern to 2.4 inches. There are two ways size images in Word: click on the image and drag a corner diagonally until you reach the correct size. Or double-click on the image and look in the right side of the tool bar to see the little window where you can adjust the size of images.
You will need these tools, to bend, cut and turn the wire. If you don't have them in your miniature making tool kit, add them. You will find them in most craft stores that sell jewelry and bead making.

I used the jeweler's wire that I had on hand, but didn't know the gage, so I took a photo of the gage at JoAnn's. 16 gage and 14 gage will be smaller. You decide which size will work for your project.

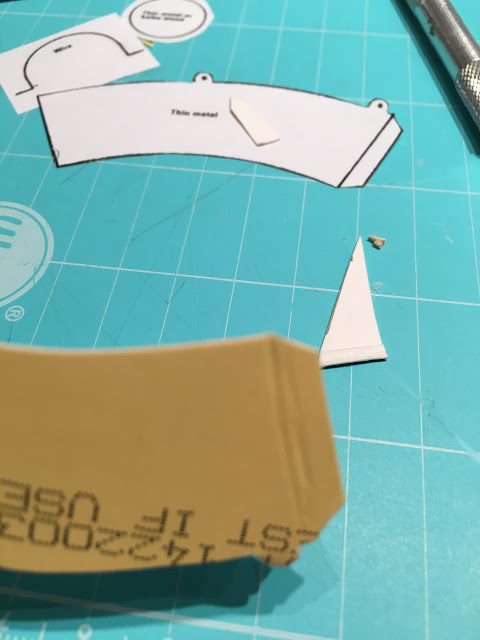
To begin I scored the glue tab with a bone folder to get a crease to clue.

I traced my pattern onto cardboard for butter. It's a bit stiff. I rounded it by wrapping it around that green screwdriver handle to get a nice curved bend then glued it together. I used clamp tweezers to clamp it in place until the glue dried.


Once the glue set on the seam, I use my punch to poke tiny holes in the tabs where the wire handle will attach.

The handle is a bit tricky. since I didn't have any exact measurements, I had to guess, so by trial and error, I finally got it right. If you look really, really close, you will see the green dots where I re-cut the wire handle.


I use my platinum acrylic paint to get a shiny galvanized-looking bucket. Once the paint has dried, I add the handle. I used the needle-nosed pliers to bend the wire in a loop to keep the handle from falling off.

And there you have it. Or. . .?

 Thinking that the bucket was a wee small, I cut two more at 2.4 inches, one out of food packaging cardboard and one out of a textured yardstick, and left a little more edge to the circle
I cut the bottom larger because I can never seem to get the bottoms on round boxes or these buckets to fit exactly. The stiffer cardboard doesn't always bent easy or concentrically, so once the glue is set, I can trim the excess bottom off to fit the shape of the bottom of the round container. I then used an emory board to sand the edges smooth. I still need to paint these two buckets and add the handles. I think I like the craft paper better. It is not so stiff and is a little easier to fold into shape without bending.


Part 2: The Chicken Coop Begins
To remind you, as I stated in my last post, I am following Julie Warren's Potting Shed instructions from her book; however, I do go rogue here and there, so if you want to build this shed watch her YouTube video and buy the book, don't follow my instructions. This post is simply meant to show you that you, too, can do this.
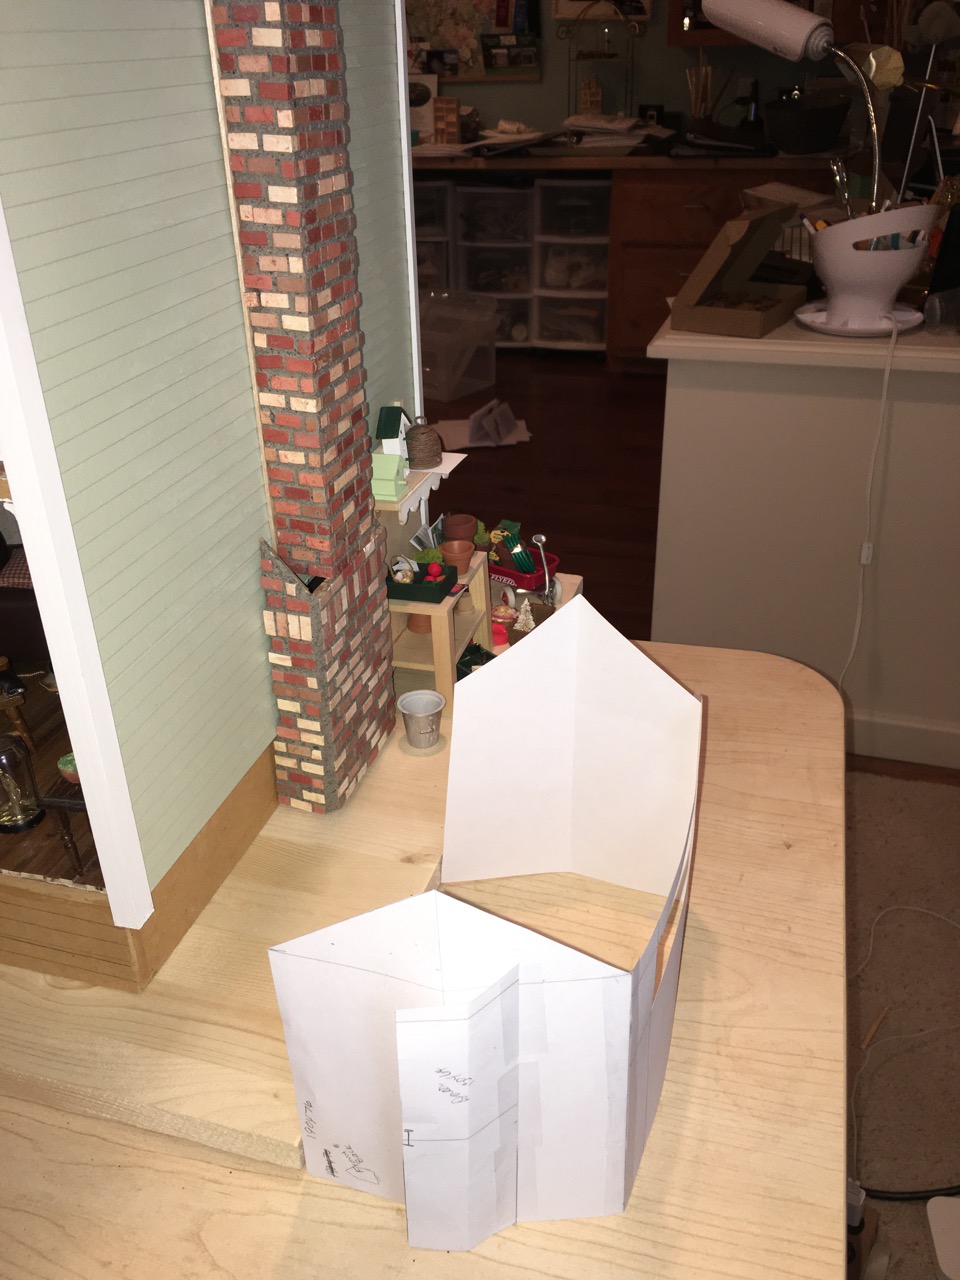
Before cutting into the wood, I mad a paper template that I would use to trace my pattern on the paper, not trusting my measuring accuracy. Also, I wanted the door on the side, so I drew that out, to see if I could convert Julie's plan to replicate our own chicken house. It didn't work.

So I followed her plan to put the window on the one side wall instead of a door and two windows.

I taped them together and put my mock-up next to the farmhouse to see if my ideas would work.
The shed is constructed using 1/16" thick bass wood and you are to cut two then glue them together. Instead, I taped the boards together and made my cuts then glued them together, requiring less cutting.


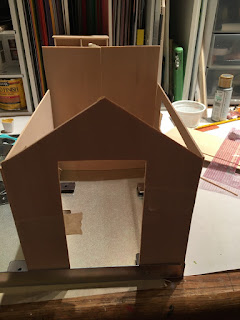


It's beginning to look like a shed. I am impressed with myself. Not perfect, but I'm doing okay.


Next I began cutting the shiplap. This is such a chore and I am now finding value in purchasing a Circuit Maker because my cuts for the shiplap are rough. I finally took out my Martha Stewart scoring board, which helped to hold the wood in place and keep it square.

Next, I glued the shiplap in place, weighted it down with my much out-dated dictionary and my grad school English lit anthology.


TA-DA. The first wall completed, with on bit of boo-boo but who will notice? I've trimmed away the excess on the sides and I am pretty pleased with the results. I have the rest of the sides to add the shiplap.

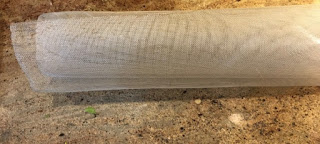
I also am thinking about how to divide the shed into two compartments, the actual coop and the potting bench. The coop will be made out of mesh wire with a screen door, one that is not as fancy as the one I made for the Blue Farm House Now Pink.


Lucky me. I told my husband that I needed some mesh, so he went out to the barn and came back it a nice roll of screen. For the screen door, I used tule and it works for a screen door, but not to contain hens. They'd have it pecked to pieces before the sun set.

Thanks for visiting. And on that note, I realized that I could check my stats on the blog--after 10 years of blogging--. I found that I get far more traffic than I imagined and I have a world wide audience, even from Ukraine. Thank you all for visiting. I would love to read your comments, your thoughts and if you have blogs or Instagram or Facebook, it would be great to visit you, too. You can follow my by email, if you like. I don't run ads or share information, it's just you and me and few other friends.
I want to add one final note here that a member on Instagram mentioned a few days ago: the difference between copying some else's work and being inspired by someone else. As an English teacher, it my was job to teach students how to document borrowed material by teaching them the difference between their own original thought and using someone else's thoughts and ideas. Not to document those borrowed thoughts and ideas is plagiarism, which if caught the student would face consequences. Since we now live in a cut, copy, and paste world, it is even easier to borrow from others, which in and of itself isn't necessarily a bad thing, unless you don't give credit where credit is due. For the home hobbiests, we rely on others' tutorials, so I always want to give credit to the artist or blogger by providing their contact information. We can get away with borrowing those ideas, especially of don't market or sell those items that aren't originally our own, but a legal line is crossed when we lay claim to an unoriginal idea for profit.
I would tell my students that tweaking a quotation by changing a word here or there is still plagiarism and the idea must be documented. Same with this little bucket or the chicken coop; I am tweeting both projects here and there, but neither are my original design, so I give credit the original source; it's the ethical thing to do. So please take my ideas, but if you share them, don't quote me, but please refer to the original artist, just I am doing.
So while the world is learning how to practice Social Distancing, we are already very good at communicating long-distance. Stay healthy.


You are putting your time as a social distance to very good end, Ann. I love the little bucket!
ReplyDeleteI agree, social distancing is not new miniaturist community. It is interesting, though, that we are dedicated social media users and consumers. You’ve made very cute buckets, with just the right detail. And your chicken coop is progressing nicely! Thanks for the reminder and instructions on using other artists’ work.
ReplyDeleteSweet little bucket and so useful I am loving the idea of a chicken coop. Like you I blog my work and some other stuff and I wished folk would leave a message just hello and I have been here would do - it is nice to know someone is receiving the share.
ReplyDeleteWhat a fun little bucket to make and I bet you'll need quite a few for the chickens! The coup is coming along nicely and I bet your confidence is, too! Great work!
ReplyDeleteI've enjoyed reading up on this bucket making tutorial Ann, and how well you've completed it. I keep promising myself, to teach myself how to use my laptop programs for projects such as this one, but I'm horrible following instructions and I become frustrated and discouraged very easily, so easier for me to try and draw it out by hand!
ReplyDeleteKeep going with the Great Work of keeping your cup" Half Full" :D
elizabeth