
This is about where I left off last week, redesigning the sink base counter. I had made the drawers for another unit that I was going to use, but they fit nicely here. Now I work on installing the inside dividers that did require some sanding to get them to fit.

Originally I wanted the sink and dishwasher switched with the sink at the end of the counter, but try as I could I couldn't get it laid out in Design Space, so I opted for a center placed sink, which works fine. I was able to release the Elf kit dishwasher from its old counter so I didn't have to order a new kit.

Before I wasted wood, I cut by hand my test piece for the sink insert from a template that I laid out in DS and printed on computer paper. Actually I did such a good job cutting, I did not cut one on the Cricut. While the rest of the cabinet is cut from 3/32" basswood, I cut the counter top from 1/16 so that I could get the sink centered and a nice cut from the machine. I cut 2 countertop pieces as smidge larger than the sink insert on the Maker from 1/16" basswood.
While the Maker cuts the thin basswood, it doesn't cut 3/32, so I'm used my Rockwell table saw to cut the thicker wood, but because I wanted the sink centered and didn't want to hand cut the thicker wood, I cut two on the Cricut and glued them together for a thicker counter top.
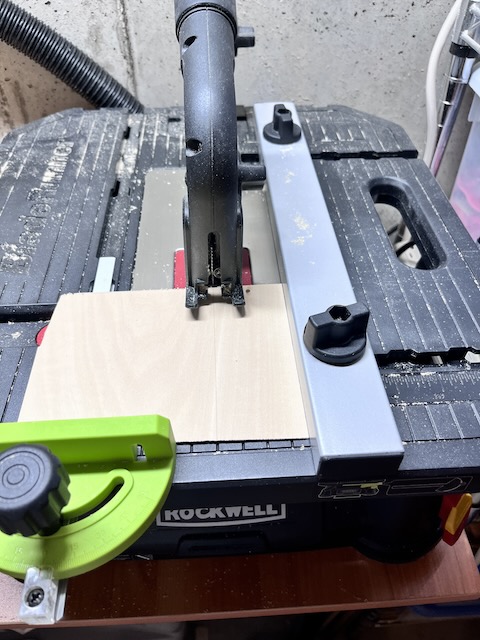

I love the saw especially when I make multiple cuts the same size because I can set the guide at just the right distance.

Sometimes--well a lot of the time for me--I have to sand pieces to get a good fit. This Rikon is just the handiest machine to sand away a lot of wood for clean straight edges.


My little machines are in the storage closet in the basement beneath beneath the stairs. My husband bought the tools and set them up in the basement storage closet. I had never consider the sander, but it is certainly handy. The saw replaced the old Craig's List scroll saw that I used with less than good results often.

The cabinet begins to take shape and I'm enjoying the results.

The inside dividers turned out a bit oversized, so I sanded them down to size for a better fit. I do find that hand sanding often leads either over sanding or altering the shape, so I try to take care to go easy.

The two layers of the counter top are glued together to make 2/32" countertop. Some would drill holes in the corners of the insert for the sink to cut it out on the saw by placing the saw blade inside a pilot hole to make that interior cut, but I'm not brave yet.

I taped computer paper as the counter top cover to see how it all the pieces fit together. Then I see it: the divider support underneath the sink is glued in crocked. Darn it! The shelf had to come out. So I used my trusty embossing heat gun to softer the Gorilla wood glue so that I could remove and reposition the divider.

I recycled the cabinet doors from the previous sink cabinet and while they fit, I really wan't happy with them because one didn't have a straight edge and once I moved the divider support piece into place they weren't tall enough.

I laid awake a good share of the night trying to redesign the doors so that they looked great, opened and closed, and were sized properly.

I began using scraps to practice cut doors. I added a middle support to solve one problem I consistently have: the center door edges never meet up nicely. I decided, too, that the center edge would not be a cut edge, but the outer edge of the raw wood to get matching edges that were perfectly even and smooth.


Here are the old pieces and the new pieces. I'm finally satisfied with the kitchen cabinetry. I managed to reuse some old pieces and use scrap wood to create new pieces. I'll save the old pieces because who knows, I might need them one day. The new pieces will soon be installed and the kitchen will finally be finished.

I'm so thankful that you took time to stop by today. I hope you learned a new trick or just enjoyed the post. Real life is catching with me again--tax prep time. 👎😝 I've got some work to do in the office--the other side of the miniature studio. At least it's a short commute.
Wishing you a fine week of mini making.


Your cabinet looks fabulous! It was well worth the two other tries and three days. Thanks for the tour of your little woodworking space. I’ve been debating about getting a sander. Along with a table saw, I have a mini drill press, which is also handy.
ReplyDeleteIf you do a lot of building--and you do--these tools would be a great asset to your workshop. I especially love the sander. I am getting more proficient with each cabinet. Still room to grow.
ReplyDeleteAnn you're becoming a real mini cabinet maker! And a master of your power tools! I admire your gumption to keep trying until you'd achieved well fitted and functional doors and drawers! I can't wait to see the sink unit all painted and the kitchen reveal with all your special touches! Great work!
ReplyDelete