We have another cool, cloudy day in Northern Colorado. which leaves us wondering if Spring will ever reach her full potential. With more rain in the forecast for tomorrow, I may just be inside working on the minis instead of out in the yard trying to get the flower beds looking pretty again.
We are hosting three parties this summer. In June my former colleagues from the University will gather hopefully NOT for one last time then in August we will host the "meet and greet" for my husband's 50th class reunion, and the next weekend we host a wedding in our barn. So we have lots to do, including getting my basement ready for company, which I means that I am trying to finish up my two current projects, the Toy Store and the Farmhouse.
I would like to say that the Toy Store is finished, but it is not; however, is any dollhouse really finished? I am going to put it on the shelf for now. The future plans include a climbing vine, an outside sign, but those will be winter projects.
Here then is a summary of the Storybook Toy Store:
If you remember, I found three houses at the local antique store just a few blocks away (it's a really little town), all made by the same lady and all dating probably to the '90s. All aged, faded, and once I got them home smelling badly of cigarette smoke. The toy store seems to have lost its odor, especially with the new wallpaper.
Before
With the first house of hers that I purchased, before I wasn't interested in miniatures--I just wanted a dollhouse--I had no desire to remodel, redo, or, renovated. Then the bug bit me. I was, with this house, at first inclined to leave the exterior as is.
Even at first inspection, I was growing very attached to this little house. Given its age, I had to test the electrical system. I had already purchased one of this lady's houses, a giant Franklin Farmhouse and the electrical in that house worked, so I thought this should, too, but you never know.
The lights are on.
At first, I like the green exterior trim, but it began to look drab, so as I searched for Victorian shop fronts, many were bold looking, Dickens-like, so I gave myself permission to paint the exterior wood and I loved the transformation.
It's fun to see an empty house and to inspect it to see how it was assembled so that you can figure out how to disassemble it.
All fresh and clean.
I began adding the toys that came with the house. There were so many.
The round table and the pink shelf are mine. These are only part of the original toys, and I began collecting more toys: Ebay, Esty, and other online shops, but the original builder had a really nice collection of toys, some handmade, signed and dated, indicating that she had gone to miniature shows, just as I do. It must have originally been a Teddy Bear Store, perhaps inspired by the one in Estes Park, a mountain resort and tourist destination--best known for Rocky Mountain National Park and even more so, perhaps, for The Stanley Inn, famous for Steven King's novel, The Shining, which it is said that he wrote it there, certainly the hotel's history of resident ghosts inspired his novel--anyway I digress--.
I had my own inspiration, a carousel full of toys. I love the print of the carousel on the divided wall. I still haven't really found a way to incorporate it, but I began playing with all sorts of ways to organize the store. I went on Pinterest and looked at miniature toy stores, some so beautiful and magical, but they were stocked with pricey (and beautiful) antique and vintage toys. I decided then that my store would be a combinations of vintage and new toys.
I also looked at retail toy stores to see how they are organized and how toys are displayed. Granted there are few brick and mortar toy stores left; there is one in Denver, but it's in an area where I seldom go, so I got some ideas from Pinterest.
The white counter came from my reject box. I originally built it for the Duracraft Farmhouse as a bathroom counter and sink, but didn't think that it was good enough, so I built another one. But it seems to fit in the toy store. I also build the little bookshelf, again sort of an experiment using balsa and bass wood. I purchased the display cabinet from
Hobby Builders Supply, but I am disappointed in it for two reasons: I wish I had purchased a white one and the doors in the back don't stay closed.
Many of the real toys stores used cable ends as shelving. Some painted out, some natural, some decorated. I created mine using wood circles that I purchased at Hobby Lobby--they don't seem to be available there now--. The package came with a variety of sizes. I dug in my stash of sewing threads and found wooden spools. I have to tell you that I hated using those vintage wooden thread spools, but I did. They are not a rare find, so they got repurposed. And the jelly tub holds books nicely, too.
The work crew got really excited when the vintage Fisher Price school bus showed up on the premises, but it is a little big for the store, but I love it. I still have my girls' FP toys.
I have spent a lot of time playing with the store and making things, such as the printable barn, then I bought a kit from Dave and Wendy--some of you have met them as they are now traveling to the miniature stores around the country. Stop and say 'hi.' I still have to make the barn, but I'll get around to it.
The original builder had such a lovely collection of vintage toys on display in the cabinet. The ones on top are mine. I think my favorites are Mickey and Minnie Mouse, barely an inch tall. I have searched Pinterest for these tiny metal toys and if I find them, they are very expensive. The detail, especially the faces, is so perfect. Some tiny minis have distorted facial features that sort of ruin the face.
I even considered making a wall to give the interior more interest, but decided that it took up too much space.
A wood railing would be nice, too, I thought, but again, it would take up too much room.
I moved things around.
The original builder must have been a Denver Broncos fan--this little doll, handmade, surely must be John Elway with his blond hair. Look a the tiny calculator. A more modern store would probably have an iPad. And Humpty Dumpty, another signed and original piece, as is the clown in the far corner.
I made the basket during "I'm going to learn how to make baskets" phase. I also built the chair from a kit. My first. The little Raggedy Andy doll came from Dave and Wendy. It is handmade and online very expensive. I love the little bear with the book. He's a reader, always has a book in his hands, but his glasses give him trouble.
More play. Finding things in my stash, such as a vintage pair of chairs from The Littles.
These are a rare find, the Disney fairies from the series of movies dedicated to Tinker Bell. The spool table is just perfect, but the fairies are too big. The American Girl has taken Cinderella's shoe--again.
All the King's Men have suddenly appeared. (Left over form the room box that I did for my grandson). I love my phone box, purchased from Minimum World, shipped from England.
Given the age of the house, it is amazing that the lights still work, the only testament to copper tape wiring.
Well the lights sort of work, but then don't when you mess with them. I tried to unscrew the white cover to clean it, but it didn't screw off. Good news. The main piece is build so that it can be rebuilt.
I bought the cute hutch from Hobby Lobby. It fits nicely, adds needed shelving, but take the space where my carousel drawing would go. I have played with what I would put on it, and I think I will be rotating inventory because the toys look more interesting on the shelf. And the corner is dark with out the globe sconce, so I will add a button ceiling light.
Two projects were left. One was to paint the hutch. At first I thought that I would paint it white, but I decided on pink with white drawers and gold handles. I originally painted the legs white, but later I put gold on them and roughed it up. I will add water slide decals to the cupboard doors and maybe paint them white.
I thought I had a better photo of the super heroines along with the gnomes. They are actually buttons.
Make sur to purchase your favorite bear. They are 40% off this week. More outside.
And I painted the cable end shelf white.
Barbie welcomes us in, declaring that she is open for business. Note that she points to banner above the window to our right, Bears are 40% off.
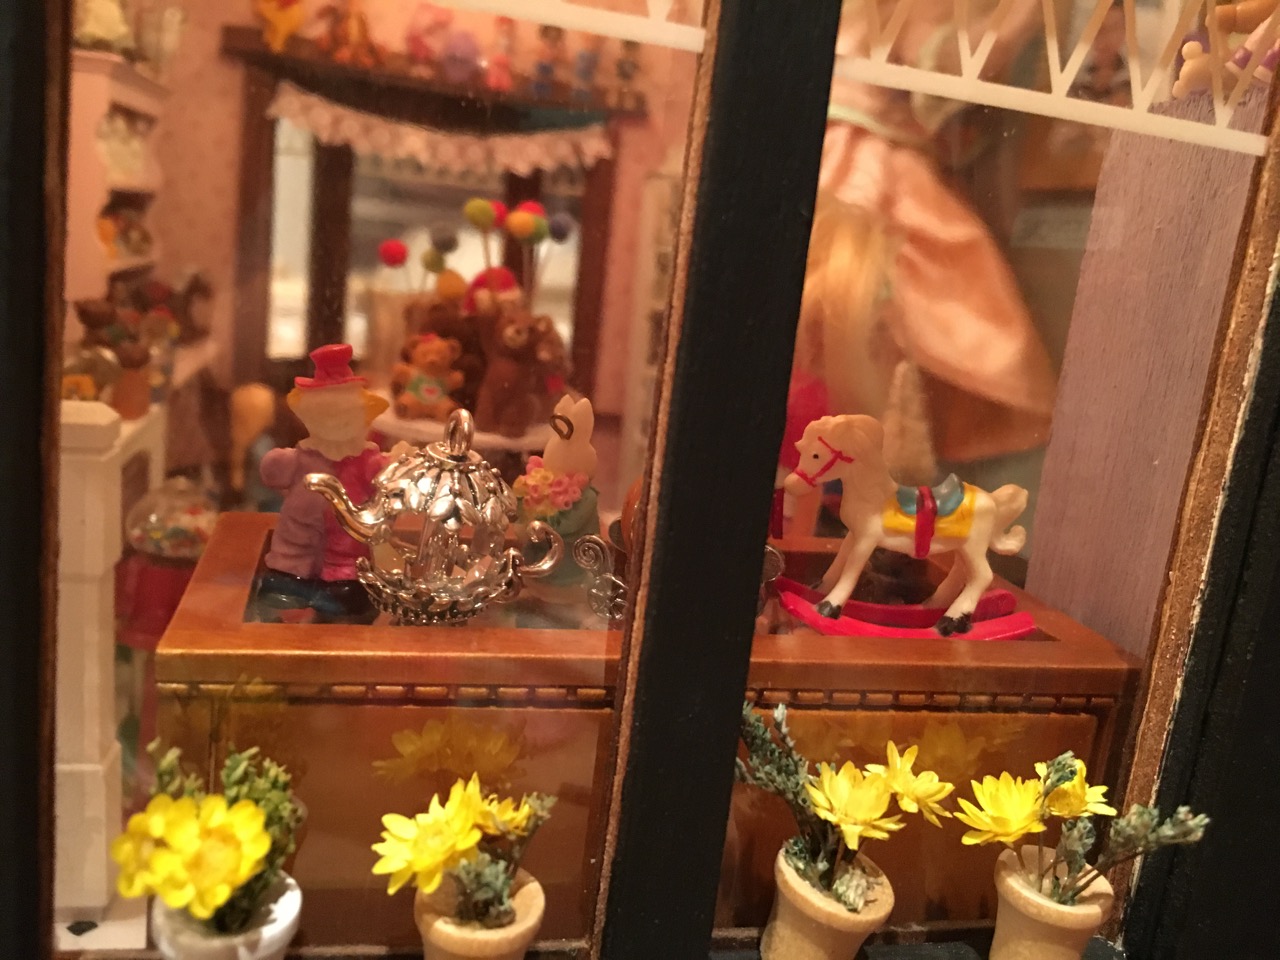
The tea kettle is a jewelry charm. Cute and a bit large, but it fits.
I wanted an airplane, but only one I found that was very small was nearly twenty dollars, so I found two of these vintage airplanes at the antiques door here in town. Vintage perfect. Scuffed and well played with.
Pooh Bear and his friends are rare in mini scale, so these are craft buttons. The other little people my daughter found and gave to me.
Someone's in the Phone Booth. I wonder who?
Oh look who just coming out of the Phone Box. I hope she stops by the store.
And Thank You for stopping by.