Friday, August 15, 2014

Measure Twice; Cut Once

Work on the Lafayette cottage has progressed to the point that I am taking a break tonight. I thought I should update the blog to share the progress.


With the gluing complete, the house is pretty sturdy, so I began thinking about wallpaper. First I began fitting for wallpaper using computer paper to make patterns. The upstairs has very difficult slopes and triangles to cut with 3 round windows.


I was able to place the house on its side to get a better view and fit the paper pattern.


The downstairs was much easier to paper. The first fit of kitchen wallpaper went well. The window arch was tricky, but the paper fits.


I had already cut paper for the Alpine Farm House, so my plan was to use left over paper on the Lafayette; however, I didn't have quite enough to cover the wall, so I pieced the wall together. I ended up having to buy more paper to finish the back wall anyway. I purchased the stripped wallpaper at Hobby Lobby. I ordered the blue wallpaper from Itsy Bitsy Mini.com. The website had a wonderful selection of wallpapers, but I didn't really like it when I got it. First, I thought I had order two sheets of two patterns and received one of each, one that I didn't like and won't use. I like the quality of the Hobby Lobby paper, but the store has a very limited selection. The Itsy Bitsy paper, I have to admit, was heavier.

Over the years I have done a lot wallpaper in our homes. Working with my husband, we got pretty good at hanging wallpaper, so I applied the same principles to this project. Wallpaper is expensive, so we want to use it as efficiently as possible. 


The nice thing about wallpapering is that while I have to cover the wall, the edges don't have to exact because I will use wood trim to around the windows, the door, and around the floor that will cover the rough cut edges.


The round windows in the upstairs created a huge problem: how to paper around them, how to cut the wallpaper accurately.


I had traced the window outline on the my pattern. I cut out the circle and tested the fit, but it didn't fit snuggly around the window, so I had to have a better way to expand the size of the window cut. I ended up making more than one pattern to get an accurate cut on the wallpaper. Still I needed a better way get a good fit, so I used my Creative Memories scrapbook cutting tool which worked so well and happened to be just the right size. 


I knew that the cut-out would not be exact, so I painted the wood window frames and a bit of the wall so that if the cut-out did have a perfect fit brown wood would not be showing from behind the wallpaper. The best way to paper such a wall would be to paper it before the window frame goes on, but after the house has been assembled. As in any remodel job, getting the detailed work right is sometimes really hard.


I used a credit card to smooth out the paper to get the bubbles out and to make good corner creases. You can see that the paper will wrap around about half an inch on the adjoining wall. More on that later.


This wallpaper job was very tricky. I got frustrated because it was not turning out perfect. The paper does not hold up well to moisture. I tried very hard not to get glue on the outer surface because washing it off tended to damage the paper. I ruined my first wall by rubbing too hard to get the paper smooth.

Things to keep in mind when wallpapering:

  1. Make a paper pattern first so that you know your walls. If you are remodeling an old house, wallpapering is quite challenging. I know that when I do the Alpine Farm House I am going to do some painting and papering first. I did okay and it was quite helpful to have the paper pattern precut and measured so that I could make adjustments on the pattern before I cut the wallpaper.
  2. Glue: I used Yes scrap booking glue. It worked okay. Different websites suggest alternatives such as regular wallpaper glue, modge podge, dollhouse wallpaper glue. I ordered it form Itsy Bitsy. It was very expensive, I thought, almost $18. for a pint. I didn't any have luck finding it any stores in town. 
  3. Most websites suggest wrapping the wallpaper around corners. I found it necessary to do so because the walls were not tightly glued to each other or to the roof, so light came through the cracks. I decided which walls would have the wrap around and papered them first. I had good results. So remember to cut your patterns to include the 1/2 wrap.
  4. Be patient and take you time. I usually do one or two things each night, simple little chores like paint the wood trim to keep from getting tired, hurried, and frustrated. Glue and paint need time to dry and cure, so plan accordingly.
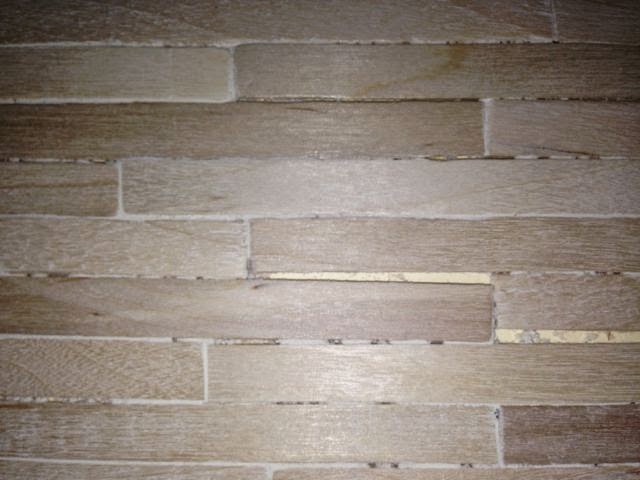
The wallpapering is done now. The pop sickle stick floors need a bit of work to smooth out the ends because I wasn't particular enough at the finished end of the row, making the uneven. I may do some sanding to give them a better fit. 

I have cut the wood trim for the windows, the door, and the floor and painted the pieces. I will install them next. And the house will be about finished. 

I didn't have a very clear picture of how I wanted the house to look. I needed inspiration. As I wondered the toy aisles at Target with my grandsons, I couldn't resist the Barbie aisle when I found the cutest little dolls, Mooskas. I had to have one. Meet Jaya and her little swan. 


I think she likes her new home.


I got a bit ahead of myself putting pieces in the little house, but I couldn't help it.


The little mooska has already fixed herself a cup of tea. She looks right at home in the chair borrowed from another dollhouse. 

I haven't decided just how far to take the decorating of the house. I have ordered a couple of pieces on ebay for the bathroom, but I don't want to put a lot of money in the Lafayette. I had hoped to make everything that I put in the house, but making furniture from scratch is really hard and I am not talented. 

So, I hope you enjoyed the wallpapering process. I know that when I do other two houses I will have a better idea as to how to cut the paper, which I will do before I glue the houses together. 

Thanks for stopping by. Love your comments.

Friday, August 1, 2014

The Repairs Begin on the Lafayette


The Lafayette has required quite a bit of work to get it repaired, mostly re-gluing it back together. The original builder did a decent job of assembling the house, but it did need some minor adjustments. Nor will my restoration be perfect just because it has already been assembled and I am repairing damage the best I know how.

First I had to remove old glue. I googled removal of old wood glue which gave two suggestions: use a blow dryer to heat the wood glue or use rubbing alcohol. Let's just say that I have to buy a new blow dryer. For exposed glue easy to get to, I found that rubbing alcohol did a fine job of dissolving the old glue. My first challenge was to remove this little chip of wood that may have been placed as a support or foundation for a stair case. I saturated a cloth then dabbed the clue and gently rubbed the wood chip.  Eventually the glue dissolved and the chip pried loose. Next I used a scrapper at the suggestion of my husband to scrap away the rest of the glue along with more soaking with alcohol. Yes, it was a time consuming process. I worked out on the patio table in the evening surrounded by the beauty of the garden. Next I worked on the glue strip where a wall divided the down stairs. There was also a similar line of glue in the up stairs. Lots of alcohol and scraping gave very good results.


An alcohol soaked rag rests on the glue glob to be scrapped off.


I used my iPhone to get inside the house for the pretty descent shots.


I pre-fit the tabs to understand how the house was meant to fit together. It was rather like putting a puzzle together.


These wood kits by Dura Craft attach walls to the floors with tabs that fit into grooves. Ideally when the house is assembled a bead of glue will be applied along the entire edge of the tabbed piece (in this case, the floor), which it wasoriginally, which assures a tight, stable fit. However it was very difficult to first remove the old glue and then reapply new glue because the back tab and edge of the floor still had a good hold, so as the photo shows, I applied the glue to the front slot. Of course there was a lot of wrangling the pieces around to make sure that I got a good fit.


With the tab in place, I applied more glue to the tab and slot and then as I had watched our professional painter apply caulking to the our crown molding and chair rail, I ran my finger along the bead of glue to smooth it out and push more into the groove. You can see that I did not run a bead of glue all along the floor/wall joint. The tab held the floor in place nicely without adding more glue.


I could not get the roof to fit down properly so that I could re-glue it in place. I finally figured out that the outside trim on the house had been improperly installed and my guess is that the roof never did fit properly. The trim just a tad too long.


I used my little saw from my kit to remove just enough of the trim to get a good fit on both sides of the roof.

The gluing was not done all at once because after each phase of gluing, the glue had to dry. The pieces also had to have a tight hold to keep them in place. Sometimes clamps can be used, but in this case I used rubber bands to hold pieces in place with the glue set. The rubber bands provided enough tension to keep the pieces in place. I think I worked on gluing the floors in place and roof back together for  two nights. 

Next I had to decide how to create a floor. I could leave the original floor as is or get fancy and add a hard wood floor.


I decided to build a hard wood floor using pop sickle sticks. I laid them out in both directions  on the floor and consulted my husband. He thought that they should run from side to side. I liked from front to back. Once again I turned to the helpful websites to see how more experienced builders made their floors.  They did both. They also painted sticks one by one before gluing them in place. Some glued them right to the floor of the dollhouse, some made a subfloor out of card stock, some stained their floors, the shabby chic-ers painted them.


I decided to glue my floor to card stock so that it could easily be removed. Should I want to wire the house for electrical lights, the wiring will be nicely concealed beneath the floor and I can remove the floor. I used an old manila folder that I cut to the shape of the floor. The floor was much easier to work with outside the house. 


I cut pop sickle sticks and glued them in place on the folder, staggering them to create realistic looking wood floor. I used a yellow wood glue. 

About glue: to glue the house together I used a white glue, water soluble, but from what I read wood glue that is not water soluble should be used because the sticks will absorb the water from the white glue, causing them to warp. White glue dries clear; wood glue dries yellow, so you have to make sure that you clean up all drips.

Some builders use a hot glue gun to adhere the sticks. I decided that it was just easier to use wood glue. I don't think hot glue would create as flat a bond as the floor needs.


Once the sticks are glued in place, the floor has to be sanded, so I used a 180 grit sand paper block and sanded and sanded and sanded. . . . You can see that the sticks didn't quite butt up to each other in some cases. I purchased my sticks at Hobby Lobby. I have started the upstairs floor with sticks my daughter gave me. They seem to be a better quality. And I didn't do a careful enough job of cutting rounded ends off of the sticks, so they really didn't fit as nicely as I wanted them to. My husband purchased a wood filler for me that I applied twice to fill the gaps, sanding between each application. It worked fair. I will work harder next time to get the sticks more evenly laid down and glued in place and use a different wood filler.


I like the look of the floor. I have now stained it a golden pecan with three coats and followed by two coats of polyurethane. 

My next challenge is to  repair the window on the left. I have cut an arched window casing out of balsa wood, but it split. I will glue it together and paint it.

I have ordered wall paper form Itsy Bitsy Mini, a great website that has all of the supplies needed to build a perfect house.

I am really nervous about the wallpapering. So I spent this afternoon making paper templates out of computer paper. The downstairs was a breeze with only 3 square walls. The upstairs is another story.


No, you do not have to stand on your head to get to awkward corners. I laid the house on its side to get a good view of the ceiling and walls. I was able to place the computer paper on the surface, run my finger along the edge to mark where I should cut. I was able to get a perfect fit for each elevation and surface of the upstairs.


While the templates fit nearly perfectly, I will have to remember to cut the wallpaper pieces a little larger to wrap around the edges and corners to give a more seamless finished look.

Helpful websites:


I often look on YouTube for ideas, but really I like the bloggers better. The youtubers talk too much, don't get to the point quickly enough, apologize for kids spoiling the shot or the dog barking. The bloggers take their time, provide good photos, and are easy to communicate with, unless the blog is too dated.

Now I wait for wallpaper and supplies to arrive. In the meantime, I have done some painting on the Alpine. I need my husband to help me glue it together. It is made of manufactured wood, so it is heavier and I need extra hands.

By the next post, the floor will be finished and hopefully I will have the wall paper installed. The exterior will remain its natural wood look. I am falling in love with its natural beauty.

See you soon. Thanks for stopping. I do appreciated you taking the time leave comments. 

Sunday, July 27, 2014

The Lafayette: A Little Charmer and a Real Bargain

Daughter Jennifer spends a lot of time on Craigslist. I try not to. She discovered an ad for a huge estate sale just east of us, close the farm where my husband helps out his farmer friend. I asked him to take me to the sale Thursday. It was mid afternoon before we were able to go and once there I got sick and had to leave, but not without a bit of looking around.

The building was piled with hundreds of boxes still packed, with many unpacked, and some things were displayed. The lady who owned the stuff, as I over heard, loved to shop and went to auctions. There were hundreds of boxes filled with everything imaginable: books, old magazines, figurines, Christmas, dishes, dolls stuffed animal, and on and on and on. There was even a stack, yes "stack" of fish aquariums of various sizes from 5 gallons to over 200. But sitting high up on an old desk was a dollhouse that caught my eye immediately.

I took it down from its perch and asked how much. $10, um. . .  I'll take $5. Not feeling well enough to make a decision and in need of going home, I left it behind. But you know when something haunts you, even late into the night. And you then dream about it. And then the daughter says, "Mom, you gotta get it. The girls can play with it at your house (emphasis on "at your house."). So Saturday morning I arrived back at the sale before it was open. Yep, the dollhouse was still there.

Still mulling around in my mind thinking that I did not want to become this lady, the one who hoards and buys and hoards, I held back. The lady in charge of the sale said that the house was left outside and had blown over in the wind the day before and suffered damage (more) and she didn't know if they even found all of the pieces. I looked at it, set it aside, bummed. What to do? I wandered around, finding other do-dads. Then the bug to buy hit as I picked up a large porcelain  owl to add to my collection at home (there were dozens of owls), 5 little ceramic Easter houses for an Easter village (brand new in boxes never opened), a red glass plate, and a porcelain swan (all for a dollar each), I decided to get the house. "How much?" I asked. $5. I replied, "That was the price yesterday. Today it is broken." $3," a quick reply.


What a little charmer it is. I adore it. I had a suspicion that is was the same vintage as Heather's house that I had build in the '80s and restored this spring. It is indeed a Dura-Craft, the Lafayette. You can still find new kits on ebay for under $40. It would make a very good starter kit for someone interested in starting a new project.


The house isn't' in terrible shape. The seams had come unglued so someone used clear packing tape to tape it back together. I pulled off all of the tape and in these photos you see the house all cleaned up. I used canned air to spray away the dust and dirt then gave it a light sanding. I believe it is now ready for paint and wall paper, after I glue it back together, that is.


This side suffered the most damage when it fell. The bay window got knocked off, but the pieces are in good shape and will glue back in easily. I have sanded and scraped away the old glue. There is still more glue inside that I would like to remove, but probably won't now. The glue does not scrap away easily. One Internet site suggested using a hair dyer to heat the glue. Not a good idea. I now need to buy a new hair dryer. I went to town to buy a heat gun that crafters use or one used to remove finish from old furniture and decided to spare the expense.

You will notice that at the front door is ajar. It is glued in place. Bummer. I don't think that I can get it free without heating the glue, so I may have to just live with a door that doesn't swing open.

While I love the natural wood look, I am thinking of painting the exterior gray with pink trim. Heather suggests pink and green. I may save those colors for the Alpine Farmhouse. 


I have discovered that special tools are needed for building a dollhouse. I found this kit on the Wallmart site and ordered it.


 It comes with a nice selection of tools


in a nice wooden box,
 

 but I am questioning the quality of the tools now. The blue clamps don't work very well, unless I don't know how to work them. I have a better one I found at Hobby Lobby. I'll note it when it appears in a photo. The best tool, though, is the miter box to cut 45 degree angles on pieces of trim to fit around corners.

 I have today to myself, so I am going to paint the interior walls of the Alpine house tbefore I begin gluing the walls on.

Here are some web sites that I have studied to get the nerve to begin:


Real Good Toys: Finishing the Interior Part I and Part II. Just follow the links.

Nana's Dollhouses and Miniatures

Thinking of building a dollhouse?

Hobby Lobby offers a really good starter kit: The Orchid for $30. Very similar to the Lafayette, it is made of the composite wood like the Alpine House. Made by Corona Concepts who also makes the Greenleaf kits, it will (I hate to promise easy to build) be a good project. Greenleaf also has great discussions on how to build their houses.

Well, the adventures begins. Thanks so much for joining me. The blog needs more work, so bear with me.

May all of your dollhouse dreams come true, and if you don't have any, enjoy mine or begin your own or both.


Tuesday, July 22, 2014

Alpine Farm House

It's here. My practice dollhouse arrived via UPS today. I was so anxious waiting that I decided to go downtown to pay the water bill  and wander through the antique stores on main street. I live in a very small town--about 1,500,  on the plains in northern Colorado. It is basically a bedroom community surrounded by farms. When I got home, the house had arrived.


I especially like that the house is made in the USA as the tag shows in Vermont.


Out of the box, all of the pieces are neatly packaged and marked with a list of exactly what pieces are included.


The shingles seem a bit thin and will need to be dyed. Dye not included.


After reading through the instructions, I begin to dry assemble the house, holding it together with blue painters tape, which I find is not strong enough to hold the walls up, so I switch to regular masking tape. I had expected a diagram labeling all of the pieces, but the instructions did not have one. So I had to guess what was what. The front pieces were pretty obvious.


With the main structure taped together, it should measure 19" wide, 16" in length (front to back), and 20" high. The yard stick actual measurement is a bit smaller, 16" x 15".


The photos don't show the gap between the side wall and the floor on the front. Frustrated that I may have to cut the front down, I leave.


We learn lessons in odd ways. Playing Angry Birds has taught me two things: when I can't master a level I go to YouTube to see video on how to aim the silly little bird and when that doesn't work, I leave the game. Generally when I return to the game, I master the level. So this strategy applies to this project. This particular house is not a popular one for builders, so there is no information from hobbyists on the internet with suggestions. I returned to the house a couple of hours later. I decided that perhaps I had pieces incorrectly placed; indeed, I did. With a minor adjustment, the gap disappeared and the front fit perfectly.

The manufacturer Real Good Toys has a great web site with lots of good information on how to build their houses, including instructions manuals for some of the more popular houses. No. the Alpine Farm House is not one of the more popular houses. Just my luck.

The instruction manual really is not the best; thus, I found that dry assembly was more helpful than trying to read the instructions and follow the illustrations. A diagram of the pieces would have saved time and frustration.

Next step: All of the instructions I found say to prime the wood first. Real Good Toys says to use semi gloss latex, which I have plenty of left over from painting my kitchen and living room. I am using an off white, Bone. 

I determined today that I will not get in a hurry. I will take my time. I will be patient.

I have been spending quite a bit of time reading this blog: Cinderella Moments, a really wonderful blog with the most beautiful dollhouses that the writer builds. I am getting a lot of ideas from her.

Tonight I am going to build the windows. I had thought that I might upgrade the window with the Hobby Lobby windows, but these windows are very nice. I do believe that I will upgrade the front door and perhaps the stairs since they are very attractive. Hobby Lobby has a very nice stair case kit.

I am so excited to have followers already. Thanks you ladies to signing on. I am still working on the blog format. Right now subscription is by email only, which I want to fix. Google has changed some of Blogger's features such as how the blogger's profile is made public--too complicated for me to explain, so when I get that all figured out you will hopefully be able to follow both with and without email. I don't want to make those drastic changes as they will affect my Garden Spot blog and I don't want it altered.

When we meet again, I hope to have the pieces primed.

Thanks for stopping by.


Friday, July 18, 2014

Hello

Welcome to Ann's Doll Dreams. Perhaps you have discovered this side of me through my blog Welcome to the Garden Spot, a blog I started in 2010 to share my gardening experiences. When I started that blog, I was a full time English professor at the University of Northern Colorado. I retired a year ago while I still had health and energy to do the things I enjoyed. One of my life long passions has been dolls, pretty, sweet dolls. I do not have a large collection of dolls, but the ones I do have are very dear to me with great sentimental value. You will be meeting them as time goes on.

Years ago when my daughter was little I built her a dollhouse from a kit. Not knowing what I was doing, it was a pretty rough toy and she never really embraced it as a play thing, so for years it sat in a storage unit then in our barn. I'd see the old ratty thing and swear that when the barn was cleaned the dollhouse was going to the dump along with other non essential junk. Then she had one request for the 39th birthday: Momma, all want for my birthday is for you to fix up my dollhouse. So I did. She loved it. She became obsessed with furnishing it and continuing the renovations. Then the bug bit me. And now I have a blog dedicated to my dolls and to my newly acquired dollhouse obsession.

Perhaps you have the same obsession. Here, as I discover great web sites and other resources, I will share them with you, hoping that you will do the same.

So this is my first project. I am learning a lot more about building houses; in fact I have a Craiglist.org bargain sitting in the garage just waiting for me to begin building it.  But first, the little red house built in the '80s refurbished in '14.


The little red house wasn't in horrible shape; though it did have some broken pieces, but its bones were strong.


The doll house sat on my center island in the kitchen as I worked steadily on it for two weeks. With a bit of help from my husband, we transformed her childhood dollhouse into a nostalgic piece that she will enjoy for a very long time.


So I began work on the little house. It required several coats to cover the red paint. I purchased a quart of latex flat interior paint for the outside. For the white trim I used craft store acrylic paint. For the interior walls that I painted, I used paint that I had recently used in my kitchen.

There is still work for her to do on the house, but she loves it. While the original porch railing had come unglued and it was still sound. The flat, one dimensional porch posts were gone or broken, so I replaced them with turned porch posts that I purchased from Hobby Lobby. I also replaced the front door with a new door from Hobby Lobby. 


The white table and chairs were on loan to Heather, but the doll and the tea set went with the house.


The bathroom fixtures original to the house were actually a vintage set that her grandmother had as a child. 


The finding the dolls and the furniture were a stroke of really good luck.


The house looked a little plain after I got the roof shingled, so I added the gingerbread trim that I found at Hobby Lobby. Gluing it on was very difficult and in retrospect I should have glued it on before I put on the shingles.


I purchased the bedroom furniture at, you guessed it, Hobby Lobby. I have the door taped instead of permanently installed because I figured Heather would want to paint. I wallpapered only one room using scrapbook paper that turned out to be cloth with an adhesive backing, but I didn't know that at the time. So if she wants to remove the wall paper she can just peel the cloth off and have a foundation to glue the new wallpaper to. 

I also purchased new two new stair steps that I did not glue in either. They are supposed to face the other direction, but I felt that the stairs looked better facing the back of the house. Heather will have to decide what she likes.


Once you begin working on a dollhouse, you begin making up a story that goes with it and the dolls end up with names and histories. This is the nanny.


On the porch we have the lady of the house, Martha, named after Heather's great grandma who lived in a two story farmhouse not so different from this one. Uncle Charlie has been to the garden and brings in his harvest for the day.


Martha enjoys tea in the afternoon on the veranda. She was purchased at local garage sale, a lucky find.


Heather wanted it painted blue, and "This time, mamma, I want shingles."


I shopped Hobby Lobby for shingles, finding them coming in very small packages and requiring staining. I wasn't up for that expense or work, so I decided that if she wanted shingles she could shingle the house. 

I am also a thriftier. I love going to the Goodwill and ARC looking for cool stuff. On one excursion to ARC,  I hit the grand jackpot, a shoe box full of not just shingles, but dolls and furniture, and the little tea set. I was in business. The Nanny, grandpa and grandma seen in in the living room holding a naked baby that I had used for a baby shower game, an over stuffed sofa and chair, and white wrought iron baker's rack all for $6.00. Sometimes things are just meant to be.


The little house really wasn't in horrible shape, but it did a lot of work to clean it up, repaint it, and make it ready as a suitable birthday gift.

On Heather's birthday, March 27th, I gave her gift in a rather unusual way, but by a totally modern way. She lives more than an hour away and works, so I created a blog post of her house on the Garden Spot, called her through Face Time and asked her to take a look at the Garden Spot. Click here to see her big smile and tears as she sees her house for the first time in over 20 years. What a grand moment.


The little house now has a family and Heather will have a lot of fun decorating it. It will be her winter project. I didn't shingle the porch roof, but there were more than enough shingles left over for her to add to the roof. 

Now, I am ready to start my next project. I mentioned a kit in the garage. It is the Bellingham Farm House made in the 1980s by Dura Craft, now out of business. My other daughters found it on Craigslist and bought it for $25. I am very nervous about building it, so I have been scouring the Internet, including Goggle, Pinterest, and YouTube learning about building dollhouses and creating the miniatures to furnish it. Before I tackle the farm house which is MDF (manufactured wood and not plywood), I have ordered a little two room MDF house to practice on before taking on the big house. 

I have so much to share with you. I hope you join me as I discover the world of dollhouses and miniatures. Perhaps you will have ideas to share, too. Be sure to check out my Pinterest Board Dollhouse. 

Thanks so much for stopping by. Ann


Bargains Galore and So Much More: It's nice to back Hello friends. Yes, I have been MIA for quite a long while. I first took a hiatus fr...