I tried all day yesterday to write a wonderful tutorial for a stair railing template that I created in Cricut Design Space, but after two attempts I finally just gave up because it was just too difficult to mange 12 different screen shots of the process. The post would assume anyway that readers were familiar with Design Space, so it wasn't meant to be a lesson on how to navigate the app. Here's how I began the post:
I am at a place in the Manchester where the projects are huge and work intensive—as if outfitting a kitchen with hand built cabinets wasn’t: flooring, lighting, and the stairs. So I am focusing on the stairs now. I ordered materials this morning that weren’t in my stash, but I have plenty to keep me busy until supplies arrive. The next step will be to paint the stair pieces and perhaps windows, doors, and trim while I have the paint out.
My stairs prep began by watching Julie Warren’s video on how to assemble the stair railing and treads again. She has some great techniques that will improve my assembly. I struggled so much with Blue Farm House and the Bellingham stairs, but now I think the Manchester stairs will be so much better constructed. https://www.youtube.com/watch?v=riPAzzwWZvY
I am not good at math or most anything that requires numbers! I’m an English major –MA. I know words. I don’t know numbers, especially fractions, reading rulers, and converting fractions into decimal points for the Cricut Maker. Julie Warren taught me how to use metric measurements, especially when I have to find 3/32 or 16/64 on a ruler. With a good metrics ruler, I find that my metric measurements are much more accurate and easier to calculate. I may measure in inches to get an idea of size, but I use the metrics measurement on the Circuit which uses centimeters, so you will find my measurements here in centimeters. I decided to create a template for the even placement of the spindles on the railing base to eliminate all that tedious measuring and probable mistakes.
Today’s project is to create the railing for the second floor, which will be in the center of the floor. A wall is supposed to line up with the stairwell, but I’m moving the wall, so I will need a
3- sided railing. Certainly it would be easier and perhaps quicker to use a ruler and do simple math to space out the spindles, but I decided to cut a template for the spindle placement and with this template now made, I will have it for future projects.
There will be more on assembling and installing the stairs once my supplies arrive and I have all the pieces painted.
Fresh Strawberries
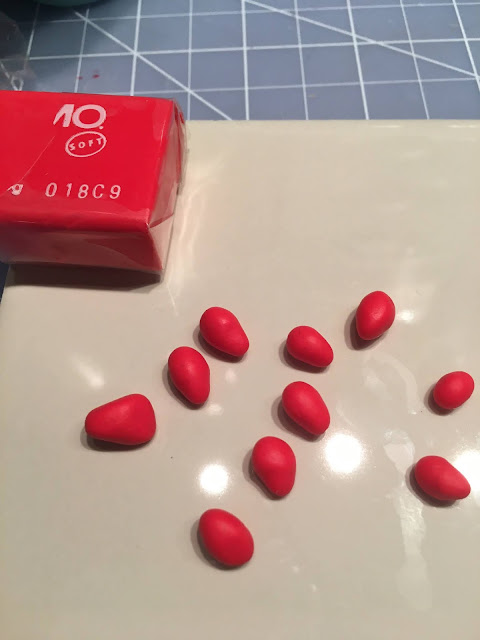
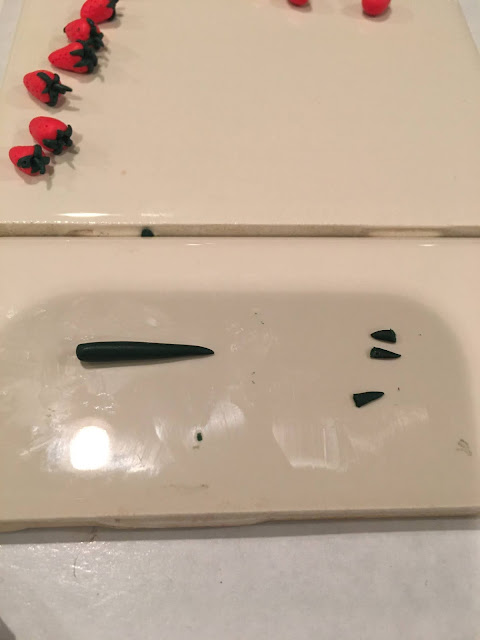
We have been eating a lot of fresh strawberries lately, but I saw a miniaturist artist on an Instagram post create a package of super market strawberries using the gum blister packs as the plastic box that strawberries are packaged in. I keep forgetting to look for the gum when I'm in the store, but at least I have the strawberries made.(https://www.youtube.com/watch?v=6y9mY6ndtes)
I watched this short video on how to make the tiny berries and that's how I've spent part of the afternoon. My berries are not as tiny, but I think they are fine.
Supplies:
Fima Oven Bake Polymer Clay: Red for the berry; green for the stem and leaves
Various Tools: Needle tool and stylus


Hi Ann,
ReplyDeleteI am so sad to hear that it was Sundance's time. You are right about losing any creature we love. Once you look into their eyes and connect with them, they are just a part of you. I am glad he was able to enjoy one last spring with the family, and I know you will miss him.
Stairs and strawberries are difficult things, but I know you enjoy a good challenge! I am glad the Manchester is offering so many opportunities for you to enjoy, and can't wait to see it progress in your capable and creative hands! The strawberries look juicy and delicious, and you are a brave and patient woman for taking them on!
Thanks, Jodi. A real challenge for me now would be to tackle resin and pouring molds. You make it look so simple and easy that I should be and able to work with resin, but it just looks so intimidating. Thank you, too, for your kind words about our loss.
ReplyDeleteAww Ann…. So sorry you lost your horse. It’s a tricky balance when animals get older, but it sounds like Sundance was very well cared for and loved. And I know he will be sadly missed. I lost my baby, a dog, about 5 years ago now and it still brings me to tears. But keep up the mini making and special times with family and friends. Take care of yourself.
ReplyDeleteThank you Shannon. We knew his time was limited, but at the moment it really hurts. We lost a young dog two years ago, too. I know exactly how you miss yours, but we wouldn't trade those years with or dear animal companions.
ReplyDeleteThank you Shannon. We knew his time was limited, but at the moment it really hurts. We lost a young dog two years ago, too. I know exactly how you miss yours, but we wouldn't trade those years with or dear animal companions.
ReplyDelete