
No one likes to admit failure or share their absolute worst nightmare, but how else do we learn if don't have to do some problem solving once in a while? As I have posted about how to install wallpaper, I've touted Grandmother Stover's Wallpaper paste because it is easily removed and that claim, my friends was put to the test this week.
I've spent hours navigating the difficult task of framing the giant doorway that connects the Real Good Toys addition to the main house, a 1998 Duracraft Manchester Country Home.Obviously the two kits were not a perfect match and required a considerable amount of engineering to get them to fit properly.
Framing the big opening has been such a challenge to get wood trim cut exactly, and finally I had all the puzzle pieces reading to install. The plan was to install all pieces during the same work session incase I had to make changes before the wood glue set. Well. So much for that. I was ready to install the top piece of strip to cover that huge gap only to discover that it would match up with the side trim.
No wonder. That piece was not clued in place straight, which meant only one thing: it had to be reinstalled because it was glued on top of the one-of-a-kind wallpaper (card stock from my stash).
I was in so much pain.
With a range of emotions
Anger
Disgust
Disappointment
Fatigue
Fear
Resolve
And I had to navigate around two wall sconces.

I knew exactly what to do. I had to removed the wood frame piece and reinstall it, which meant that I had to remove the wallpaper since the moulding was glued on top of the wallpaper.
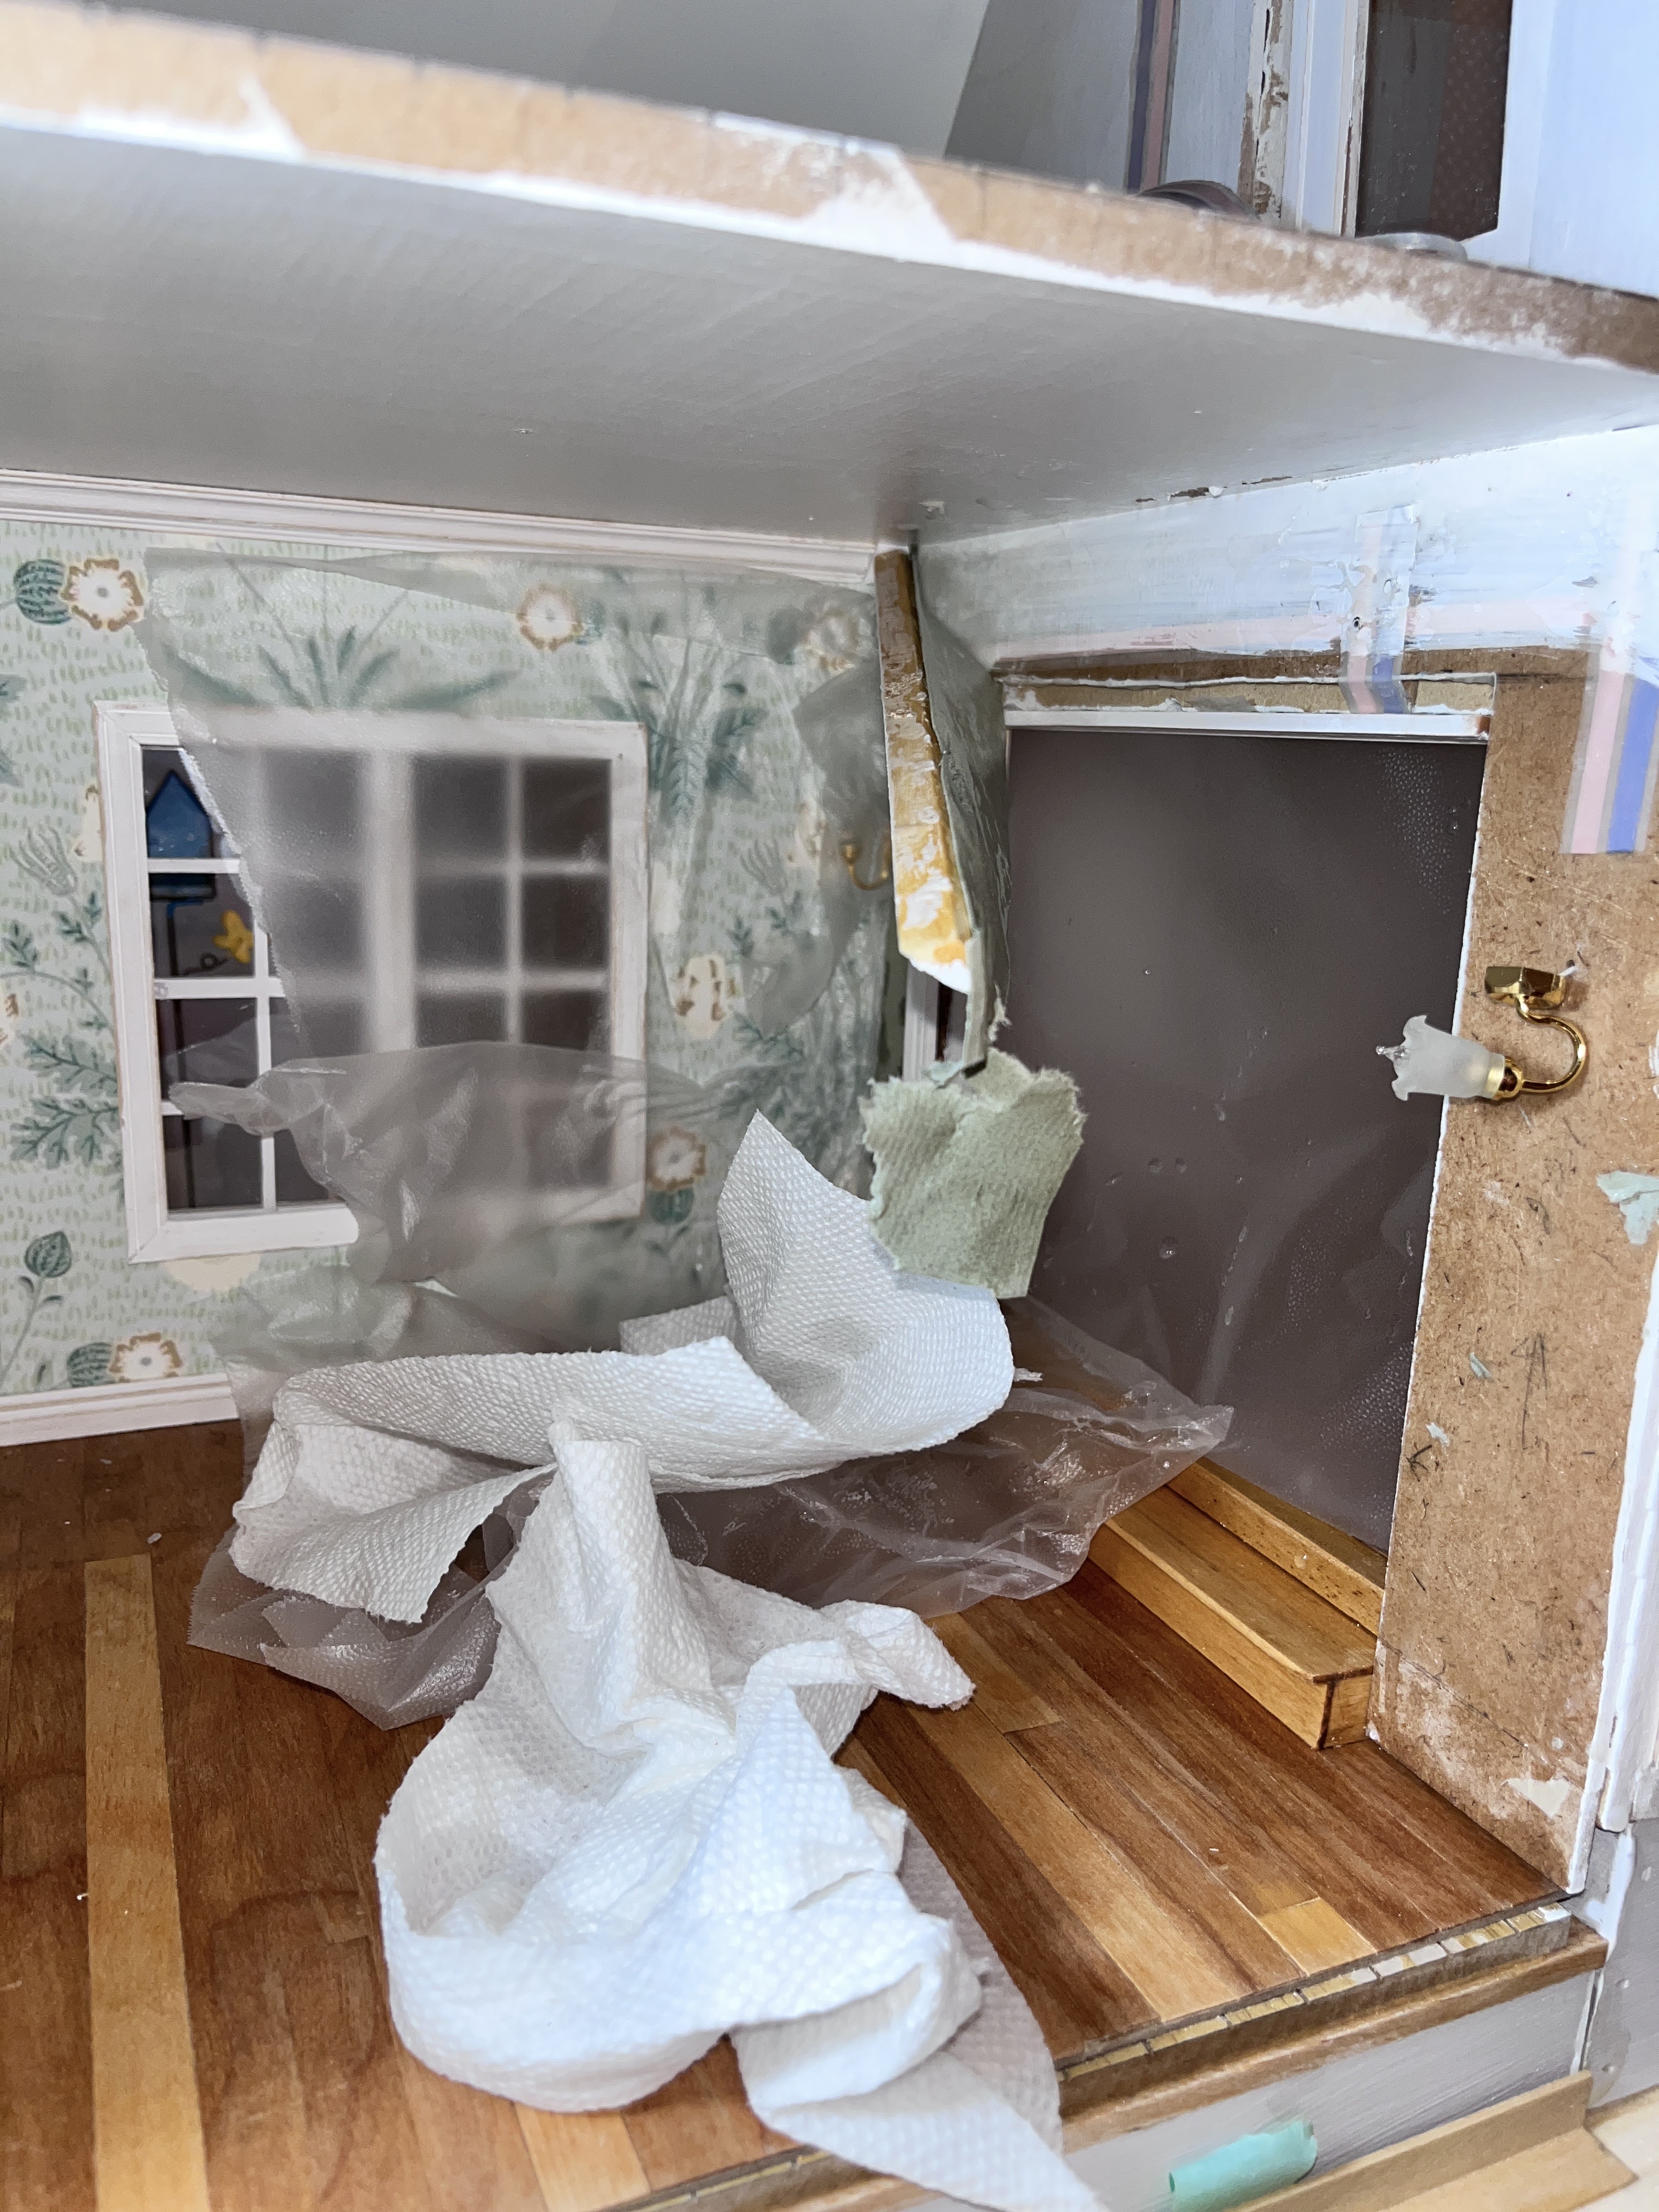
I began by protecting the good surfaces using my favorite kitchen plastic wrap self-sealing product, Press N Seal.


Next I prepared a solution of 1 cup warm water with about a tablespoon of Downy Fabric softener. If nothing else, the project would smell pleasantly.

I saturated the wallpaper then let the moisture soak in a while. The glue on the wall was still soft and sticky since it had not completely cured, making it a little hard to work with, but not a real problem--just sticky messy.
Before I sprayed, I covered the tiny sconces to keep them from getting wet. This was my main concern. The misplaced moulding removed easily when the paper came away from the wall nicely.

The crown molding released nicely, too, since it was glued to the paper and not so much to the ceiling, but I did have to spray a little mixture on the ceiling seam to release the glue.

And off it all came.

Gentle prying kept the trim from breaking in two and the kitchen paper protected the other wallpaper.

I did have to wipe up some water from the floor, but it didn't hurt the flooring or other wood trim.
Of course the water seeped to the opposite wall, but today the paper had dried and didn't leave a water mark. Pure Luck.

Now I have a bare wall. A sticky bare wall, but the lights still work.

Disheartened, I left the project then returned yesterday afternoon to create a template for new wallpaper, using my standby computer paper. It took a couple of tries to get the template fitted around the sconces.
I began by making a fold line on the paper so that it fit just below the the bottom of the sconce then placed the paper on the other side of the wall to cut the opening. On the fold line I cut approximate holes to fit around the sconces.
By removing the shades (which just screw off) I was able to slide the template over the lamp to see if my holes were properly placed. It took a couple of tries to get the cutouts properly placed then I cut a slit in the paper to more easily fit the template in place.

So now I have a nice fitting template. When I instal the wallpaper, I hope not to have to cut that slit, or perhaps now that I look at the picture I'll cut it from the opposite side where it won't show.


The holes don't have to be huge, just enough the allow for the scone wiring.

And there you have it: My drama for the week. The truth of the matter is that things go wrong. We miscalculate; we get in a hurry; we lack planning, vision, yadayady. Still we have to way a way out of our muddle and not beat ourselves up. In the end, when the new wallpaper in place, no one will ever know--well, except you.
But a challenge remains: I had a hard enough time finding the wallpaper to begin with and only had two sheets. I don't know where it I purchased it and even if I could remember would it still be in stock? When I was making flowers, I purchased several shades of green for leaves and there are only 3 stores in my area that carry scrapbooking supplies. But what's the hurry? Right?
The lesson here is a simple one: how to fix a problem. Wallpaper can be removed with little effort--messy on a new build or build in progress, but certainly possible: warm water with a bit a fabric softener added.
Oh and another lesson: Buy extra.
Coming up: The Kitchen.
Have a great weekend.
I'll be posting the post that was meant for this week, too. Double your reading pleasure.
Thanks for visiting.


It can be very frustrating to put hours of thought and effort into a project and then find you have to do it all over again. But you have the right attitude, we all learn from our mistakes. If you have to take a detour to become a better miniaturist, so be it.
ReplyDeleteWords of comfort. I felt so inept when I realized my mistake. I pondered for a moment, then decided that I really needed to fix the crocked trim; otherwise, the rest of the trim wouldn't fit properly. So here I am now, trying to locate a matching or at least appropriate piece of wall covering. Lesson: slow down and look at all sides while putting items in their final spot.
ReplyDelete