
Note:[To increase the font size or screen size: Mac: Command +. Windows: Start>System>Display]
From the beginning this simple farmhouse style 3 story house caused me problems because I decided to do what some call "kit bashing," which I really am not very good at. I wanted a larger house, so because this house resembled a Real Good Toys Vermont farmhouse, I bought one of the company's sweet additions to add two more rooms, assuming it would be a perfect fit. I decided, too, that the addition's roof should have a sky light. I fumbled my way through, struggling because the addition really didn't attach as seamlessly as it would have to one of Real Good Toys current kits.

Still I preserved and herd she is in the final stages of completion.
.jpeg)
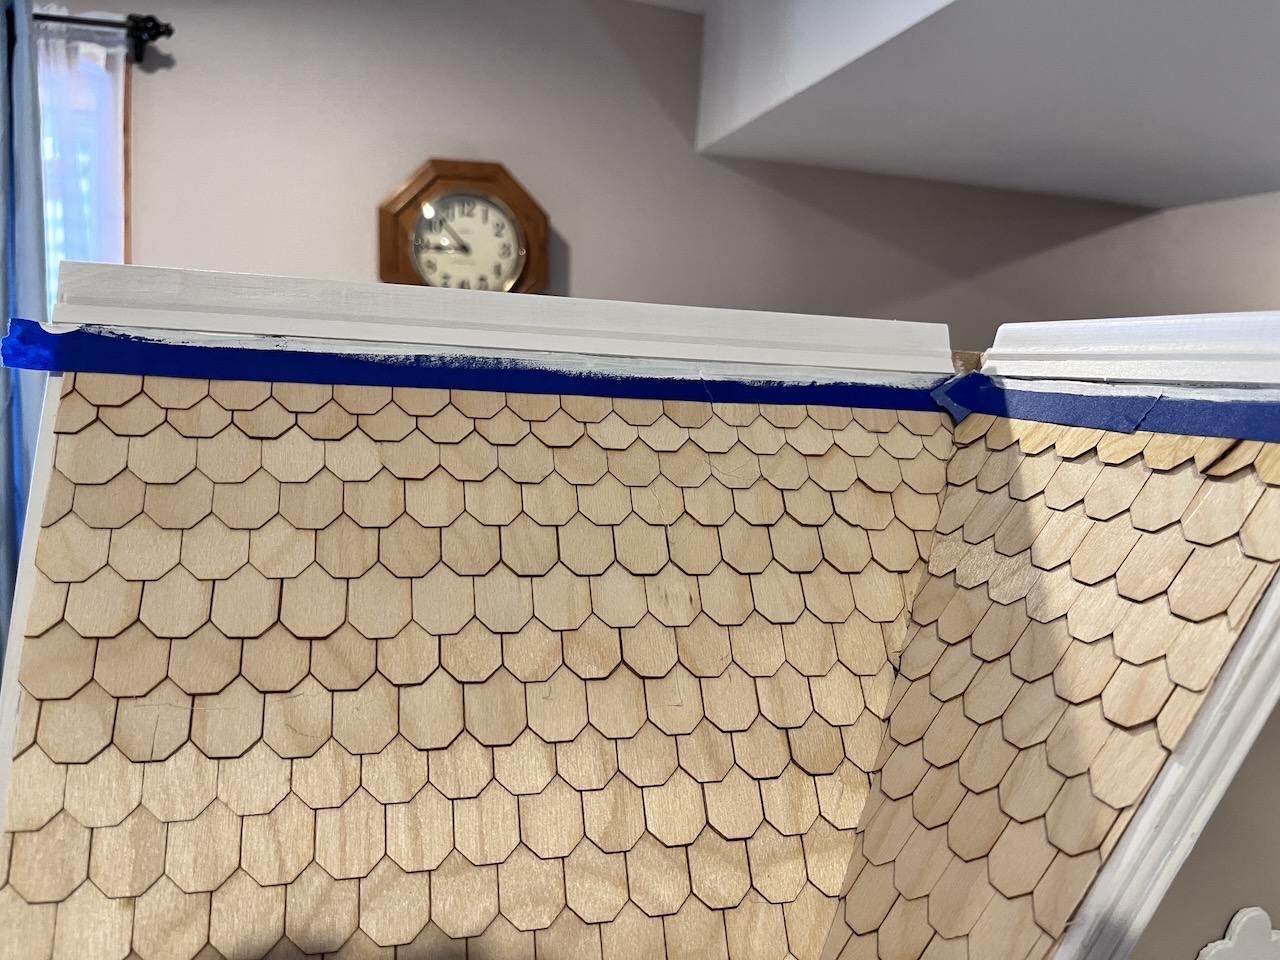
With the main roof shingled, the addition had only one challenge, shingling around the sky light.
I began by placing a wood strip along the end as a foundation for the first row of speed shingles so that that roof itself would not show through.

The strip shingles went into place quickly.

Looks like a mess, but I used full strips because it was easier to match the off-set, so there was more waste than what I liked; however, I save the end pieces to use the rows.

I had to order more speed shingles from Greenleaf, so I also ordered single shingles, which I used for the row that framed the bottom of the window.

In some cases the the variation in color might be an issue depending how the shingles are to colored. I will paint the roof gray, so I don't think the darker shades will matter that much.

I made the skylight so that the window pane piece could be easily removed and replaced.


I used white water base enamel interior paint with primer, so it goes on smoothly and easily.

I ordered the trim from an Etsy shop, Miniature Crush. Other online stores used to carry a wider selection of wood trims, but they seem be harder to find; fortunately, there are Esty vendors who carry good selections of speciality wood trims.

The roof molding is painted, too. I will install the decorative trim after the shingles are painted.


All in all, I'm quite pleased with the way the shingles turned turn out, tedious as the chore is.
I used my paper trimmer to trim the both the speed shingles and the single ones, using my a paper cutter, which will probably dull the blade. Oh well.

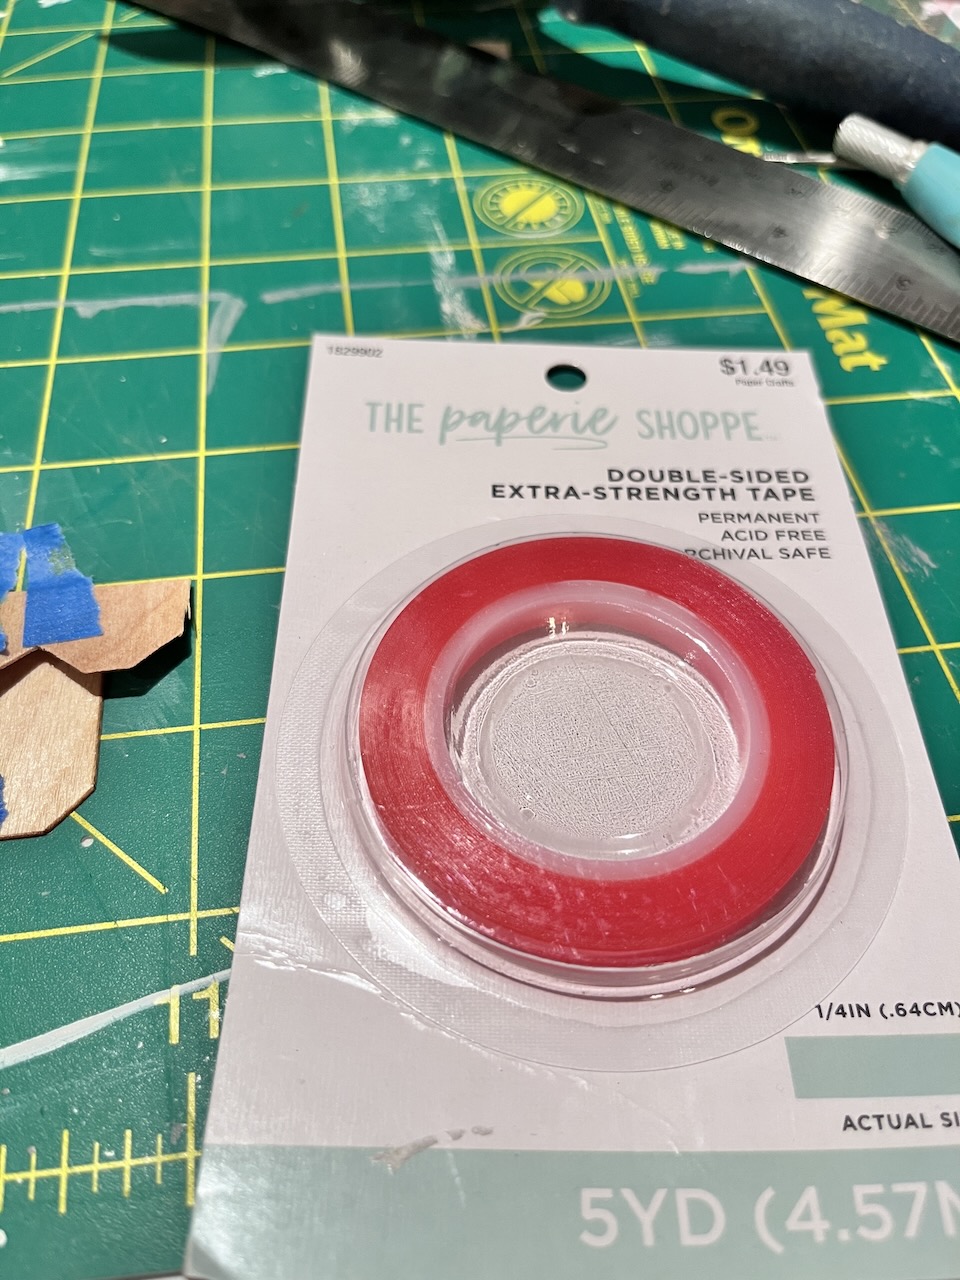
I attached the single shingles directly to a row of speed shingles before installing them on the roof. It just seemed easier to line them up.


I lined the up each, anchoring with painter's tape.

The using my favorite double stick tap, I taped them in place instead of using hot glue to reduce the bulk that a bead of hot glue can create.

The red protective cover peels off easily.

So there you have it. Final step: paint the roof. Maybe tomorrow. Maybe not.

Were I thinking, I should have just trimmed back the speed shingles instead of singles ones. 😐

Final major project: flooring for the 3rd floor. I purchased Cricut's veneer Walnut that I'lll cut the planks on the Cricut Maker. In another couple of weeks, the Manchester Country Home should be completed.

I am thankful that you stopped by. Have a great week.
Fondly,
Ann


You have been working so hard on those shingles!
ReplyDeleteThe roof certainly has been a chore.
DeleteI am so glad that you went out on a limb and added the RGT addition, Ann! The house looks so charming with the extra detail and you have made it your own unique model! It is unfair to say that you are not "good" at kit bashing. It is more accurate and fair to say you are only at the beginning of discovering your talent for it. I hope you will bash again, as you have a great eye for architecture and are excellent at solving construction dilemmas! The roofing looks amazing!
ReplyDeleteI am excited to hear about your shingle experiments and to see the wood floors you make with the Cricut veneer! The attic floors will be the cherry on top of this beautiful project!
Jodi you are amazing! We tend to be our worst critic; I certainly am. Thank you for your confidence and support.
ReplyDeleteThat was a lot of hard work to get those shingles just right but they look so good now you have got them in place.
ReplyDeleteYes, it was quite a tedious task. And welcome to my dollhouse dreams. I'm hopping over to join you.
ReplyDelete